Wooden Bench Plans

Craft Your Own Comfort: Ultimate Guide to Wooden Bench Plans

Wooden Bench Plans: Discover comprehensive wooden bench plans that guide you through tools, styles, and step-by-step instructions for creating beautiful, personalized seating solutions.

brown wooden bench
Wooden Bench Plans

Overview of Wooden Bench Plans

Wooden benches are not only functional but also carry a charm that enhances the aesthetic appeal of various settings, from lush gardens to cozy patios. Their ability to transform outdoor spaces into inviting areas for relaxation and socialization makes them a favored choice for homeowners and garden enthusiasts alike.

There are countless styles of wooden benches that you can create, each serving different purposes—be it a garden bench for quiet reflection, a picnic table for family gatherings, or a storage bench that helps keep your space organized. For instance, a garden bench with a traditional slatted design not only offers a place to sit but also allows for drainage, preventing water accumulation that could lead to rot. Engaging in a DIY project allows you to tailor your bench’s design to your specific needs and personal taste, ensuring that it complements your home or outdoor area beautifully.

Building wooden benches can be a fulfilling project for both beginners and seasoned woodworkers. The hands-on nature of the task fosters creativity and problem-solving skills, making it an excellent way to spend a weekend or an afternoon. As you work on your bench, you will develop a deeper appreciation for craftsmanship and the materials you choose, which can enhance your future woodworking projects.

Essential Tools and Materials

Before diving into your wooden bench project, it’s crucial to gather the necessary tools and materials to ensure a smooth building process. Essential tools for this endeavor include saws, drills, clamps, and sanders, which are vital for achieving accurate cuts and polished finishes. Investing in a good-quality miter saw can make cutting angles simple and enjoyable, while a power drill is indispensable for securing your joints effectively.

In terms of materials, popular choices include cedar, teak, white oak, redwood, and cypress, each offering unique durability and aesthetic qualities. For instance, cedar is renowned for its natural resistance to decay and insects, making it an excellent choice for outdoor benches. Additionally, using screws that are specifically designed for outdoor use can greatly enhance the longevity of your bench, as they are built to withstand the elements.

Safety gear is another critical component of woodworking. Wearing goggles and gloves protects your eyes and hands from splinters and debris, ensuring that you can focus on the task at hand without distraction. It’s also wise to have a first aid kit nearby, just in case of any minor accidents. Once you have your tools and materials ready, the excitement of building your wooden bench can truly begin.

Wooden Bench Plans
Wooden Bench Plans

Different Styles of Wooden Benches

Garden benches typically feature a slatted design, allowing for drainage and airflow, making them perfect for outdoor environments. A classic example is a curved garden bench that not only provides seating but also adds an elegant touch to your yard, encouraging guests to sit and enjoy the surroundings.

Picnic benches usually have a robust construction with flat surfaces, ideal for family meals or gatherings. These benches often feature attached tables and can be crafted in various sizes to accommodate different group sizes. Another practical option is a storage bench, which combines the benefits of seating with hidden compartments, perfect for organizing garden tools or outdoor cushions. This type of bench is particularly useful in smaller spaces where storage is at a premium.

In addition to traditional designs, modern benches may incorporate geometric shapes and innovative materials, creating striking focal points in contemporary settings. For example, a sleek, minimalist bench made from reclaimed wood and metal accents can serve as a conversation starter in an urban garden or patio. Whether you prefer rustic warmth or modern elegance, there’s a wooden bench style that can complement your vision perfectly.

Step-by-Step Instructions for Building a Basic Wooden Bench

Creating a basic wooden bench can be an enjoyable and straightforward process when approached methodically. Start with precise measurements and cutting your wood pieces to the specified lengths as per your design. For example, if you’re building a 5-foot bench, you’ll need to measure and cut the wood for the legs, seat, and any backrest or support pieces accurately to ensure stability and comfort.

Once the pieces are cut, assemble the legs first, ensuring they are securely attached and aligned properly before you proceed to attach the slats for the seat. Using pocket holes can be particularly beneficial, as they minimize visible screws, resulting in a cleaner and more polished appearance. After the legs and slats are attached, it’s essential to sand all surfaces meticulously. This step not only smooths the wood for comfort but also prepares it for finishing, as rough edges can lead to splinters and discomfort.

Finishing touches are crucial for enhancing the bench’s aesthetic appeal and durability. Fill any screw holes with wood filler and allow it to dry before sanding it smooth. Applying a protective coat of stain or sealer will not only beautify your bench but also shield it from the weather elements if it’s placed outdoors. Following these steps will ensure that your completed project is both functional and visually appealing, ready to be enjoyed for years to come.

Safety Tips While Working with Wood

Prioritizing safety is essential when engaging in woodworking projects. To begin, always work in a well-ventilated area to avoid inhaling wood dust and fumes. If you are using any finishes or adhesives, ensure that the space is adequately ventilated, as some products can release harmful vapors. Additionally, keeping your work area organized can help prevent accidents, allowing you to focus on the task without the distraction of clutter.

Proper maintenance of your tools is also vital; ensure they are functioning correctly and used according to manufacturer guidelines. Regularly check your saw blades for sharpness and your drill bits for wear to maintain efficiency and safety in your work. When using power tools, keep your hands clear of cutting areas, and consider employing push sticks or similar devices when working with small pieces of wood.

Finally, familiarize yourself with the operation of each tool before beginning your project. Knowing how to handle tools safely can prevent injuries and boost your confidence as you work. Always store your tools safely when not in use, especially if you share your workspace with others, to minimize the risk of accidents. By incorporating these safety tips, you can enjoy your woodworking experience while ensuring a secure environment.

Finishing Options for Durability and Aesthetics

One effective approach is to apply a wood sealant or outdoor varnish, which protects against moisture and harmful UV rays, both of which can degrade the wood over time. For instance, if you choose a high-quality marine varnish, it can provide excellent protection for benches exposed to the elements, making it an ideal choice for outdoor furniture.

Staining your bench can enhance its natural beauty and provide an additional layer of protection. The right stain can bring out the wood grain, making your bench a stunning focal point in your outdoor area. Regular maintenance, including reapplication of your chosen finish, can prolong the life of your bench significantly. If you notice the finish beginning to wear, it’s a good practice to schedule a touch-up, which will keep your bench looking its best.

When selecting a finish, consider how it complements the surrounding decor. A darker stain might look stunning against lighter-colored siding, while a natural finish can bring warmth to a rustic setting. Testing different finishes on scrap wood before application allows you to see how the color and sheen will look on your bench, ensuring you achieve the desired effect without any surprises.

Wooden Bench Plans
Bench Plans

FAQs About Wooden Bench Plans

If you’re interested in beginner-friendly wooden bench plans, seek out options that provide comprehensive materials lists and visual aids. Many resources offer step-by-step instructions that break down the process, making it easier for novice woodworkers to follow along. For example, a plan for a simple wooden bench might include diagrams and clear instructions, helping you visualize the project from start to finish.

Standard dimensions for a wooden bench typically range from 4 to 6 feet in length, which is comfortable for most users and allows for ample seating. If you have specific needs, such as accommodating larger gatherings, you can adjust the dimensions accordingly. Unique designs, such as a shoe storage bench, can blend functionality with aesthetics, making these plans particularly appealing for entryways.

Plans for benches can vary in complexity, catering to different skill levels. Beginners might appreciate straightforward designs that can be completed in a weekend, while more experienced woodworkers may seek out plans that incorporate advanced techniques. Utilizing resources like video tutorials can also enhance your understanding, providing visual learners with additional guidance to make the construction process more accessible.

Creative Ideas for Modern and Rustic Wooden Benches

The world of wooden benches is rich with creative possibilities, allowing you to express your style through your design choices. Modern benches often feature sleek lines and minimalistic styles, which fit perfectly into contemporary settings. For example, a modern bench crafted from polished hardwood with stainless steel legs can serve as a stunning accent piece in a modern garden design.

Rustic benches, on the other hand, typically include reclaimed wood and natural finishes, adding a warm and inviting feel to any space. Imagine a rustic bench made from weathered barn wood, complete with a natural edge that showcases the wood’s character. These benches not only provide seating but also tell a story, enhancing the overall ambiance of your outdoor area.

To add comfort and personality to your benches, consider incorporating cushions or upholstered seating. Custom engraving or painting can further personalize your bench, making it a unique statement piece that reflects your individual style. Mixing materials, such as wood with metal accents, can create an eye-catching contrast, offering a modern twist on traditional designs. Embracing creativity in your bench design allows you to craft a piece that is both functional and visually captivating.

Popular Resources for Free Wooden Bench Plans

Numerous websites offer free wooden bench plans suitable for a variety of skill levels and styles, making it easy to find the perfect project for your needs. Websites like Instructables and Minwax provide downloadable plans that include detailed instructions, material lists, and tips for successful construction. One popular plan is the “Simple Wood Bench,” which can be completed in just a few hours, making it ideal for beginners eager to dive into woodworking.

The Spruce Crafts features an extensive array of blueprints and cut lists for various bench designs, allowing you to choose one that best fits your space and skill level. For instance, a mid-century slatted bench plan can provide a stylish solution for those looking to add seating to their patio without compromising on aesthetics. DIYGardenPlans.net offers quick projects that are beginner-friendly, emphasizing ease of construction and accessibility for those new to woodworking.

Engaging with online woodworking communities can also prove beneficial, as these platforms offer advice, modifications, and inspiration based on personal experiences. Many woodworking blogs share user-generated projects, providing a treasure trove of ideas and alternative designs to inspire your next bench project. By exploring these resources, you can find the perfect plan that suits your needs and abilities, setting you on the path to creating your own wooden bench masterpiece.

Encouragement for DIY Wooden Bench Projects

Wooden Bench Plans
Wooden Bench Plans

Taking on a DIY wooden bench project can be a gratifying experience that yields both personal satisfaction and cost savings. Building your own bench not only allows for creativity but also provides a sense of accomplishment that comes from completing a project with your own hands. Crafting a bench tailored to your style and needs can be much more rewarding than purchasing a pre-made option, leading to a unique piece that enhances your space.

Sharing your completed projects on social media can inspire others in the DIY community, fostering a sense of connection and camaraderie among fellow woodworking enthusiasts. Utilizing hashtags like #DIYBench can help you showcase your work while discovering other projects that ignite your creativity. Remember that every completed project is a step forward in your woodworking journey, building your skills and confidence as you take on new challenges.

The skills you gain from building a wooden bench can serve as a foundation for more complex woodworking projects in the future. As you learn about joinery, finishing techniques, and material selection, you’ll find yourself better equipped to tackle larger or more intricate designs. Embrace the journey of woodworking, knowing that each project enhances your capabilities and brings you closer to becoming a skilled craftsman.

Adirondack Chair Plans

.

Adirondack Chair Program

adirondack chair plans

Those looking for a chair that will certainly last for years to come will certainly desire to make an adirondack chair. These chairs have actually been around for years, however they are still one of the most prominent and also most convenient kinds of chairs to construct.
Whether you’re a newbie or an experienced woodworker, you can develop a contemporary Adirondack chair. You will certainly require some standard devices as well as a little woodworking competence, yet the ended up item is a useful and also sturdy chair that looks excellent in your lawn.

With a very easy modern-day Adirondack chair strategy, you can develop a durable chair that can be tarnished in any kind of shade you want. The strategy is outlined and also consists of instructions as well as images, making it very easy to adhere to.

The Adirondack chair is a sophisticated outside item that looks wonderful in your lawn or poolside. The chair is likewise resilient, so it can be folded up level for very easy storage space.

The contemporary Adirondack chair set is a budget-friendly alternative. It consists of all the devices you require, along with several layers of repaint as well as tarnish. You will certainly likewise discover a coming with overview that consists of in-depth cutting as well as setting up directions.

The Easy Modern Adirondack chair strategy is a fantastic means to make a contemporary chair that is very easy to develop, while conserving you effort and time. It has an easy yet stylish layout, and also utilizes dowels for signing up with assemble.

Consists of pointers for convenience. It takes concerning a couple of hrs to set up, and also it looks wonderful in your yard.

There is likewise a skiptomylou Adirondack chair strategy that is a simpler, streamlined variation of the timeless Adirondack chair. This strategy likewise consists of comprehensive guidelines as well as a wish list.

There are lots of strategies to pick from. Whether you’re a specialist or a novice, you can construct a lovely Adirondack chair with the appropriate strategy.
Whether you are fortunate sufficient to live on the coastline or not, you might well have a variety of sea front chairs to inhabit. A well crafted upcycled vintage chair might make a great swank, not to state a good location to kick back as well as loosen up. The finest method to go around this venture is to make a listing of your leading options as well as after that take it in turns to go shopping for one.
Including on to Adirondack chair strategies can be a terrific method to individualize your exterior furnishings. Adirondack chairs are typically constructed with strong, long lasting frameworks that are excellent for a range of outside usages.

There are additionally chairs that utilize light weight aluminum if you aren’t interested in developing a chair from timber. These chairs are lighter and also have much less of an angle. They are additionally less costly to construct.

Adirondack chairs come in a broad array of surfaces, shades, as well as spots. You can locate Adirondack chairs for any type of dimension or design of house.

Adirondack chairs are generally made from timber. You can locate cost-free Adirondack chair strategies that consist of outlined directions, images, representations, and also a products listing.

If you aren’t comfy developing a chair from timber, you can additionally discover Adirondack chairs made from plastic. You can likewise locate chairs with cupholders.

These strategies consist of comprehensive guidelines, layouts, shade images, and also a wish list. Several of them likewise consist of prepare for an Adirondack love seat. You can likewise discover Adirondack shaking chairs if you aren’t interested in developing an Adirondack chair.

If you intend to develop an Adirondack chair yet do not have the moment or cash to invest in a chair from timber, you can locate totally free Adirondack chair strategies from Ana White. These strategies utilize 2×4 lumber, making them fairly economical. They are likewise charming, welcoming, and also simple to develop.

The Adirondack chair has a high back as well as extra-wide armrests for convenience. These chairs are slatted and also can be utilized for exterior lounging. They are likewise made with a resilient, sturdily-framed structure.

Those looking for a chair that will certainly last for years to come will certainly desire to make an adirondack chair. If you aren’t interested in constructing a chair from timber, there are additionally chairs that make use of light weight aluminum. If you aren’t comfy developing a chair from timber, you can additionally locate Adirondack chairs made from plastic. If you aren’t interested in constructing an Adirondack chair, you can likewise discover Adirondack shaking chairs.

If you desire to construct an Adirondack chair yet do not have the time or cash to invest on a chair from timber, you can discover complimentary Adirondack chair strategies from Ana White.

The Most Common Woodworking Joints

Woodworking joints are made use of to attach 2 items of timber with each other. There are several kinds of joints, however the most usual ones are dovetail, mortise, butt as well as tenon, fifty percent lap, fifty percent blind, box as well as headscarf.

The dovetail joint is one of the most typical joints in woodworking. The joint is held with each other by the syncs, which are reduced right into the ends of the boards.

The butt joint is likewise one of the most typical joints made use of in woodworking. The joint is made by reducing a groove right into the side of the boards.

The mortise and also tenon joint is an additional of the most usual joints utilized for linking 2 boards with each other. The joint is made by making an opening via the board as well as after that reducing a groove right into the end of the board.

The fifty percent lap joint is one of the least usual woodworking joints. It is made by reducing a groove at the end of the boards.

The fifty percent blind joint is additionally one of the least usual timber functioning joints. It is made by putting the boards with each other so that the groove is encountering away from the various other board.

Package joint is additionally among the much less typical woodworking joints. The joint is made by positioning the boards in person and after that securing them with each other.

Headscarf joint

The headscarf joint is additionally among the lower usual woodworking joints. The headscarf joint is made by positioning both boards along with the groove dealing with each means. The 2 boards are secured with each other and also the groove is filled up with adhesive.

The dovetail joint is one of the most usual joints in woodworking. The butt joint is likewise one of the most usual joints utilized in woodworking. The mortise and also tenon joint is one more of the most usual joints utilized for attaching 2 boards with each other. The fifty percent lap joint is one of the least usual woodworking joints. The headscarf joint is likewise one of the lower typical woodworking joints.

Timber! How to Choose the Right Wood

< img course="wp-image-942 size-full"src= "https://woodworking4home-page.net/wp-content/uploads/2022/01/blogger2.jpg"alt="Timber! Just how to Choose

the Right Wood TimberwidthSize”2000″ height Elevation”1445″/ > TimberHardwood Wood: You have actually imagined a beautiful normally red-hued timber table you are going to construct.
Are you trying to find a means to pick the appropriate timber for your woodworkingjob?

Wood is your leading product selection on your following DIY job. That is so since timber is functional, gorgeous, difficult, and also dynamic.

When offered the ideal treatment, hardwood can last for generations since it is classic.

Do you desire a dining-room table, coffee table, closet workdesk, a collection of cabinets, bed framework, something, or chair else? Finding out to select the appropriate timber is essential.

You’ve obtained a great deal of options. There are lots of unbelievable as well as varied varieties of lumber throughout the globe.

Exactly how do you pick the best lumber for your handmade job? Why are some boards much more costly than the remainder? Do not fret; we have actually developed this extensive overview to assist you in picking the appropriate lumber.

Maintain checking out to understand the correct timber to match your job.

Variables to Consider When Choosing the Right Timber

Wood is an usual option for developing different frameworks at residence as well as in business rooms. Not every lumber is excellent for lumber application.

Hardwood residential properties consist of insulation, expense, visual look, as well as tensile toughness. It supplies numerous applications within your residence.

Right here are a couple of bring about aid you in buying wood when intending to DIY.

Planned Use of the Final Product

Where do you want to utilize your ended up hardwood item? Given that woods are difficult, they are ideal for producing outside jobs.

Think about sunshine direct exposure as well as ground get in touch with. That is so due to the fact that different timbers have high resistance to degeneration from severe aspects.
It is important to choose wood that has an all-natural shade. This way, it reaches praise as well as emphasize your interior decoration job.

The all-natural shades make your furnishings mix well with the remainder of the home, making it a really eye-catching residence. Keep in mind that if you do not locate the shade you require, discoloring the timber is likewise an alternative.

The timber grain determines its appearance. Shut grain timbers will certainly have a smoother appearance like cherry and also maple.
What is your item’s designated coating? Keep in mind that some wood calls for chemical therapies to secure them from severe aspects.

You require initially to recognize the type of components in your atmosphere. In this way, you recognize the sort of coating as well as upkeep that are ideal.

Some durable timbers will certainly not require any type of ending up. Some woods will certainly require unique therapies.
Depending upon your location, natural environments will certainly impact your residence. Such components consist of UV rays, hefty rainfalls, and also invasions.

Commonly we like making use of wood. You can likewise utilize softwood so long as you treat it with the best chemicals to make them much more resilient.

Professional woodworkers will certainly reveal you just how to deal with wood to include its life-span, or you can purchase cured lumber from lumber products shops.

Expense

Expense is constantly the primary factor to consider, particularly if you get on a limited spending plan.

One method to reduce your price is picking softwoods. By doing so, you can make them a lot more sturdy with chemical therapies.

Workability

No matter what you wish to DIY, you wish to collaborate with the best timber. Various hardwood kinds are excellent for differing jobs.

Redwood is simple to airplane, sand, and also cut. That makes it perfect for joinery jobs. Wood-like walnut will certainly provide you an actual appearance making it remarkable for several furnishings employees.

Keep in mind that the hardwood’s workability should not hinder the appearance of the item you wish to make.

Hardwood Best Types of Wood for Your Project

Have you gotten on the web as well as seen woodworking strategiesyou wish to implemented? Whether it is an ornamental art furniture, you need to understand the sort of timber that functions finest for that task.

Because various timber varieties have differing homes and also shades, they benefit different woodwork items. Below are some popular all-natural timber varieties.

Cherry

Cherry is scratch-resistant as well as gorgeous. Eventually, the cozy pink-reddish brownish points gradually dim under sunshine direct exposure.

The timber is perfect for a cottage-style inside or a nation farmhouse layout. The strengthening shade likewise offers impressive comparison to any type of Scandi or contemporary style.

When intending to produce furnishings, cherry ought to be your top selection. Being safe, it is a well-rounded timber many thanks to its straight and also steady grain.

Cherry will certainly likewise vapor well, making it suitable for rounded styles. Keep in mind that discoloration usually provides a blotchy outcome so, very first usage a fining sand sealant.

Oak

The wood is a traditional, incredibly vibrant, and also timeless selection. Because oak is extremely thick, it is just one of the toughest timber for furnishings.

Both most prominent types are the light American White Oak as well as the golden-brown European Oak. We likewise have red oaks.

The wood is a precise furnishings standard. Oak functions well in light, Scandinavian-style insides– however can likewise operate in eccentric, contemporary, and also modern layouts.

A lot of house setups will certainly have oak coffee tables. You can include a deep personality to your space making use of pippy oak hardwood, making one-of-a-kind furnishings items.

An American White Oak will certainly provide a much more refined as well as lighter completing. The hardwood still has lots of personality– it’s excellent for including an all-natural touch to your indoor style.

When machining, oak creates wonderful outcomes and also is additionally wonderful for gluing, vapor flexing, ending up, and also discoloration. In addition to being fungal immune, oak is really solid, making it a prominent selection for furnishings tasks.

Oak items will certainly be much more inexpensive than various other wood kinds.

Zebrano

Understood as Zebrawood, the hardwood is excellent for including a ornamental and also bold touch to your indoor layout. The name is from its distinct markings and also dark red stripes, which offers it a combination of dark brownish as well as lotion shades.

Desire to make a strong declaration? You can decide to utilize it for your coffee table, mirror structure, workdesk, worktop, or side table.

Zebrawood saws, adhesives, as well as additionally completes well. Due to its interlacing grain, the timber might be hard to airplane.

As a result of expanding slow-moving as well as being an unique types, Zebrano is costly.

Walnut

Wish to include a dash of costs darkness right into your interior decoration? Walnut types are a superb option.

Walnut is dark timber with an exceptional structure, shade, as well as grain. Because it is a thick wood, walnut will certainly be best for high-impact furnishings within your home.

The dark browns and also purple colors will certainly function well in commercial as well as darker rustic layouts. Walnut comes to be a lot more preferred for contemporary setups by maintaining the shade combinations basic as well as contrasted.

The chocolate-brown shade will certainly additionally function well for furnishings in a standard setup. You can additionally make use of the hardwood for a Scandi inside to escape from the regular ventilated and also white environments.

Keep in mind that Walnut is reasonably pricey than various other woods.

Maple

Maple is a safe, vibrant light timber that produces lovely furnishings. The hardwood has a velvety white shade with cozy gold tones.

The hardwood is incredible for a Scandinavian inside and also any kind of ventilated and also brilliant contemporary layout. Because the hardwood expands well in chilly environments, it is extremely durable as well as extremely solid.

The coatings and also woodworks well, its high thickness makes points even more difficult.

Sapele

Desire a timber that splits from the light side? Sapele has an ageless reddish-brown shade. The wood belongs to the exact same household as mahogany in look as well as physical residential properties.

That makes it an impressive option or replacement to mahogany. Because the timber can flex and also functions well, it assures deluxe, luster, and also luxury as criterion.

Take Into Consideration Choosing the Right Timber to Complement Your Project

Given that you currently understand what to search for, you can proceed as well as start your hardwood search. You prepare to complete your DIY jobs.

Absolutely nothing defeats timber items course. Timber is basic to tidy and also preserve. Your feet will certainly never ever obtain cool due to its insulation home if you prepare on making use of hardwood for your deck.

Intend to begin your woodworking jobs?

At Woodworking Plans, we have numerous woodworking items as well as short articles.

Exactly how to Choose

the Right Wood TimberwidthSize”2000″ height Elevation”1445″/ > TimberHardwood Hardwood: You have actually visualized a charming normally red-hued timber table you are going to construct. Just how do you pick the best hardwood for your handmade job? Do not stress; we have actually come up with this thorough overview to assist you in picking the ideal lumber.

Not every wood is perfect for wood application.

How to Build a Wooden Birdhouse

Check out on for our overview that will certainly instruct you just how to construct
a wooden wood you and also garden yard will certainlyLike Area the front panel of your birdhouse onto the sides. Utilizing your nail weapon, punch 1 1/4 inch brad nails right into the face of the birdhouse so they go with the side of each side wall surface.

Location the much shorter roof covering panel initially so that it’s flush with the idea of the optimal. Toenail with the roofing and also right into the side of front and also back wall surfaces. Next off, put the longer roofing system panel right into area so that it’s overlapping the leading side of the front panel.

Toenail via his roof covering panel to the sides of the front and also back panels also. Sand it down so
that it’s as well as and smooth against versus panels. Pierce an opening right into the side of each roofing system panel along the roofing system’s optimal.

Currently you understand the actions in just how to make a birdhouse, allow us look at a couple of fast factors why you must have one. A birdhouse gives safety and security and also sanctuary for nesting birds looking to increase chicks. By including a birdhouse or 2 you’ll bring a selection of birds right into your lawn.

When birds consume the seeds they will certainly transfer them in their body anywhere they go. As those seeds get to the end of the gastrointestinal system the seeds come out as the bird excretes. Currently you understand why a wood birdhouse is an ideal task as well as just how to construct one.

Check out on for our overview that will certainly educate you exactly how to construct
a wooden wood you and also garden yard will certainlyLike Location the front panel of your birdhouse onto the sides. Utilizing your nail weapon, punch 1 1/4 inch brad nails right into the face of the birdhouse so they go via the side of each side wall surface. A birdhouse supplies security and also sanctuary for nesting birds looking to increase chicks. By including a birdhouse or 2 you’ll bring a range of birds right into your backyard.

Top 10 Woodworking Project Plans

, it sets you back around$ 16,200 to equip a 2,000-square foot residence?

Taking into consideration these numbers, you could be attracted to develop several of your furnishings on your own. You may be considering finishing various other woodworking jobs, as well.

You may not recognize where to obtain begun, which can be aggravating.

With woodworking task strategies, you can obtain fantastic suggestions as well as detailed directions on exactly how to finish your woodworking jobs.

In this write-up, we’ll assess the leading woodworking task intends you must examine out. You can utilize these DIY woodworking intends to produce the jobs you’ve constantly desired to. The Adirondack chair woodworking job is likewise very easy to set up, so it’s the best option if you’re a woodworking intends newbie.

In addition, you can construct this chair from resilient, affordable timber that will certainly look stunning as soon as you discolor it.

You can additionally incorporate it with a seat as well as table to finish a whole exterior furnishings collection.

2. Shower room Unit

Do you require a little added area in your shower room!.?.!? Maybe you intend to amaze your companion with a helpful area to save her washroom items. Or possibly you wish to construct a lively restroom device where your youngsters can keep their tooth brushes as well as various other toiletries.

This is where developing a shower room system can be a wonderful concept.

There are numerous methods you can do this. You can pick to mount your restroom system as a closet over the sink, or you can produce a vanity that connects to the sink itself.
Among one of the most prominent woodworking jobs is the bench. You can develop one for your entranceway to develop the impression of an entrance hall. An additional choice is to put one in your front backyard under a tree for kicking back on, and also an additional is to produce a little one for your children to make use of in their game room.

One terrific bench job is the paint bench. The paint bench is a solid, light bench you can construct in around 4 hrs. You can utilize it for numerous objectives, such as resting, scaffolding, and also as a table.

It’s economical to make as all the products will certainly set you back under $20.

One more alternative is the yard bench. 4.
One more prominent sort of woodworking task is package. You can develop a huge box for saving bigger products or a tiny box for keeping smaller sized ones (as an example, where you can keep showpieces or precious jewelry).

With a smaller sized box, it’s very easy. All you require is the timber you’re making use of as well as a band saw.
In some cases, you require a closet where you can keep tiny items so you have very easy accessibility to them. Whether you require a cupboard for saving flavors as well as various other cooking basics, or one for your shower room, this is a vital woodworking job strategy to have accessibility to.

It’s fairly simple to develop a wall-mounted closet created for storage space. With standard, basic joints and also eye-catching information, you can make this task in just a couple of hrs.
If your DVDs as well as cds are around your living-room, after that you require this remedy. You can produce this durable boxed-in rack to maintain your DVDs as well as cds arranged. The racks within it make this feasible.

You can pick the size that benefits you. If the closet is 42 inches broad, it ought to fit about 60 DC or DVD situations. Depending on exactly how lots of you have, you can change appropriately.

You can likewise readjust the size depending on exactly how much area you have for the CD/ DVD owner on your wall surface. 7.
Do you have a great deal of mess in the entrance of your residence? Or perhaps your entranceway storage room is currently loaded packed with coats, umbrellas, headscarfs, as well as perhaps even some things you’ve saved. In this situation, constructing a layer shelf for your entrance is a terrific suggestion.

Component of what makes this such a fantastic selection is that it just takes about a hr to finish this job. 8.
One choice is the yard or deck table, which will certainly take about 2 hrs to develop. The devices you require are a drill little bit and also any type of saw that you can make use of to reduce with lumber.

When it comes to the timber as well as extra products required to finish this job, they consist of sandpaper, screws, paint or discolor, and also lumber.

The cuts as well as screws are basic, so it’s a fantastic selection if you’re a novice woodworker.

Extra Table Plans

One more table alternative is the side table. The side table job takes a bit much longer, around a day, since of the bent timber that goes from the base to the top of the table.

When it comes to the timber and also extra products, these consist of sandpaper, timber timber, adhesive, as well as paint/stain filler.

They additionally consist of at the very least 11 self-tapping pocket screws that are 2 as well as a fifty percent inches, along with a wood board that gauges 2 by 10 by 10 inches.

An enjoyable choice? The dangling table. You can affix some rope to a timber cross-section to have a gorgeous, creative, and also ornamental outcome.

To develop this job, you require a drill, an orbit sander, and also a saw. 9.
Woodworking workdesk strategies are likewise rather preferred. One instance is the wall-mounted workdesk, which is best if you wish to construct a workdesk for your child without it using up way too much room. The wall-mounted workdesk just takes about 2 hrs to construct and also the devices required are a degree, drill, as well as tear saw.

When it comes to the timber and also added products, these consist of a pencil, drill little bits, a paintbrush, paint, 4 three-inch cupboard installing screws, 2 9.5- by 9.5-inch bird’s mouth braces, as well as painter’s tape.

Furthermore, you’ll require an item of timber that’s 2 by 4 by 93 inches as well as a coating quality plywood that determines 16 by 40 inches.

Naturally, depending upon the dimension of the area where you’re setting up the workdesk, you may make a decision to make it a various dimension.

10. Bird Feeder

Developing a bird feeder just takes about 20 mins, so if you desire a task that will not occupy excessive time and also has fantastic outcomes, this is an excellent alternative for you. This is an excellent selection that will certainly test your putting together and also reducing capacities if you’re a rookie.

Since it will certainly be left outside to weather the components, it’s likewise a great examination of your woodwork.

Since you’ve found out about the leading woodworking job intends you need to have a look at, you could wish to discover more regarding woodworking task strategies. Perhaps you desire a lengthier listing of choices or you intend to find out more concerning items or woodworking devices.

Whatever details you require, we can aid. At Woodworking Plans, we’re specialists when it involves woodworking.

We know regarding prominent woodworking, woodworking devices, woodworking strategies, and also item evaluations. For more information regarding just how we can assist, call us currently.

In this write-up, we’ll evaluate the leading woodworking task prepares you must inspect out. You can make use of these DIY woodworking intends to develop the jobs you’ve constantly desired to. Component of what makes this such a terrific selection is that it just takes about a hr to finish this task. The side table task takes a little bit much longer, around a day, due to the fact that of the rounded timber that goes from the base to the top of the table. To produce this job, you require a drill, an orbit sander, as well as a saw.

Mortise And Tenon Joint What Is It

Mortise As Well As Tenon Joint What Is It

Mortise And Tenon Joint What Is It

.

Mortise And Tenon Joint What Is It? Discovering exactly how to update to a mortise and also tenon joint can alter your technique to all kinds of furnishings.

This short article will certainly lead you with just how to make a mortise as well as tenon joint as well as clarify just how you can utilize it.

What Is a Mortise and also Tenon Joint?

A mortise and also tenon joint is an interlocking of 2 items of timber, where a tenon tongue on completion of a rail matches a mortise opening on the side of an additional item of timber.

The tenon is formed to precisely match the dimension of the mortise opening, making certain a limited, unmovable hold. It matches the opening approximately the tenon shoulders, where the tongue upright the rail. It’s comparable to exactly how a USB enters into its port.

This straightforward joint, like the dovetail joint, is just one of one of the most commonly made use of joints. Woodworkers throughout different societies have actually been making use of variants of it for countless years to build whatever from clocks to family furnishings and also ships.

Mortise as well as tenon joints are generally made use of for attractive objectives in preferred furnishings designs. The tusk tenon joint, as an example, is a specifying attribute of artisan and also mission-style furnishings, a classic touch of personality and also top quality.

Just how to Make a Mortise and also Tenon Joint

The best joints, and also the topic of this how-to, are rectangle-shaped mortise and also tenons.
The much deeper you make the joint, the more powerful the hold. There will certainly be a reduced possibility of splitting, as well as it can hold a greater fixed weight. You likewise take advantage of a bigger adhesive surface area.

One of the most usual kind of mortise as well as tenon joint is the stub tenon, where the mortise quits partway via the deepness of the timber, so there is just an opening on one side. You generally see this on chair cots.

Various other kinds of joints, like the tusk tenon joint, go all the means via the mortise item. Depending on the task, this can in some cases be much easier to make, as you require much less precision with the tongue deepness.
It’s vital to set out where the mortise and also tenon will certainly consult with your 2 items of timber to guarantee you are collaborating with the appropriate faces and also making a useful and also enticing joint.

Placement the tenon item of timber at the factor on the mortise item where you desire them to interlace. Make 2 inbounds markers showing where it will certainly satisfy the tenon shoulder. When noting your cut lines, make a special mark on the face of both the tenon and also mortise so that you’ll recognize exactly how to place the tenon.

Next off, note the deepness of the tenon tongue by superimposing the tenon over the mortise. Leave it as deep as you desire the mortise to run. If you desire a through joint, overlay the tenon to make sure that completion runs over the opposite of the mortise, developing a “+” form.

Utilize a square to run a line around each side of the tenon item suggesting the side of the tenon shoulder.

Mark the Cut Lines

You’ll require to note your cut lines for the tenon tongue and also the mortise opening. The tongue ought to be in between 1/3 – 1/2 the size of the rail.

Action the preferred size of the tongue as well as established the scale to that setting. Run the scale from the shoulder mark to the end of the rail so that it can rack up the timber.

Repeat the procedure reviewing the top of completion of the rail as well as down the opposite.

You’ll have to reset the size for the various other side of the tongue if you have a solitary scale. You can make it simple with a twin noting scale, which has 2 pens that can be countered, so you can note both sides of the tongue at the same time.

To make life very easy if you’re utilizing a sculpt for the mortise, make the size of the tongue the exact same size as the carve. This will certainly conserve you time excavating out the best mortise size later on.

Make the First Tenon Cuts

Since you have actually a racked up line for 2 sides of your tenon tongue, you can reduce those sides out. You can make use of a backsaw to do this, very carefully reducing to the shoulder line. To maintain your backsaw consistent when beginning the cut, sculpt a notch with a sculpt or energy blade for the backsaw to secure right into.

With the backsaw approach, you’ll likewise need to trim cut along the must line to divide the item of timber and also reveal the bare side of the tongue. Sculpt right into the shoulder line for a crosscut attended suit, after that thoroughly function the saw to where the tongue starts. It’s vital to pursue a tidy shoulder cut.

Repeat this procedure beyond, so you wind up with 2 sides of the tongue as well as 2 shoulders.

If you desire a quicker cut, you can utilize your table router to trim the shoulder.

Cut the Rest of the Shoulder

You can function on the 2 smaller sized sides as soon as you have the 2 tongue sides reduced. These might need even more treatment and also skill, so it may be much easier to collaborate with a backsaw as opposed to a power device.

Cut the staying items off the tongue to make a shoulder that copulates around the tongue. Having a shoulder on all sides is much better for cosmetics, and also will certainly cover any kind of blemish in the mortise dimension.

These tongue cuts do not require to be an accurate dimension, as they will certainly be overviews for the cut lines on the mortise.

Cut the Mortise Hole

You need to currently have actually 2 lines defined from utilizing the mortise scale previously. With your full tenon tongue, you can overlay it onto your mortise, utilizing it as an overview for making your size marks on the mortise.

You ought to currently have a rectangle-shaped representation for making the mortise opening.

The opening can be eliminated by slicing it with a mortise carve or with a dive router. You’ll require to protect the mortise board in a clamp on your workbench.

When reducing with your mortise carve, do not begin straight on completion, as the pressure will certainly create the wall surface to increase, therefore broadening the mortise opening. Rather, begin about 1/4″ far from completion of the opening and also hammer the sculpt in, functioning backward and forward to open up as well as grew the opening. Make certain you do not copulate to the side of your overview lines on either side while reaching the appropriate deepness.

As you function, watch on your mortise deepness with a leader up until it amounts to the size of your tenon.

Make certain you do not birthed out the opening from just one side if you are doing a through tenon. Doing so will certainly trigger the timber on the various other end to splinter and also mess up the appearance. Rather, sculpt openings out on both sides till they satisfy in the center.

The quicker method to pierce the opening out is with a dive router. Discover the little bit that matches your tenon tongue size and also established the elevation to the tongue’s size.
Do a completely dry run fit with your tenon in position, attempting not to require or strike it in as well tough. Attempt cutting timber off of the tenon to obtain it to fit if there’s as well much resistance. It ought to be tight as well as purge approximately the tenon shoulder.

Once it’s cut to fit, you simply require to use adhesive and also established it in position, making certain to clean any kind of excess adhesive.

You can additionally strengthen the joint with dowels. Pierce dowel openings via the joint when you do the completely dry run.
A mortise as well as tenon joint is eye-catching as well as stout, an information that does not go undetected by an experienced furnishings buyer. With this rundown on just how to make a mortise as well as tenon joint, you can begin using this premium attribute to many tasks.

Are you trying to find your following huge woodworking task? If you wish to place your newly found understanding to the examination, have a look at our collection of 50 complimentary woodworking strategies.

Understanding just how to update to a mortise as well as tenon joint can transform your technique to all kinds of furnishings. Mortise and also tenon joints are frequently utilized for attractive objectives in prominent furnishings designs. Make an one-of-a-kind mark on the face of both the tenon as well as mortise so that you’ll understand just how to place the tenon when noting your cut lines.

Next off, note the deepness of the tenon tongue by superimposing the tenon over the mortise. If you desire a through joint, overlay the tenon so that the end runs over the various other side of the mortise, developing a “+” form.

White Wooden Filing Cabinet

White Wooden Filing Cabinet From Amazon

White wood declaring closet will certainly offer any type of workplace a wonderful cozy sensation. End Up Type White. Product Dimensions LxWxH 20.87 x 20.24 x 30.71 inches.
Thing Weight 65.15 Pounds.
Brand name Winsome.
Design Contemporary.
Concerning this product.
Table leading measurements are 20.8″ W x 20.2″ D.
Inside measurements of data cabinets are 14.8″ W x 16.1″ D x 9.8″ H (side panel is 5.5″ H).
Leading cabinet inside measurements are 14.8″ W x 15.1″ D x 2.75″ H.
Constructed of composite timber.
Ships in 1 box.

Requirements

The Delta File Cabinet is a good-looking and also useful method to keep your vital documents as well as documentation. Completed in white, it will certainly improve any kind of expert or residence workplace room. It can likewise be utilized without the data rods as a storage space closet to maintain workplace materials within very easy reach.

White wood declaring cupboard will certainly provide any kind of workplace a great cozy sensation. End Up Type White. Thing Dimensions LxWxH 20.87 x 20.24 x 30.71 inches.
Ended up in white, it will certainly boost any type of specialist or residence workplace room.

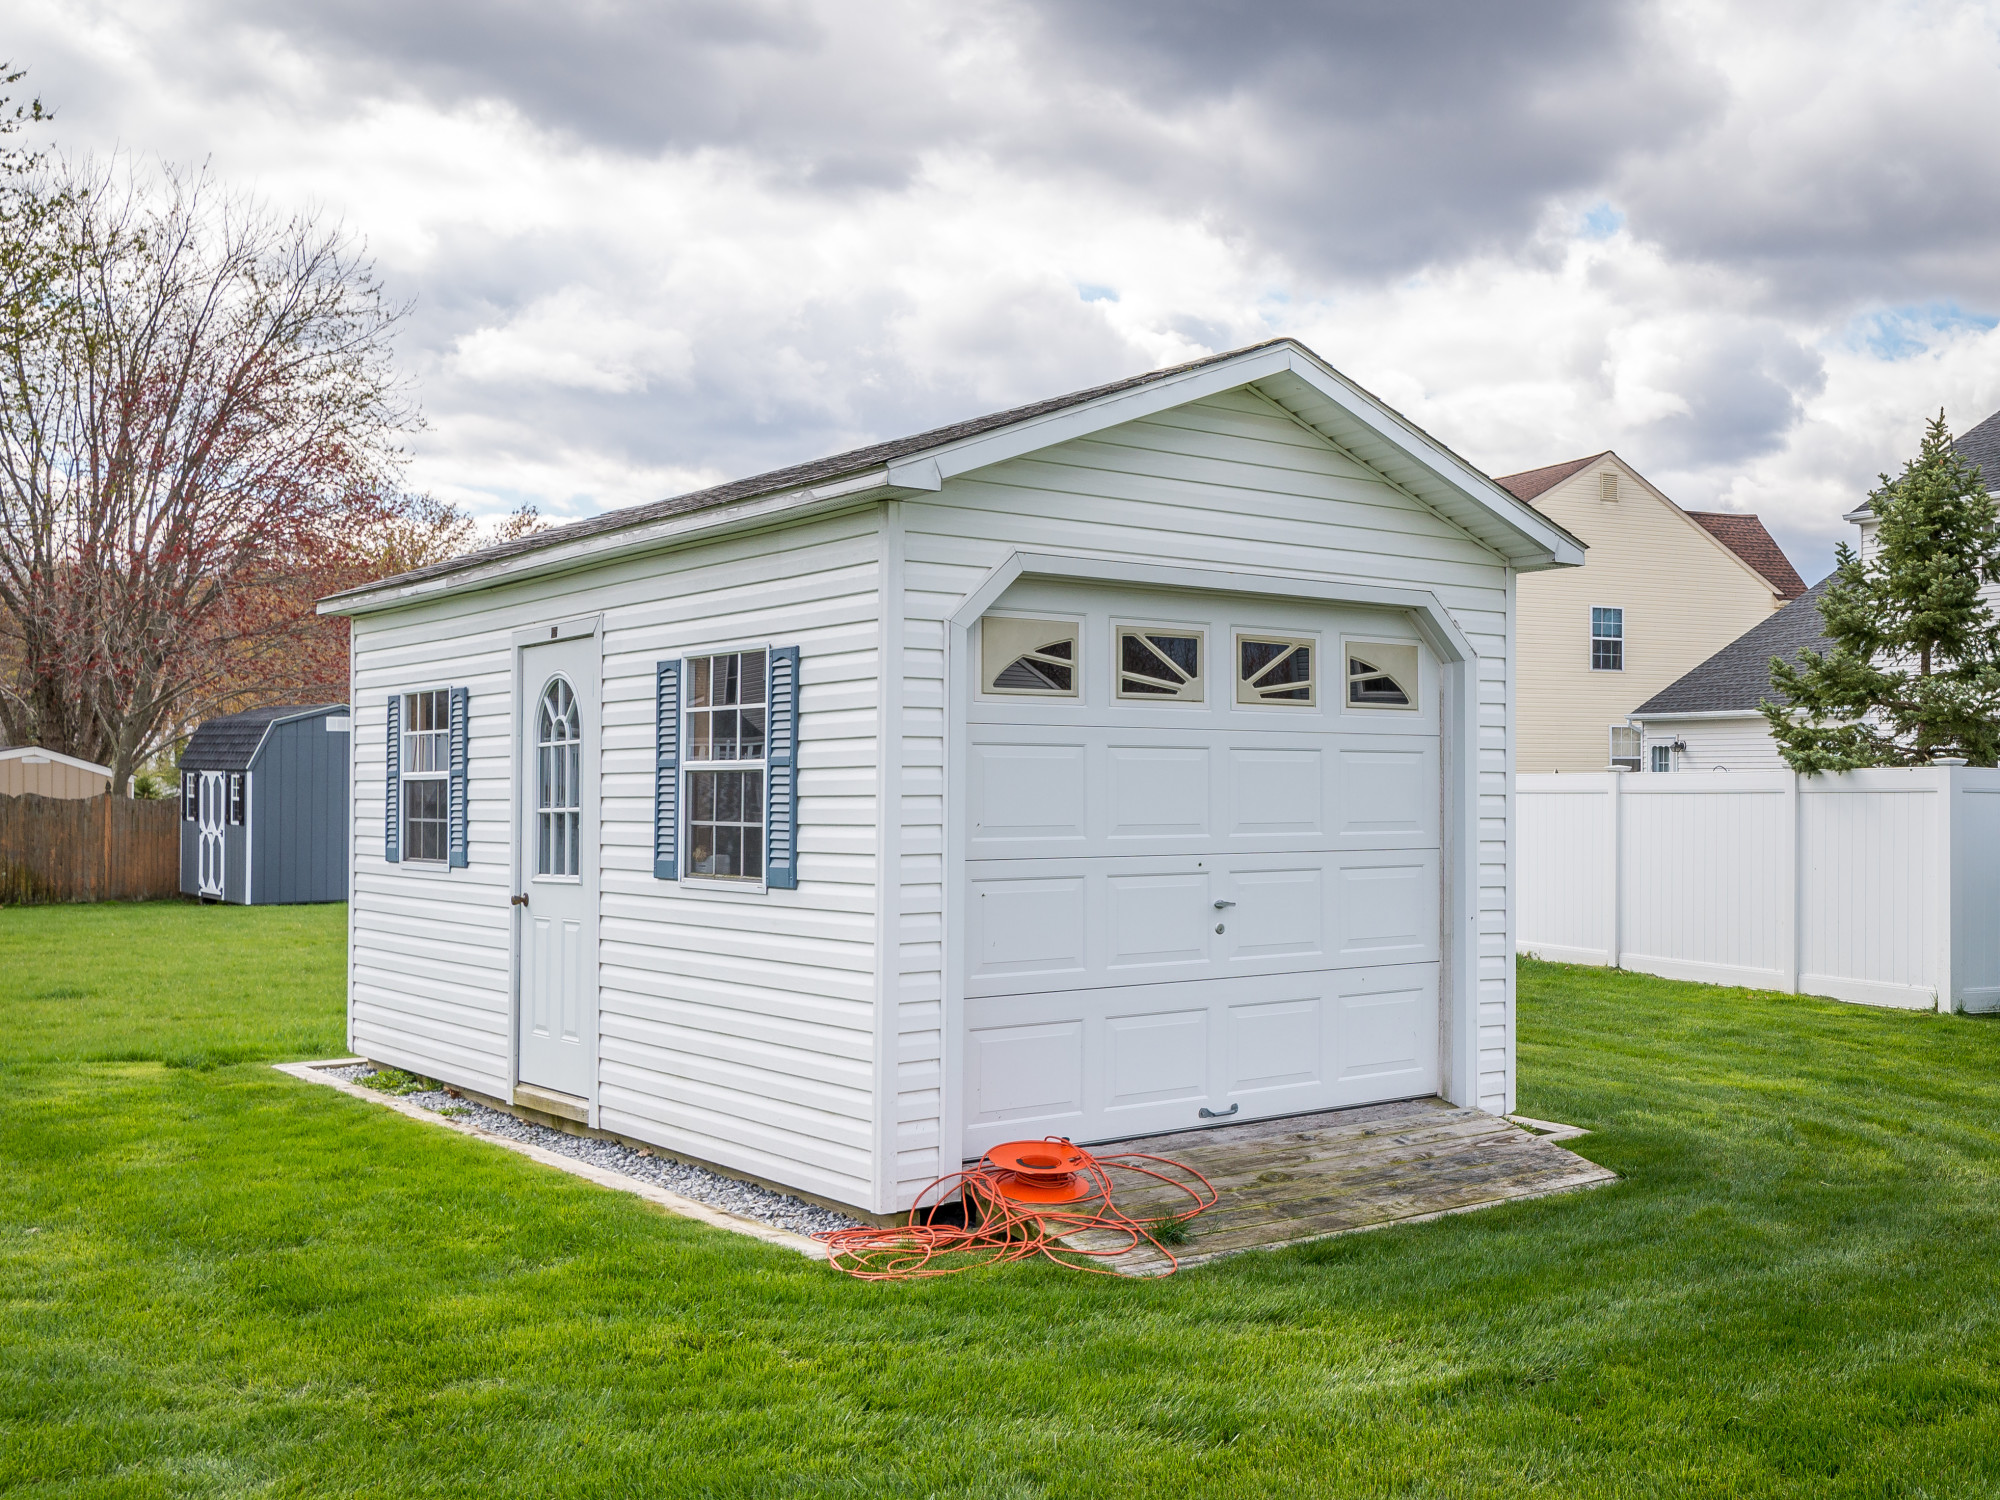
How to Build a Shed From the Ground Up

build a shed

Summer is nearby, implying it’s practically time to roll up those sleeves and also construct on your own a shed. No house is full without a shed to save house and also horticulture tools as well as products. Due to the fact that you obtain added area to save all the summertime equipment and also devices you got throughout summer season, summertime is the suitable time to place up a shed.

It’s real, you can obtain a professional to develop a shed in your yard, yet where’s the enjoyable because? Developing a shed by yourself is a fun task, specifically if you obtain the whole family members entailed. And also, you’ll conserve some cash money as well as obtain the complete satisfaction of structure something with your very own 2 hands.

Do it yourself is among the most inexpensive means to develop a shed. All you require is the right devices, the appropriate products, a little assistance, and also you’re great to go.

Today’s article is a detailed overview on just how to develop a yard shed.

1. Obtain a Building Permit

Do I require a license to construct a shed? You do not require a structure license for little sheds that determine eight-by-ten or six-by-ten feet in a lot of locations.

As soon as all the neighborhood companies offer you the eco-friendly light, your following task is to obtain structure strategies for your shed. You can attract the strategies on your own or obtain a specialist to assist you do it.

After obtaining the strategies, call a structure assessor to assess the strategies. The structure examiner will certainly verify whether the strategies are in line with all neighborhood and also nationwide structure codes.
If every little thing checks, the following point to do is situate the precise place where you’ll place up the shed. You might currently have a location in mind, yet possibly it’s not the most appropriate website for a shed.
Structure your shed in a low-lying location where the water gathers is harmful to your shed’s architectural stability. Excessive wetness will certainly bring about timber rot and also make the joints corrosion. The moisture will certainly likewise advertise the expansion of mold and mildew and also mold, which might be a health and wellness threat.

If you additionally do not desire your shed to be a soaked and also sloppy mess every damp period, stay clear of developing your shed downhill.

Do Not Build It Deep Inside the Woods

A deserted shed in the center of the timbers produces a terrific scary film scene, yet not a wonderful property shed. Putting your shed deep in the timbers implies that it’ll be bordered by trees that will certainly shut out the sunlight. Aside from the absence of all-natural light, the shed will certainly likewise have little air movement, making it damp.

Dark and also moist are the excellent problems for mold and mildew as well as mold development. And also, the particles from the trees bordering the shed will certainly leave the roof covering a mess.
There’s no usage neglecting code-required problem ranges while developing your shed. Due to the fact that the authorities could need you to tear it down as well as develop one that observes all needed trouble ranges, that’s.

Trouble ranges differ by state, so make certain you consult your structure assessor to understand whether your shed observes the policies.

If you comply with the above word for word, you will not need to stress over constructing a brand-new shed due to incorrect resting.

4. Obtain Your Tools Ready

Currently it’s time to obtain your devices all set prior to you can start the real job. For a durable shed, you’ll require a significant collection of woodworking, hand, as well as power devices.

A lot of these devices are woodwork devices that you can discover in woodworking and also equipment shops countrywide.

Apart from the job devices, do not neglect to obtain security equipment like safety glasses, handwear covers, as well as a tough hat. 5.
A shed is a little framework, it still requires a solid structure to last as long as you would certainly desire it to. On-grade, structures suffice for many small-sized sheds. These structures include concrete blocks that you establish straight on the ground, though occasionally you can make use of cured posts.

On-grade structures are simple to construct, yet you require to be added persistent. All the blocks and also blocks have to be on the very same quality as well as close sufficient to sustain the flooring’s structure. Around 4 inches of compressed crushed rock will certainly suffice to secure the structure from dirt disintegration.

If you’re constructing a tiny shed, you can make use of a hand meddle to small the structure. For anything bigger than 200 square feet, think about working with a plate compactor, which is a gas-powered condensing maker. 6.
Just pressure-treated lumber will certainly provide for the flooring structure to shield the structure from timber rot as well as wood-boring insects. The flooring framework contains the flooring joists, mudsill, and also boundary band joists.

For the deck, you’ll require three-quarter-inch exterior-grade plywood. Do not go with anything listed below to stay clear of flexing in between joists. You can just utilize half-inch outside plywood in dual layers to stop the exact same.

For sheds that keep hefty devices like a grass tractor, you must utilize three-quarter-inch tongue-and-groove plywood. It’s more expensive than exterior-grade plywood, yet the sides secure strongly with each other for an unbelievably solid flooring.

Bear in mind, your flooring is at risk to dampness damages, specifically if you live in a damp location. 7.
When it comes to constructing shed wall surfaces, accuracy is vital. An out-of-square wall surface will certainly haunt you for the remainder of the task.

For the wall surface structures, you’ll require 90mm square articles for the edges and also 3m and also 3.6 m C16 as well as CLS 2.4 m. Figure out just how high you desire your wall surfaces to be, after that reduce and also screw the assemble. Area each baton around 8cm apart.

Place up the wall surface and also protect them with bolts. If you desire an additional layer of security, take into consideration stapling the water-proof sheeting over the structure.
Mounting the roofing is among the trickiest elements of developing a shed. The repeated tilted cuts as well as dimensions might be frustrating for many DIYers. To make points less complex, develop roofing system trusses by constructing the rafters and also ceiling joists.

Later, you can increase the trusses in addition to the wall surface, as well as voila, you have your roofing system framework.

9. Door Placement and also Door Type

Many sheds have actually pivoted as well as moving doors. The kind you select relies on the dimension of your shed as well as your individual choice. Hinged doors occupy much less area than gliding doors, however gliding doors are much easier to make use of as well as leave a great deal even more door room to relocate products.

You must additionally take care with door positioning. Putting your door on the gable side of your shed looks wonderful, yet it’s not extremely useful. You’ll have a tough time reaching things at the back side of the shed.

A much better choice is to have the door along the wall surface so you can access your products from any kind of side. You can set up a door on both gables’ ends to make products conveniently obtainable.

Develop a Shed This Summer

Since you recognize just how to develop a shed, make strategies to construct one this summer season. Bear in mind to obtain every person entailed and also if you require a little aid, call the pros. Bear in mind, quality products equate to a high quality shed, so do not be terrified to invest on top quality products as well as devices.

If it’s your very first time collaborating with timber, you have a whole lot to discover prior to you can develop your shed. Get in touch with us today so we can obtain you familiarized with all you require to find out about just how to construct a shed from the ground up.

build a shed

Summer is summer season the corner, edge itIndicating almost time virtually roll up those sleeves and build and also develop on your own. Do I require an authorization to develop a shed? Structure your shed in a low-lying location where the water gathers is damaging to your shed’s architectural stability. A deserted shed in the center of the timbers makes for a fantastic scary motion picture scene, however not a fantastic domestic shed. Currently that you understand just how to construct a shed, make strategies to construct one this summer season.

Woodworking With Your Youngsters

Woodworking With Your Children

<img class="size-full wp-image-728" src="https://woodworking4home-page.net/wp-content/uploads/2021/01/Woodworking-With-Your-Youngsters.jpg" alt=""

Woodworking With Your Youngsters: Some household participants take pleasure in television, others like to play showing off tasks. Prior to enabling your young person touch any kind of one of your woodworking gadgets, you require to have a safety and security and also safety and security talk with them. After you have a security and also protection talk with your child concerning your woodwork shop as well as likewise its tools, you can begin to expose them specifically just how each of the gadgets feature. Prior to you begin, you as well as likewise your child need to pick what job you will definitely mean to deal with each various other. After finishing up the manufacturing of your job, the authentic delightful beginnings.

You cannot copy content of this page