Woodworking Bench Clamp

Mastering Woodworking Bench Clamps: Essential Tools for Precision and Efficiency

Woodworking bench clamp. The essential guide to woodworking bench clamps, exploring types, techniques, and tips for better woodworking projects.

a person is holding a small object in their hand

Overview of Woodworking Bench Clamps

Woodworking bench clamps are essential tools that provide stability and precision during various woodworking projects. They are designed to firmly hold workpieces in place, thereby enhancing the quality of cuts and assembly. By preventing movement, clamps play a crucial role in avoiding damage to materials during intricate tasks, such as joinery or glue application. For instance, when attaching two pieces of wood, using clamps ensures that the surfaces remain flush and aligned, allowing for a clean finish once the glue dries.

Spring Clamps for Woodworking,

Moreover, effective clamp usage can significantly reduce the need for additional fasteners, streamlining the assembly process and saving time and resources. When building furniture, for example, clamps can hold components together securely while the glue sets, eliminating the necessity for screws or nails in some applications. This capability also minimizes the risk of warping in wood, which can occur during glue application if the pieces shift. Understanding the importance of proper clamping techniques ensures that your woodworking projects yield high-quality results, ultimately reflecting your skill and dedication to the craft.


Types of Woodworking Bench Clamps

There is a diverse array of woodworking bench clamps available, each tailored to serve specific tasks effectively. Common types include bar clamps, F clamps, and parallel clamps, all of which have unique designs and applications in woodworking. For example, bar clamps are particularly useful in large-scale projects, such as assembling table frames, as they can provide a strong, even pressure across expansive surfaces. Conversely, F clamps are suited for smaller projects and can easily fit into tight spaces due to their compact structure.

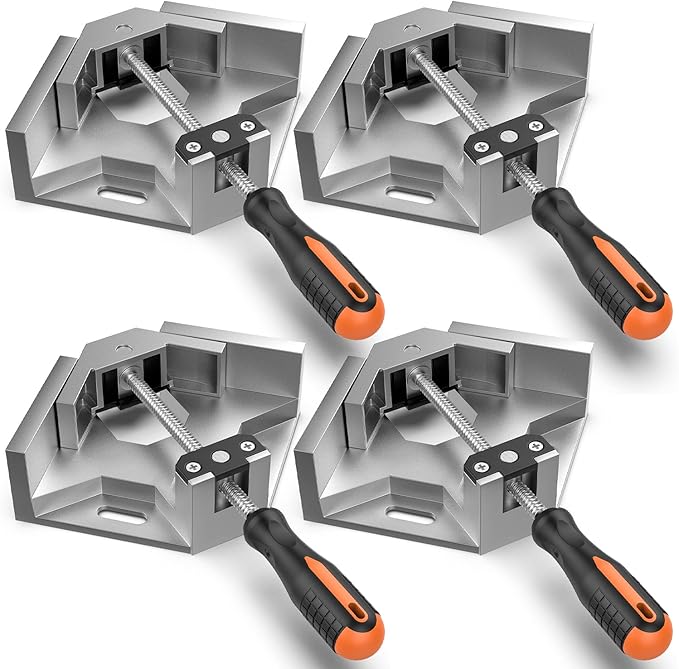
Adjustable woodworking clamps are a versatile choice, allowing users to modify the clamp’s length to accommodate various material thicknesses. Heavy-duty woodworking clamps, designed for larger projects, provide greater clamping force, making them ideal for holding heavy timbers in place as they are being joined. Specialty clamps, such as corner clamps and pipe clamps, cater to specific tasks like creating right angles or clamping round stock, respectively. Additionally, spring clamps are notable for their quick-action capabilities, making them excellent for temporary holds when attaching small pieces or performing quick repairs. The variety of clamps available ensures that woodworkers can select the most appropriate tool for their specific needs, leading to better project outcomes.

Woodworking Bench Clamp

Importance of Using Clamps in Woodworking

Woodworking Bench Clamp: The importance of using clamps in woodworking extends beyond mere convenience; they are vital for ensuring the accuracy and integrity of your projects. Clamps help secure materials in place, significantly minimizing movement during cutting, drilling, or assembly, which is crucial for achieving precise results. For instance, when creating dovetail joints, proper clamping ensures that pieces fit together tightly, enhancing both the aesthetic and structural integrity of the finished product. This precision is particularly important in fine woodworking, where even minor misalignments can compromise the overall quality of the piece.

Moreover, clamps are indispensable during glue-ups, as they ensure that the pieces bond effectively without shifting out of alignment. The application of glue, especially in larger projects, requires careful management of the clamping process to prevent any movement that could lead to uneven joints. Using clamps can significantly enhance the overall finish of the project by ensuring tight joints and seams that require minimal sanding or adjustment afterward. For example, when constructing a cabinet, the use of clamps during assembly allows for a seamless fit across all joints, ultimately leading to a professional-looking finish. Their role in woodworking cannot be overstated, as they contribute to both the quality and precision of the work being produced.

Choosing the Right Woodworking Bench Clamp

Selecting the right woodworking bench clamp for your project involves careful consideration of several factors to ensure optimal results. First, assess the specific requirements of your project, including the type of joint or assembly method you plan to use. For example, if you are working on a mortise and tenon joint, a clamp that can evenly distribute pressure across the joint will be crucial for achieving a tight fit. Evaluating the clamping capacity and reach of the clamp is equally important, as these features determine whether the clamp can handle the size and thickness of your materials.

Quick-release features can also enhance efficiency during assembly, allowing you to easily adjust or remove clamps as needed. If you’re frequently switching between tasks, having clamps that can be quickly released can save valuable time and streamline the workflow. Additionally, assessing the material and construction quality of the clamp is vital for ensuring durability, especially if you frequently engage in heavy-duty projects. For instance, clamps made from high-quality steel will withstand more stress and resist wear over time compared to cheaper alternatives. Finally, consider the weight of the materials being clamped, as heavier items will necessitate stronger clamps to maintain security and stability during the work process.

Maintenance and Care for Woodworking Clamps

Maintaining and caring for your woodworking clamps is crucial for ensuring their longevity and performance. Regular inspection for wear and damage helps identify potential issues before they impact your projects. Checking for signs of rust, especially in metal clamps, can prevent further deterioration and maintain smooth operation. After each use, be sure to clean the clamps to remove any resin or glue build-up that may hinder their performance. For example, using a damp cloth to wipe down the surfaces and mechanisms can keep your clamps functioning optimally, especially after working with adhesives.

Storing clamps in a dry area is essential to avoid rust and deterioration, particularly for those made of metal. Wooden clamps, while less prone to rust, can still benefit from proper storage to prevent warping or damage. Lubricating moving parts periodically ensures a smooth clamping action, enhancing your overall efficiency during projects. If you notice any worn or damaged components, replacing them promptly is critical to maintain safety and effectiveness in your woodworking tasks. A well-maintained clamp not only performs better but also extends the lifespan of your tools, making it a wise investment for any woodworker.

Safety Tips When Using Woodworking Clamps

Prioritizing safety when using woodworking clamps is essential to prevent accidents and injuries in the workshop. Always wear safety goggles to protect your eyes during clamping operations, particularly when working with power tools or materials that may splinter. Ensuring that clamps are properly tightened is crucial, but avoid over-tightening, as this can lead to damage or breakage of the workpiece. For instance, when clamping delicate veneers, excessive pressure can cause them to crack or warp.

Using clamps that are specifically designed for the task at hand is vital for avoiding accidents and ensuring effective clamping. For example, using a bar clamp for a large assembly project provides better stability than using a smaller clamp not designed for heavy-duty work. Always keep your hands clear of the clamping area to prevent pinching injuries, which can occur if fingers get caught between the clamp and the workpiece. Before starting any clamping operation, inspect clamps for any signs of structural weakness that could lead to failure during use, which could pose a significant safety hazard. Taking these precautions helps create a safer workspace for everyone involved in the woodworking process.

Woodworking Projects That Utilize Clamps

Woodworking clamps are invaluable tools across a wide range of projects, playing a crucial role in furniture assembly, cabinetry, and intricate joinery. For instance, in furniture making, clamps provide the necessary stability during glue-ups, ensuring that parts align correctly and adhere properly. Clamps are particularly beneficial when constructing tabletops or frames, as they hold the pieces in place while the adhesive cures, preventing shifts that could lead to misalignment. This stability is essential for achieving a professional finish, as it minimizes the need for adjustments after the glue has set.

Moreover, clamps are crucial for more complex woodworking tasks that require precision. For example, when creating intricate designs such as dovetail joints, clamps allow for tight fitting, which is vital for both strength and aesthetic appeal. They also assist in holding templates or jigs in place during routing operations, ensuring that cuts are made accurately. In projects involving cabinetry, clamps are essential for mounting hardware, ensuring that components align correctly during installation. This versatility demonstrates that no matter the complexity of the woodworking task, clamps are a fundamental tool that enhances efficiency and quality in every project.

Woodworking Clamp Techniques

Mastering effective clamping techniques can significantly elevate the quality of your woodworking projects. For larger assemblies, employing multiple clamps can help distribute pressure evenly across the workpiece, preventing deformation or damage during the process. For example, using several clamps on a wide tabletop ensures that the pressure is applied uniformly, resulting in a strong bond without any warping. Experimenting with different clamping arrangements can provide additional stability, particularly when working with irregularly shaped pieces or joints.

Utilizing holdfasts and handscrews for vertical clamping can improve precision during chiseling or sanding tasks. These tools allow for a more controlled approach, ensuring that the workpiece remains steady throughout the process. Additionally, consider using cauls—wooden strips placed between the clamp and the workpiece—to distribute clamping pressure over larger areas. This technique prevents surface damage and ensures that the pressure is applied evenly across the glued surfaces. Practicing different tightening methods, such as ratcheting systems, can also lead to more efficient clamping and better results, allowing woodworkers to adapt their techniques to a variety of projects with ease.

Accessories for Woodworking Bench Clamps

To enhance the functionality of woodworking bench clamps, a variety of accessories are available that can improve their performance. Clamp pads are a popular addition, as they protect delicate surfaces from damage caused by clamping pressure, especially when working with finished wood or veneers. These pads help distribute the pressure more evenly, preventing marks or indentations. Additionally, clamp extenders are valuable for increasing the versatility of clamps, allowing them to handle larger workpieces that would otherwise be difficult to secure effectively.

Other accessories, such as clamp tracks and vises, can significantly improve the effectiveness of your clamping setup. These tools provide additional support and options for securing materials, making them essential for complex assemblies or projects requiring precision. Magnetic clamps are another innovative solution, offering quick and adjustable holding for lightweight materials, which can be particularly useful for tasks that require frequent repositioning. Specialty clamp accessories, such as glue spreaders, can further streamline the assembly process by ensuring even application of adhesives, leading to better overall results in your woodworking endeavors.

Final Thoughts on Maximizing Woodworking Clamp Use

Understanding the nuances of woodworking bench clamps can lead to considerable improvements in both efficiency and safety within your workshop. Proper selection, use, and maintenance of clamps are essential for achieving successful outcomes in woodworking projects, allowing craftsmen to focus on their artistry without being hindered by equipment issues. Continuous practice and experimentation with different clamping techniques will yield better results, as woodworkers become more adept at selecting the right clamp for each task and applying it effectively.

Investing in high-quality clamps is a decision that pays off in the long run, as they can save time and resources while enhancing the quality of your work. By mastering the use of woodworking clamps and their various applications, woodworking enthusiasts can elevate both the quality and enjoyment of their craft, producing pieces that reflect their skills and dedication to the art of woodworking. Ultimately, knowing how to utilize these tools effectively transforms the woodworking experience, making it not only productive but also immensely satisfying.

Woodworking Bandsaw Your Ultimate Guide

Mastering the Bandsaw: Your Ultimate Guide to Precision Woodworking

Woodworking Bandsaw; the essential guide to woodworking bandsaws, including types, key features, safety tips, maintenance, and project ideas.


Overview of Woodworking Bandsaws

A woodworking bandsaw is a highly versatile power tool that excels in cutting wood and various other materials with remarkable precision. Its design features a continuous loop blade that runs on two wheels, allowing woodworkers to achieve smooth, consistent cuts. This characteristic makes bandsaws particularly popular among craftsmen who require both straight and curved cuts for their intricate projects. The ability to resaw lumber into thinner sheets enhances the bandsaw’s usefulness, making it an essential tool for maximizing wood utilization, especially in both hobbyist and professional woodworking settings. For example, a furniture maker might use a bandsaw to create delicate curves on the legs of a custom chair, showcasing the tool’s ability to handle complex shapes.

In addition to its cutting capabilities, the bandsaw serves multiple functions that cater to a wide range of woodworking needs. It is capable of handling various materials, including softwoods, hardwoods, and composites, making it a go-to choice for many woodworkers. Its role extends beyond cutting, as it can also be used for shaping and even joinery tasks, further illustrating its versatility. Many woodworkers find that having a bandsaw in their toolkit significantly enhances their craftsmanship, allowing for more creative freedom and efficiency in completing various projects.

Types of Woodworking Bandsaws

When exploring bandsaws, it’s important to understand the different types available, each designed to meet specific woodworking needs. The two primary categories are vertical and horizontal bandsaws. Vertical bandsaws are often favored for intricate cuts and curves, making them ideal for detailed projects where precision is key. On the other hand, horizontal bandsaws are generally utilized for resawing operations and cutting larger pieces of wood, which is advantageous in commercial settings where efficiency is crucial. An example of this is a lumber mill that employs horizontal bandsaws to quickly slice through substantial logs, maximizing output in a time-efficient manner.

Bandsaws also come in various sizes, catering to different workshop environments and project requirements. Smaller models, typically around 10 inches, are suitable for hobbyists with limited workspace, while larger models, up to 20 inches, are designed for heavy-duty tasks in professional settings. Portable bandsaws provide another level of convenience, as they are lightweight and easy to transport. These are particularly useful for contractors who perform on-site work or for woodworkers who lack a dedicated workshop. Specialized bandsaws exist as well, such as those designed for metalworking, which allow craftsmen to cut through non-ferrous metals efficiently, showcasing the tool’s adaptability across various materials.

Key Features to Look for When Purchasing a Bandsaw

When considering the purchase of a bandsaw, several key features should guide your decision to ensure you select the right model for your woodworking needs. One of the most critical aspects is motor power, with options typically ranging from 1-3/4 HP to 3 HP. The motor’s power directly influences the saw’s cutting ability, affecting how well it can handle tougher materials and thicker woods. For instance, a woodworker planning to cut dense hardwoods would benefit from a bandsaw with a more powerful motor, as it will make the task easier and more efficient.

Additional features to consider include tension indicators, which help maintain proper blade tension during use, and digital readouts that provide precise measurements, enhancing the overall usability of the tool. The height of the table and the resaw capacity are also significant considerations. A model with a 38-inch table height allows for greater versatility in cutting larger pieces of wood and provides better ergonomics during operation. Moreover, adjustable blade guides are essential for improving cutting accuracy and stability during use, ensuring that the woodworker achieves the desired results consistently.

An often-overlooked feature is the presence of integrated dust collection systems. These mechanisms help maintain a clean workspace, which is vital for both safety and efficiency. A clean environment reduces the risk of accidents caused by slipping or tripping over debris while also improving air quality, an important consideration for those who spend extended periods in their workshops. By focusing on these features, woodworkers can make informed decisions when selecting a bandsaw that meets their specific needs.

Safety Tips for Using a Bandsaw

Safety is a paramount concern when operating a bandsaw, as improper use can lead to serious injuries. Wearing safety goggles is essential to protect the eyes from flying debris, while hearing protection is crucial when working with powerful machinery. Furthermore, ensuring proper hand placement and the use of push sticks can significantly reduce the risk of accidental contact with the blade during cuts. For instance, a woodworker might use a push stick to guide a narrow piece of wood through the saw, maintaining a safe distance from the blade.

Maintaining a clean work area is critical in preventing accidents. Cluttered spaces can lead to slips or missteps, increasing the likelihood of injury. Woodworkers should also familiarize themselves with the operational manual and safety instructions specific to their bandsaw model. Understanding the machine’s features and limitations is essential for safe operation. Regular safety checks on the bandsaw are also advisable to ensure all components function correctly, as this can prevent malfunctions that might lead to accidents.

An additional safety practice involves setting up the bandsaw in a room with adequate lighting. Poor visibility can contribute to mistakes during operation, making it difficult to maintain awareness of both the workpiece and the blade’s position. For example, a well-lit workshop will allow the woodworker to see any potential hazards and make necessary adjustments during the cutting process. By following these safety tips, woodworkers can enhance their protection and ensure a safer working environment.

Maintenance Tips for Bandsaws

To ensure a bandsaw remains in good working condition, regular maintenance is essential. This includes routine inspections and cleaning of the blade to prevent buildup that can hinder performance. A clean blade is crucial for achieving accurate cuts and prolonging the life of the bandsaw. Woodworkers should also lubricate the bearings and guides to ensure smooth operation, as this reduces wear and tear on the components, promoting longevity in the tool’s lifespan.

Checking and adjusting the blade tension is another critical maintenance task. Proper tension is vital for maintaining cutting accuracy, as an improperly tensioned blade can lead to drift and uneven cuts. For instance, a woodworker might find that their bandsaw produces cleaner, straighter cuts after making minor adjustments to the blade tension. Promptly replacing dull blades is also essential; using a dull blade not only strains the motor but can also compromise the quality of the cuts, leading to frustration and wasted materials.

Additionally, woodworkers should periodically check the alignment of the blade and wheels to ensure straight cuts. Misalignment can lead to inaccurate cutting results and may cause increased wear on the saw. For example, a simple realignment of the blade can drastically improve the quality and precision of the cuts being made. By adhering to these maintenance tips, woodworkers can keep their bandsaws in optimal condition, ensuring reliable performance for years to come.

Common Projects That Can Be Completed With a Bandsaw

Woodworking bandsaws are capable of executing a wide array of projects, allowing craftsmen to create intricate furniture pieces by cutting curves and shapes. The bandsaw’s ability to resaw lumber enables users to produce thinner boards for various applications, such as crafting tabletops or doors. This functionality is particularly valuable for those looking to maximize their material usage while minimizing waste. For example, a woodworker may resaw a thick plank into several thinner boards, allowing for multiple projects from a single piece of lumber.

Beyond furniture-making, bandsaws are also utilized for crafting decorative items and detailed joinery. Projects such as creating custom moldings or trim work can be accomplished with a bandsaw, enhancing the overall aesthetic of woodworking endeavors. Moreover, bandsaws are effective in cutting out jigs, templates, and patterns essential for more advanced woodworking tasks. A woodworker might create a series of templates for repetitive cuts, ensuring consistency across multiple pieces.

Additionally, bandsaws can be employed to fabricate intricate designs for artistic projects or crafts. For instance, a woodworker could use a bandsaw to create detailed wooden sculptures or signs, allowing for creativity and personalization in their work. The versatility of the bandsaw makes it an invaluable tool for a wide range of projects, from functional furniture to artistic expressions.

Bandsaw Blade Types and Their Uses

Selecting the appropriate bandsaw blade is crucial for achieving desired results, as different blade widths and tooth patterns cater to various cutting needs. For example, a finer blade is better suited for detailed cuts, while a wider blade is more effective for aggressive ripping tasks. This distinction is essential for woodworkers who want to ensure their blade selection aligns with the specific requirements of their project.

The materials used for blades also vary, with options including carbon steel, bi-metal, and carbide-tipped blades, each offering different levels of durability and performance. Carbon steel blades are typically more affordable and suitable for softer woods, while bi-metal blades offer enhanced strength and flexibility for tougher materials. Carbide-tipped blades, while pricier, are designed for heavy-duty use and can cut through denser hardwoods or composite materials with ease.

Understanding tooth configurations is vital for selecting the right blade for a woodworking project. Common tooth patterns include skip tooth, which is ideal for cutting softer materials, and hook tooth, which excels in aggressive cuts on thicker woods. Additionally, blade thickness affects both cutting speed and precision. A thicker blade can handle heavier tasks but may sacrifice some finesse, while a thinner blade allows for more delicate cuts. By carefully considering blade types and their specific applications, woodworkers can optimize their bandsaw’s performance.

Bandsaw vs. Table Saw: Which is Better?

When comparing bandsaws and table saws, it becomes apparent that each tool offers distinct advantages depending on the task at hand. Bandsaws excel in making curved cuts and intricate designs, which makes them ideal for detailed woodworking projects. Conversely, table saws are generally preferred for straight cuts and handling larger sheets of material, making them indispensable for many traditional woodworking tasks. For instance, a woodworker may rely on a table saw for ripping wide boards into manageable sizes before using a bandsaw for more intricate shaping.

Workspace requirements also factor into the decision between a bandsaw and a table saw. Bandsaws typically occupy less floor space, making them suitable for smaller workshops or hobbyist setups. This compact nature allows woodworkers with limited space to still have access to a powerful cutting tool without sacrificing valuable room for other equipment. Furthermore, bandsaws can often handle a wider range of materials beyond wood, including plastics and soft metals, further enhancing their value in diverse woodworking applications.

Cost differences provide another layer of consideration when choosing between these two tools. Bandsaws can vary significantly in price based on their features and capabilities, offering a range of options for different budgets. User experience is also a critical factor; bandsaws may require different skills and techniques compared to table saws, which could influence a woodworker’s choice based on their level of expertise. By weighing these considerations, woodworkers can determine which tool best suits their specific needs and projects.

Bandsaw Techniques for Beginners

For newcomers to woodworking, mastering basic bandsaw techniques is essential for successful and safe operation. Beginners should focus on learning to perform straight cuts, curves, and resawing, as these foundational skills will enhance their overall proficiency with the tool. Starting with simple practice projects, such as building small shelves or coasters, allows new users to familiarize themselves with the bandsaw’s operation and develop confidence in their skills.

Proper posture and hand positioning are vital for maintaining control and ensuring safety during cuts. New woodworkers should practice using push sticks or other aids to keep their hands at a safe distance from the blade while guiding the material through the saw. Additionally, learning to troubleshoot common issues, such as blade drift and uneven cuts, is crucial for improving cutting performance. For example, a beginner may encounter blade drift when making straight cuts, and understanding how to adjust the blade tension and alignment can significantly enhance their results.

Another effective strategy for beginners is to practice different techniques on scrap wood before tackling more complex projects. This approach allows them to gain hands-on experience without the pressure of working on final pieces. As they become more comfortable with the bandsaw, they can gradually progress to larger and more intricate projects, building their skills and enhancing their craftsmanship over time.

Best Brands and Models of Bandsaws for Woodworking

Choosing a bandsaw from reputable brands known for quality and reliability can greatly influence a woodworker’s experience. Brands like Laguna Tools, JET Tools, and Rikon Power Tools have established themselves as leaders in the woodworking industry, offering a diverse range of models to cater to various needs and preferences [4]. Notable models include the Laguna 14|BX and the JET 14” bandsaw, both recognized for their performance, ease of use, and advanced features that appeal to both beginners and experienced woodworkers.

When comparing brands, it’s essential to look at the specific features of each model. For instance, Laguna’s 14|BX features a disc-brake with a micro-switch for added safety, while Rikon’s models offer electronic variable speeds for enhanced control. Additionally, considering warranty offerings and the reputation for customer service can significantly impact a buyer’s satisfaction. User reviews and feedback also provide valuable insights into the performance and reliability of various models, helping potential buyers make informed decisions.

Ultimately, the best choice will depend on the woodworker’s specific needs, budget, and preferences. By researching different brands and models, woodworkers can find the perfect bandsaw to help them achieve their goals and elevate their craftsmanship to new heights.

Summary of Bandsaw Benefits and Considerations

Woodworking bandsaws provide a versatile tool that can enhance a woodworker’s capabilities across a wide variety of projects. Their ability to handle both intricate cuts and basic resawing tasks illustrates their importance for hobbyists and professionals alike. When selecting a bandsaw, it is crucial to consider the balance between cost, features, and individual user requirements to find the best fit.

Engaging with the woodworking community through forums, workshops, and local clubs can offer additional insights and tips for effectively using bandsaws. As woodworkers explore different options and techniques, they unlock new opportunities for creativity, craftsmanship, and personal expression in their projects. With the right bandsaw in hand, the possibilities for woodworking are virtually limitless, encouraging artisans to push the boundaries of their craft and achieve remarkable results.

Woodworking Biscuits Joint

Mastering Biscuit Joints: The Ultimate Guide to Woodworking Success

Woodworking Biscuits Joint: Discover the essentials of woodworking biscuit joints, including their advantages, applications, and step-by-step creation guide for strong and efficient wood assembly.

Understanding Biscuit Joints in Woodworking

A biscuit joint is a woodworking technique that involves joining two pieces of wood using a flat, oval-shaped piece of compressed wood known as a biscuit. These biscuits are designed to fit snugly into matching slots cut into the edges of the wood pieces, providing both alignment and added strength to the joint. The primary purpose of biscuit joints is to align and reinforce wood pieces, making them ideal for various woodworking projects, including furniture and cabinetry. The concept of using biscuits for joining dates back to the 1950s, when this method was developed to simplify and improve the accuracy of wood assembly.

The versatility of biscuit joints allows them to be employed in various applications, which reinforces their popularity among woodworkers. For instance, they are commonly used for edge joining, where two boards are connected at their edges to create wider panels, such as table tops or cabinet doors. This technique is especially beneficial in the production of furniture where seamless surfaces are desired. Additionally, biscuit joints can be found in cabinetry construction, where they are utilized to create strong, invisible joints that maintain the aesthetic integrity of the piece.

Tools Required for Biscuit Joints

To create biscuit joints effectively, the primary tool you will need is a biscuit joiner. This specialized device is designed to cut arc-shaped slots in the wood for biscuit insertion, allowing for precision in aligning the pieces, which is crucial for achieving a tight and strong joint. The biscuit joiner operates by using a blade that makes quick, clean cuts, thereby facilitating efficient assembly. Alongside the biscuit joiner, clamps are essential for securing the joint while the adhesive dries, ensuring that the pieces stay aligned and bonded effectively during this critical phase.

While a biscuit joiner is highly beneficial, it is not strictly necessary for everyone. Many woodworkers have successfully created biscuit joints using traditional hand tools, such as chisels and routers, to achieve similar results. This alternative approach can be particularly appealing for those who prefer a hands-on method or are working on smaller projects where investing in a specialized tool might not be justified. For example, a woodworker might use a router to cut the slots manually, showcasing their skill and creativity while still achieving strong joints.

Step-by-Step Guide to Creating a Biscuit Joint

Creating a biscuit joint involves several straightforward steps that can yield impressive results. First, begin by marking the cut locations on both pieces of wood to ensure accurate alignment. This initial marking is crucial as it sets the foundation for a successful joint. Using a square or marking gauge can help maintain precise measurements and angles. Next, use the biscuit joiner to cut matching slots in both pieces of wood, ensuring that the slots are of appropriate depth and width to accommodate the biscuits.

After cutting the slots, insert the biscuits into one of the slots and apply glue to both the biscuits and the edges of the wood. This step is vital, as the glue not only helps hold the joint together but also activates the biscuits, causing them to expand and create a tighter bond. Once glued, join the two pieces together, and then secure the joint with clamps, maintaining pressure to ensure a tight bond as the glue sets. Cleaning the excess glue that may ooze out during the clamping process is important for achieving a clean finish, as this can affect the final look of the project. Lastly, allow the joint to dry according to the manufacturer’s recommendations to ensure a strong bond. This drying period can vary, so checking the glue instructions is essential for a robust joint.

Advantages of Biscuit Joints

One of the main advantages of biscuit joints is their quick assembly. They are easy to mark and cut, enabling faster project completion compared to more traditional joinery methods. The speed of assembly can significantly benefit larger projects, such as constructing cabinets or tables, where time efficiency is essential. The flexibility of biscuit joints is another significant benefit; the oversized slots allow the biscuits to move slightly, providing wiggle room for alignment during clamping. This feature is particularly useful when working with larger pieces where precise alignment is critical, as it accommodates minor discrepancies that can arise during assembly.

Additionally, biscuit joints offer improved strength. When glued, biscuits expand and create a strong bond that enhances the overall stability of the joint. The joint’s strength is further augmented by the way pressure is distributed across a larger area during assembly. This characteristic is particularly beneficial in applications where the joint must bear significant weight, such as in furniture construction. Moreover, biscuit joints require minimal surface preparation, which helps save time during the assembly process. Overall, these advantages make biscuit joints a favored choice among woodworkers for a variety of projects, simplifying the joinery process without sacrificing quality.

Common Applications for Biscuit Joints

Biscuit joints are widely used in furniture construction, particularly for creating frames and edges in cabinets and tables. Their ability to provide a strong, seamless edge join makes them ideal for cabinetry, where a polished finish is paramount. This application is often seen in high-quality kitchen cabinets, where the appearance of joints can significantly impact the overall aesthetic. Moreover, biscuit joints are effective in trim work, where precise alignment is necessary for a clean and professional appearance. They allow for the joining of trim pieces, ensuring that joints are nearly invisible, which is crucial in fine woodworking.

Another key application of biscuit joints is in panel joining. This technique is particularly useful for larger panels, such as tabletops or the sides of cabinets, as it helps reduce warping and ensures a flat surface. For example, when creating a large dining table, using biscuit joints to connect the tabletop boards can prevent gaps and maintain structural integrity over time. By employing biscuit joints in these applications, woodworkers can achieve both structural integrity and aesthetic appeal in their projects, making them an invaluable technique in the woodworker’s toolkit.

Woodworking Biscuits Joint: Types of Wood Biscuits

Wood biscuits are typically made from straight-grain hardwood, which ensures durability and strength. These biscuits are designed to hold up under pressure and provide reliable joints for a variety of woodworking applications. Available in various sizes, these biscuits can accommodate different joint requirements, enhancing the versatility of biscuit joinery in woodworking projects. For instance, a standard size might be used for most cabinetry, while larger biscuits might be employed for heavier furniture pieces, providing additional support.

Some woodworkers opt for plastic biscuits, which offer moisture resistance and can be beneficial in outdoor projects where wood may be exposed to the elements. Plastic biscuits do not swell like wood biscuits when exposed to moisture, making them a suitable choice for outdoor furniture or structures. The choice of biscuit material can influence the overall performance of the joint, as the expansion of wood biscuits with water-based glues creates tight joints that are ideal for indoor applications. Conversely, plastic biscuits can provide an advantage in environments where moisture could compromise the integrity of traditional wood biscuits.

Woodworking Biscuits Joint Strength Considerations

When it comes to the strength of biscuit joints, several factors play a crucial role in determining their effectiveness. Research indicates that joints made with medium density fiberboard (MDF) exhibit greater strength compared to those made with particleboard when using biscuits. This finding highlights the importance of selecting the right materials for your project, as the substrate can significantly affect the durability of the joint. Furthermore, the type of adhesive used also significantly impacts the joint’s overall strength. For example, polyurethane adhesives generally provide better bonding strength than polyvinyl acetate adhesives, which are more commonly used in woodworking.

Another important aspect to consider is how the load is distributed across the joint. Biscuit joints distribute stress over a larger area, which reduces the risk of failure under load. This characteristic makes them suitable for applications where the joint must bear significant weight, such as in furniture construction. Understanding these strength considerations allows woodworkers to make informed choices about the materials and techniques they use, ultimately leading to more successful projects and longer-lasting furniture.

Woodworking Biscuits Joint

Best Practices for Using Biscuit Joints

Woodworking Biscuits Joint. To maximize the effectiveness of biscuit joints, proper slot alignment is essential. Ensuring that the slots are accurately aligned on both pieces of wood can prevent misalignment during assembly, leading to a stronger joint. Using a jig or a template can help maintain consistency and precision when cutting slots, especially when working with multiple joints. Additionally, it is crucial to avoid “biscuit telegraphing,” a phenomenon where biscuits fit too tightly, resulting in surface finish issues. Biscuits should allow for slight movement to facilitate proper alignment during clamping.

Using adequate clamping pressure is also important to secure the joints without damaging the wood. Too much pressure can crush the biscuits or distort the wood, while too little may result in a weak bond. Testing joint strength with scrap wood before applying the technique to final projects can help ensure that the method is applied correctly and that the resulting joints will be strong and reliable. This practice allows you to refine your technique and gain confidence in your biscuit joinery skills before committing to your main project.

Troubleshooting Common Issues

Common issues can arise when working with biscuit joints, such as misalignment or weak joints. If joints do not align properly, it may be necessary to check the cutting depth and biscuit size to ensure everything has been executed correctly. In some cases, using a larger biscuit may provide a better fit or compensate for minor inaccuracies in cutting. For weak joints, verifying the quality of the adhesive used and the bonding technique can help identify potential problems. Ensuring that the adhesive is appropriate for the materials and conditions can make a significant difference in the joint’s overall strength.

Another common issue is glue squeeze-out, which can affect the finish of the project. To minimize this, employing proper application techniques and wiping away excess glue during assembly can lead to a cleaner final product. Using a damp cloth to clean up excess glue before it dries can prevent unsightly marks and ensure a smoother finish. Additionally, allowing the glue to dry completely before sanding or finishing the project can help achieve the best results and avoid damaging the joint.

Maximizing the Benefits of Biscuit Joints

To fully leverage the advantages of biscuit joints, consider combining them with other joinery techniques. This approach can enhance joint strength and versatility, allowing for innovative project designs. For example, incorporating dowels or screws alongside biscuit joints can create an even more robust connection, especially in high-stress applications. Experimenting with different materials and adhesives can yield varying results; testing various combinations can lead to optimized outcomes in your woodworking projects.

Ongoing skill development is vital for mastering biscuit joinery. Practicing on smaller projects can build confidence and improve skills, paving the way for more complex undertakings as your expertise grows. Engaging with woodworking communities, either online or in-person, can provide valuable insights and feedback on your techniques. Additionally, staying informed about new tools and advancements in joinery can help you continuously improve and refine your craft.

Summary Of Woodworking Biscuits Joint

Biscuit joints present a quick, effective, and robust method for wood assembly, making them a preferred choice among woodworkers. New woodworkers are encouraged to practice biscuit joining techniques, as they can significantly enhance skills and improve project outcomes. With the right tools, materials, and techniques, anyone can master this joinery method and create professional-quality projects. As woodworking technology continues to evolve, advancements in biscuit joiners and materials are likely to further improve the effectiveness of this joining method, making it an exciting area for ongoing exploration and development.

Woodworking Branding Iron

Crafting Your Mark: The Ultimate Guide to Woodworking Branding Irons

Woodworking Branding Iron: Discover the significance of woodworking branding irons, their types, and tips for effective use to elevate your craftsmanship and brand identity.

Woodworking Branding Iron


Understanding the Importance of Woodworking Branding Irons

A woodworking branding iron is an essential tool used by artisans to imprint a unique design or logo onto wooden surfaces, serving as a personal signature that enhances the identity of crafted items. This tool allows woodworkers to create a lasting mark on their projects, which is particularly important in an age where handmade items are cherished for their individuality and craftsmanship. For instance, a woodworker specializing in custom furniture may use a branding iron to imprint their initials or a logo, thereby creating a recognizable identity that can lead to repeat business and customer loyalty.

The benefits of branding wood extend beyond mere aesthetics; it adds a layer of personalization and exclusivity to each piece. This practice increases the perceived value of handmade items, making them more appealing to potential customers or gift recipients, as a branded item feels more authentic and thoughtfully created. Moreover, branding serves as a protective measure against theft, marking items with a unique insignia that can deter would-be thieves. For example, a craftsman who sells items at fairs can easily identify their work among similar pieces by the distinctive mark left by their branding iron, enhancing both security and brand recognition.

Types of Branding Irons

There is a diverse array of branding irons available for woodworking, each designed to cater to different needs and preferences among artisans. Custom branding irons are particularly popular, as they allow woodworkers to create specific designs or logos tailored to their individual projects, thus enhancing personal expression.

Electric branding irons are another widely used option due to their ability to provide consistent heat, ensuring uniform results even on larger projects. This consistency is crucial for professional woodworkers who need to maintain a high standard across multiple items. In contrast, torch-heated branding irons offer portability and flexibility, making them ideal for artisans who work outdoors or at various locations. For example, a woodworker who participates in outdoor craft fairs can easily transport a torch-heated branding iron to brand items on-site. Drill press-mounted branding irons are excellent for those requiring precision, as they can brand multiple items simultaneously with uniform results. Additionally, pre-made branding irons with popular designs are available for those looking for a quick solution without the delay of custom orders, making them ideal for hobbyists or those just starting out.

Creating Custom Designs

Crafting a custom design for a branding iron is an exciting journey that allows woodworkers to express their artistic vision. Many companies now offer user-friendly design generators to facilitate the creation of personalized logos or symbols, which can make the process much more accessible. When designing, woodworkers might choose to incorporate initials, significant dates, or symbols unique to their personal brand or story. For instance, a woodworker could create a design that includes a family crest or a date that marks a special occasion, such as the establishment of their business.

Researching popular branding designs within woodworking communities can provide valuable insights and inspiration. Engaging with fellow artisans through forums or social media platforms can lead to the exchange of ideas and techniques that enhance the branding process. It’s also crucial for woodworkers to ensure that their custom design adheres to the technical specifications provided by the branding iron manufacturer. This adherence will impact the clarity and detail of the final product, as a poorly designed logo may not transfer well onto wood. For example, a woodworker designing a logo with intricate details must ensure that the design is simplified enough for effective branding.

Materials Used in Branding Irons

The construction of branding irons involves various materials, each selected for specific properties that enhance performance and durability. Common materials include solid brass and aluminum, both known for their robustness and excellent heat retention. These materials ensure that the branding iron can withstand repeated use without degrading, which is particularly important for professional woodworkers who may use their tools frequently. For instance, a solid brass branding iron can provide a clear, lasting impression even after extensive use, making it a worthwhile investment for serious artisans.

In addition to brass and aluminum, some branding irons are crafted from stainless steel, which offers resistance to rust and corrosion, making it suitable for different environments. This property is especially beneficial for woodworkers who may work in humid or varied outdoor conditions where exposure to moisture could affect tool longevity. The choice of material can significantly influence the sharpness and clarity of the branding, ultimately affecting the final appearance of the marked wood. For example, a branding iron made from high-quality stainless steel may produce a more defined brand compared to one made from a lower-quality material, which could lead to blurred or incomplete impressions.

Tips for Using a Branding Iron

Effectively using a branding iron requires careful preparation and technique. First, it’s essential to preheat the branding iron to the recommended temperature to achieve optimal branding results. Each type of wood may require a different temperature, so understanding the specific needs of the material being used is vital. Applying firm and even pressure during the branding process is crucial; this ensures a clear and distinct mark on the wood surface, which is particularly important for professional projects.

Before branding the final project, it’s wise to test the branding iron on scrap wood to gauge the results. This practice allows woodworkers to make any necessary adjustments before marking their final piece, helping to avoid costly mistakes. It’s also beneficial to experiment with different heating times and pressures to find the ideal settings for specific materials and desired branding depth. For example, a woodworker might find that a certain type of softwood requires less pressure than hardwood to achieve a clear imprint. Using a thermometer can ensure that the branding iron reaches the correct temperature, preventing under or over-branding.

Maintenance and Care

Proper maintenance and care of a branding iron are vital for ensuring its longevity and effectiveness. After each use, cleaning the branding head is essential to prevent residue buildup, which can affect the quality of future impressions. A simple wipe with a cloth can often do the trick, but for tougher residues, a gentle abrasive may be needed. Storing the branding iron in a cool, dry place will help avoid damage or warping over time, which is particularly important for those investing in high-quality tools.

Regularly checking for wear and tear, especially on the branding tip, is also essential. A worn tip may not produce clear marks, which can diminish the quality of the finished product. Woodworkers should also consider using a protective cover when the branding iron is not in use, as this can prevent accidental damage and prolong the tool’s life. Additionally, lubricating any moving parts on electric branding irons is a good practice to maintain optimal performance. For instance, a woodworker who frequently uses an electric branding iron may notice that it operates more smoothly and efficiently with regular maintenance.

Safety Precautions

When using a branding iron, taking safety precautions is crucial to prevent accidents and injuries. Always wearing heat-resistant gloves is essential to protect your hands from burns, as branding irons can reach extremely high temperatures. Keeping a fire extinguisher nearby is also a wise safety measure, especially when working in enclosed spaces where accidents could escalate quickly. A well-ventilated workspace is critical to avoid inhaling harmful fumes released from heated materials, which can pose health risks over time.

In addition, avoiding loose clothing and securing long hair can significantly reduce fire hazards while working with branding irons. Familiarizing yourself with the branding iron’s user manual will provide further safety instructions specific to the model being used. For example, some electric branding irons may have specific operational guidelines that, if not followed, could lead to malfunctions or injuries. Creating a dedicated workspace for branding activities, with proper organization and safety equipment, can further enhance safety during the branding process.

Applications Beyond Woodworking

Branding irons are versatile tools that can be used on various materials beyond wood, expanding their utility significantly. They are popular in leathercraft, allowing artisans to imprint their logos onto wallets, belts, and bags, thus personalizing their creations. For instance, a leather artisan could use a branding iron to create a distinct mark on a handbag, making it uniquely identifiable and adding to its market value.

Branding irons can also be employed for marking food items, such as branding steaks or baked goods, offering a unique way to personalize culinary creations. Additionally, artisans often use branding irons for fabric projects, particularly in quilting and upholstery, where unique designs can add a personal touch. For example, a quilter might use a branding iron to imprint their name or a special date onto a quilt label, making the finished product feel even more special. This versatility allows artisans to explore new creative avenues, turning a simple branding iron into a multifunctional tool that enhances their craft.

Historical Context and Evolution

The history of branding irons dates back to early American expeditions, where they were utilized for marking property and goods. Historical branding irons have significantly influenced modern marking techniques, serving as precursors to contemporary branding methods. Originally made from iron or copper, these tools reflected the materials available at the time and the practical needs of the users. For instance, early settlers often branded cattle and wooden crates with their insignias to indicate ownership, a practice that ensured their belongings were easily identifiable.

Over the years, the evolution of branding techniques has led to significant innovations in design and functionality, allowing for greater creativity and customization. Modern technology has introduced electric and customizable branding irons, which can provide artisans with more precise and versatile options than ever before. Today, woodworkers and artisans have access to branding tools that allow for intricate designs and logos, providing an array of possibilities for personal expression and branding in their craft.

Customer Experiences and Reviews

Customer feedback on branding irons consistently emphasizes satisfaction with their durability and effectiveness. Many woodworkers report that the ease of customization enhances their creative projects, allowing them to make unique items that stand out in a crowded market. Engaging with customer testimonials can provide valuable insights into practical applications and tips on using branding irons effectively. For example, artisans often share their experiences on social media, showcasing their branded projects and providing inspiration to others within the community.

Positive reviews highlight not only the quality of the branding irons themselves but also the importance of excellent customer service when ordering custom branding irons. Many customers appreciate quick turnaround times for custom orders, as well as helpful and responsive customer support during the design and ordering process. This level of engagement fosters a sense of community and trust among woodworkers, encouraging them to share their experiences and recommend products to their peers.

Maximizing the Value of Your Branding Iron

To maximize the value of a branding iron, woodworkers can consider offering branding services to customers, creating an additional revenue stream. This service can be particularly appealing at craft fairs or local markets, where customers may be interested in personalizing their purchases on the spot. Additionally, branding irons can be used to create branded merchandise that can be sold or given away at events, helping to promote the artisan’s work and increase visibility within the community.

Collaborating with other local artisans to co-brand products can also expand market reach, as it allows multiple creators to benefit from shared exposure. Participating in woodworking fairs and shows allows woodworkers to demonstrate branding techniques and promote their products to a larger audience. For instance, a woodworker could set up a demonstration booth at a local fair, showcasing how branding is done while also providing attendees the opportunity to purchase branded items, thereby enhancing both visibility and sales. Such efforts can significantly enhance the reputation and credibility of artisans in the woodworking community, ultimately benefiting their business.

Wood Carving For Beginners

Mastering the Craft: A Beginners Guide to Wood Carving Techniques and Tools

Wood Carving: Discover the essential techniques, tools, and safety tips for mastering the art of wood carving, from beginner to advanced methods.

Wood Carving For Beginners

Understanding the Art of Wood Carving

Wood carving is an ancient craft that allows for creative expression and skill development through various techniques. This art form encompasses both simple practices like whittling, which requires minimal tools and focuses on shaping wood with small cuts, and more complex methods like relief carving, which creates intricate designs from a flat surface [1]. The craftsmanship displayed in this type of carving reflects the beauty and characteristics of the wood, fostering a deep connection between the artist and their material.

Historically, wood carving has held significant importance across cultures, with ancient civilizations such as the Egyptians and Greeks utilizing it for both decorative and functional purposes. These early artisans not only created practical items but also imbued their work with artistic value, which has influenced generations of woodworkers. Today, wood carving continues to evolve, blending traditional techniques with modern innovations, yet its core remains rooted in the artist’s intimate relationship with the wood.

Wood Carving
Wood Carving For Beginners

Essential Tools for Beginners

For those embarking on the journey of wood carving, a few essential tools are necessary to get started. Basic tools include carving knives, gouges, chisels, and sharpening stones, which are crucial for effective carving. For example, a simple whittling knife allows a beginner to explore the art of shaping wood into various forms, making it an ideal starting point. In addition, a mallet can be used to provide extra force when using chisels, enhancing precision in the carving process.

Safety is paramount in any kind of woodworking; therefore, protective gear, such as cut-resistant gloves and eye protection, should always be worn. Maintaining sharp tools is vital, as dull blades can lead to accidents and compromise the quality of the work. A well-maintained workspace, organized and clutter-free, not only fosters creativity but also reduces the risk of injuries while carving.

Types of Wood Suitable for Carving

Choosing the right type of wood is a crucial aspect of successful wood carving. For beginners, basswood is highly recommended due to its softness and uniform texture, which make it easier to carve. Other woods like butternut offer a rich tone, while mahogany provides durability and cherry is admired for its beautiful aging properties. Each type of wood brings its unique qualities, influencing the final artwork and the techniques employed.

Furthermore, properly prepared wood plays a significant role in preventing issues such as cracking and warping during the carving process. For intricate designs, woods like teak and rosewood not only offer beauty but also durability, making them ideal for more advanced projects. As wood carvers develop their skills, understanding the properties of different woods becomes essential in selecting materials that align with their artistic vision.

Common Wood Carving Techniques

Wood carving encompasses various techniques that cater to different skill levels and artistic goals. For beginners, whittling is a fantastic entry point, as it involves removing small pieces of wood to create shapes and figures, allowing for personal expression. Chip carving, another popular technique, focuses on removing small chips to form intricate patterns, showcasing both geometric and free-form styles.

Relief carving is a more complex method involving carving figures into a flat surface, creating depth and dimension through careful manipulation of light and shadow. This technique can be seen in historical works, where artists brought scenes to life with skillful detailing. Additionally, carving in the round creates three-dimensional figures that require a broader variety of tools and techniques, offering exciting challenges for more advanced carvers.

Wood Carving
Wood Carving For Beginners

Safety Precautions in Wood Carving

Safety is a critical aspect of wood carving that cannot be overlooked. When working with wood using tools you should always wear protective gear, including gloves and eye protection, to avoid injuries. Working in a well-ventilated area is essential to prevent the inhalation of wood dust, which can pose health risks. Proper grip and cutting methods must be employed to ensure safety during carving, as maintaining control over the tools is paramount.

Regularly inspecting tools for damage and replacing worn items can prevent accidents and improve carving quality. Additionally, organizing the workspace and keeping it free of clutter reduces the risk of accidents while carving. By adopting these safety precautions, wood carvers can focus on their craft with peace of mind, allowing their creativity to flourish.

Advanced Techniques and Tools

As wood carvers progress in their skills, they may wish to explore advanced techniques that elevate their artistry. Sculptural work transforms solid wood blocks into three-dimensional figures, requiring a deep understanding of form and anatomy. Power tools, such as rotary tools and CNC machines, have enhanced efficiency and enabled the creation of complex designs that are challenging to achieve by hand.

Techniques like undercutting and layering can add depth and detail to relief carvings, transforming simple designs into intricate works of art. Decorative carving techniques applied to furniture and architecture can further enhance the beauty and functionality of woodworking projects. Participating in workshops or online courses led by masters can significantly boost one’s skill level and knowledge of advanced techniques, providing valuable guidance and inspiration.

Embracing the Craft of Wood Carving

Engaging in this kind of craft not only reflects the artisan’s skill but also fosters a profound connection between the artist and their material. This meditative practice encourages patience and focus, allowing individuals to immerse themselves in the creative process. As artists refine their skills, they can explore more advanced techniques, ultimately creating intricate and meaningful pieces that resonate with their personal vision.

Participation in communities or forums offers valuable feedback and inspiration, enriching the whole experience. Documenting the carving journey through sketches and notes can aid in tracking progress and improving future projects. Embracing the art of carving wood opens the door to a world of creativity, craftsmanship, and self-expression that can be both fulfilling and transformative.

You cannot copy content of this page