Maintaining Your Tools: Essential Care for Longevity
Maintaining Your Tools
Maintaining Your Tools: Woodworking tools are the lifeblood of any craftsman’s workshop. Whether you’re a seasoned professional or a hobbyist, keeping your tools in top condition is essential for creating high-quality projects and ensuring safety. Proper maintenance not only extends the life of your tools but also improves their performance and saves you money in the long run. In this guide, we’ll cover everything you need to know about maintaining your tools for longevity.
Why Tool Maintenance Matters
Tools are an investment, and like any investment, they require care to maximize their value. Neglected tools can become dull, rusty, or even dangerous to use. Here are a few reasons why regular maintenance is crucial:
Safety: Dull or damaged tools can slip or malfunction, increasing the risk of accidents.
Efficiency: Well-maintained tools work more effectively, saving time and effort.
Cost-Effectiveness: Proper care reduces the need for frequent repairs or replacements.
Precision: Clean, sharp tools ensure accurate and professional results in your projects.
General Maintenance Tips for All Tools
While different tools require specific care, there are universal maintenance practices that apply to most woodworking equipment:
Keep Tools Clean: After every use, wipe your tools with a clean, dry cloth to remove dust, debris, and moisture.
Store Tools Properly: Use a dry, organized storage space to prevent rust and protect tools from damage.
Inspect Regularly: Check for signs of wear and tear, such as cracks, rust, or loose parts.
Lubricate Moving Parts: Regularly apply lubricant to hinges, bearings, and other moving parts to ensure smooth operation.
Sharpen Blades: Keep cutting edges sharp for precise and effortless work.
Maintaining Hand Tools
Hand tools, such as chisels, hammers, and screwdrivers, are staples in any workshop. Here’s how to care for them:
1. Cleaning
Use a stiff brush or cloth to remove sawdust and debris.
For sticky residues, use a mild solvent like mineral spirits.
2. Rust Prevention
Apply a thin coat of oil or a rust-preventive spray to metal surfaces.
Store tools with silica gel packets to absorb moisture.
3. Sharpening and Honing
Regularly sharpen chisels and plane irons using a sharpening stone or honing guide.
Keep screwdrivers’ tips in good condition by filing or grinding them as needed.
4. Handle Care
Check wooden handles for cracks or splinters. Sand and refinish as necessary.
Tighten or replace loose handles to maintain proper functionality.
Caring for Power Tools
Power tools like drills, saws, and routers require additional attention due to their complexity and electrical components. Here are some tips:
1. Cleaning
Use compressed air to blow out dust and debris from vents and crevices.
Wipe down surfaces with a damp cloth, avoiding electrical components.
2. Check Electrical Connections
Inspect power cords for frays or damage. Replace them immediately if compromised.
Test batteries regularly and store them in a cool, dry place.
3. Lubrication
Follow the manufacturer’s instructions for lubricating moving parts.
Use appropriate grease or oil to maintain gears and bearings.
4. Blade and Bit Maintenance
Keep blades sharp and clean to ensure efficient cutting.
Replace worn or damaged bits to prevent undue strain on the motor.
Specialized Tool Care
1. Table Saw
Align the blade and fence for precise cuts.
Clean the tabletop with a rust remover and apply a protective wax coating.
Regularly check the blade for sharpness and replace as needed.
2. Router
Clean collets and bits to prevent slipping.
Ensure the motor housing is free of dust and debris.
Lubricate the plunge mechanism for smooth operation.
3. Planer
Keep the cutterhead and rollers clean.
Adjust the blade height for consistent results.
Check for alignment and make necessary adjustments.
Preventing Common Tool Problems
Rust
Keep tools dry and apply a rust inhibitor regularly.
Use a dehumidifier in your workshop to control moisture levels.
Dull Blades
Sharpen tools frequently to maintain their edge.
Avoid cutting through nails or other hard materials that can dull blades quickly.
Misalignment
Regularly calibrate tools like table saws and miter saws.
Use a square or alignment gauge to check for accuracy.
Organizing Your Workshop
Proper organization plays a significant role in tool maintenance. Here are a few tips:
Tool Storage: Use pegboards, tool chests, or wall-mounted racks to keep tools accessible and protected.
Labeling: Label drawers and containers for easy identification of tools.
Cleaning Station: Set up a dedicated area for cleaning and maintaining tools.
The Role of Proper Usage
Using tools correctly is as important as maintaining them. Misuse can lead to premature wear and damage. Follow these guidelines:
Read the Manual: Always refer to the manufacturer’s instructions for proper use and care.
Avoid Overloading: Use tools within their specified capacity to prevent strain.
Use the Right Tool for the Job: Don’t substitute tools; using the wrong tool can cause damage and compromise safety.
Scheduling Maintenance
Creating a maintenance schedule helps ensure your tools are consistently cared for. Here’s an example:
Daily: Clean tools after use and inspect for visible damage.
Weekly: Sharpen blades, lubricate moving parts, and organize storage.
Monthly: Perform detailed inspections, clean power tools thoroughly, and test electrical components.
Annually: Deep clean all tools, replace worn parts, and recalibrate precision equipment.
When to Replace Tools
Even with the best care, tools have a finite lifespan. Replace tools when:
Repairs become frequent and costly.
They no longer perform efficiently or safely.
Wear and tear compromise their structural integrity.
Conclusion
Maintaining your tools is an essential aspect of woodworking that ensures safety, efficiency, and cost-effectiveness. By implementing regular cleaning, proper storage, and routine inspections, you can extend the life of your tools and enhance the quality of your work. Remember, a well-maintained tool is a reliable tool, and investing time in maintenance is investing in your craft’s success. Start your maintenance routine today and experience the benefits of a well-cared-for workshop!
Transform Your Space: Innovative Wooden Shelf Ideas for Every Room
Wooden Shelf Ideas
Wooden shelf ideas: Discover creative and functional wooden shelf ideas to enhance your home decor with style and organization.
Creative and Functional Use of Wooden Shelves
Wooden Shelf Ideas. Wooden shelves serve a dual purpose in home decor, offering both functional storage solutions and aesthetic enhancement. They can transform spaces into personalized havens, facilitating organization while showcasing decorative displays that reflect individual style. For example, a living room outfitted with floating wooden shelves can display family photos, books, and art pieces, creating a unique focal point that draws the eye and sparks conversation. When installed strategically, wooden shelves also enhance the perceived height of a room, making it feel larger and more open, which is especially beneficial in compact living areas.
The versatility of wooden shelves extends far beyond mere storage. They can be utilized in various rooms, including kitchens, offices, and bedrooms, adapting to different needs and styles. In a kitchen, wooden shelves can elegantly hold spices, cookbooks, and decorative jars, while in a home office, they can organize files and display inspiring quotes or art. This multi-functional capability not only maximizes space but also contributes to the overall design aesthetic of the home. Additionally, the warmth of wood can soften the look of a space, making it feel inviting and homey.
Types of Wood Suitable for Shelves
Selecting the right type of wood for shelves is crucial for achieving durability and visual appeal. Common choices such as oak, pine, and maple are often favored due to their strength and beauty. Oak, with its robust structure and rich grain, is particularly suitable for heavier shelves that will support substantial weight, such as in a library or a kitchen filled with cookware. Pine is a more lightweight and budget-friendly option, making it ideal for decorative purposes or children’s rooms where safety is a concern. Maple, known for its fine texture, works well in modern designs, providing a sleek and polished appearance.
Reclaimed wood is an increasingly popular choice, offering an eco-friendly option that comes with unique textures and histories. This wood can bring rustic charm and character to any design, making it perfect for farmhouse-style homes. For outdoor shelving, pressure-treated wood is recommended due to its resistance to moisture and decay, ensuring that outdoor structures last through various weather conditions. Each type of wood not only impacts the functionality of the shelves but also plays a significant role in enhancing the overall decor style.
Creative Styling Ideas for Wooden Shelves
Styling wooden shelves creatively can significantly elevate the ambiance of any room. One effective way to do this is by incorporating plants into the shelf design, which integrates a touch of nature and adds vibrancy to the space. For instance, a shelf adorned with small potted succulents, trailing vines, and colorful blooms can create a refreshing atmosphere that purifies the air and promotes well-being. The combination of greenery against the natural wood can create a stunning visual contrast that draws attention.
Moreover, layering decorative items such as books, picture frames, and unique art pieces allows for personalization and the reflection of individual style. Mixing different heights and arrangements can lead to a dynamic and visually appealing display that captures attention and encourages exploration. For example, a shelf might feature a stack of books on one side, with a whimsical sculpture or framed artwork on the other, creating balance and intrigue. Using color-coordinated items can also enhance the cohesive look that ties the room together, making the shelves not just functional but a central component of the room’s decor.
Installation Tips and Weight Capacity Considerations
Installing wooden shelves correctly is essential for ensuring stability and maximizing weight capacity. It is crucial to secure the shelves to wall studs, as this provides the necessary support for heavier items and prevents accidents. For example, a typical kitchen shelf should be around 11.25” to 12” deep, accommodating various kitchen tools and ingredients, while bathroom shelves can range from 5.5” to 8” deep for toiletries and accessories. Knowing the depth requirements for different areas ensures that the shelves serve their intended purpose effectively.
When considering weight capacity, heavy-duty brackets should be used for shelves designed to hold substantial weight, like books or kitchenware. Careful measurement and marking on the wall before installation can prevent misalignment and ensure even spacing between shelves, which is critical for both aesthetics and functionality. For instance, a shelf designed to hold a collection of cookbooks must be installed with appropriate support to avoid sagging. Using level tools during installation helps achieve a professional look that enhances the shelf’s overall appeal, contributing to a cleaner and more organized environment.
DIY Wooden Shelf Projects
Embarking on DIY wooden shelf projects can be a fulfilling experience, allowing for creativity and personal expression. Popular projects include the Wood Slab Hanging Shelf and the DIY Triangle Shelf Plant Holder, both of which cater to various styles and needs. Essential materials typically include shelf boards, metal brackets, screws, and power tools like a cordless drill, which can be easily sourced from local hardware stores or online retailers. The satisfaction of creating something functional and beautiful for your home can be incredibly rewarding.
Salvaged wood can be particularly effective in creating unique shelf designs, offering character and history that new materials may lack. For example, a DIY project using reclaimed barn wood can result in a rustic shelf that tells a story while serving as a beautiful display for cherished items. Numerous online tutorials provide step-by-step guidance for beginners, making it easy to embark on these projects with confidence. Not only do these DIY endeavors provide functional storage solutions, but they also allow homeowners to express their personality and creativity through their decor choices.
Benefits of Using Wooden Shelves in Home Decor
Wooden shelves come with a multitude of benefits that enhance home decor. They add warmth and texture to spaces, creating a cozy and inviting atmosphere that makes a house feel like a home. The natural beauty of wood can complement various decor styles, from rustic to modern, ensuring that wooden shelves fit seamlessly into any design scheme. Their versatility as storage solutions means they can be customized to fit any room’s needs, whether it’s a living room, kitchen, or home office.
Moreover, wooden shelves improve organization by providing designated spaces for items, significantly reducing clutter. This organization not only enhances the visual appeal of a room but also promotes a sense of calm and order. For instance, neatly arranged shelves that hold books, decorative items, and plants can create a serene reading nook that invites relaxation. The unique grain patterns and variations in wood add visual interest, making each shelf a one-of-a-kind piece that enhances the charm of the space.
Wooden Shelf Ideas
Unique Designs for Floating Wooden Shelves
Floating wooden shelves represent a modern aesthetic that can significantly enhance the decor of any space. These shelves can be used to display an array of items, from plants to decorative objects, offering both style and function. For example, in a contemporary living room, floating shelves can hold a carefully curated selection of books, framed photographs, and art pieces, creating a visually appealing gallery-like effect. The minimalist design of floating shelves allows for an uncluttered look, making them an ideal choice for modern interiors.
Unique designs for floating shelves can include live-edge styles, which highlight the natural beauty of the wood, or geometric shapes that add a contemporary flair. Custom floating shelves can be tailored to match any decor style, whether that be minimalist, contemporary, or bohemian, making them incredibly versatile. Incorporating hidden brackets can enhance the illusion of floating shelves, achieving a sleek and sophisticated appearance that adds elegance to any room. For instance, a child’s playroom may benefit from floating shelves that hold toys and books, keeping the space organized while maintaining an airy feel.
Enhancing Functionality with Wooden Shelf Accessories
Enhancing the functionality of wooden shelves can be achieved through various accessories that add both practicality and style. Decorative brackets and shelf dividers can improve organization while adding visual appeal to the shelves. For example, using decorative brackets in a contrasting color can turn a simple shelf into a statement piece that enhances the room’s overall design. Incorporating lighting elements, such as LED strips, can highlight displays on shelves and create an inviting ambiance that enhances the overall atmosphere.
Adding hooks or small baskets to shelves provides additional storage options for smaller items, maximizing functionality without sacrificing style. Labels can also be an invaluable accessory, helping to keep items organized and making it easy to find what you need, especially in busy areas like home offices or craft rooms. These thoughtful enhancements can transform wooden shelves into efficient storage solutions that align with personal style, making them an integral part of home decor that’s both beautiful and practical.
Maximizing Space with Wooden Shelves
Wooden Shelf Ideas
Utilizing wall-mounted wooden shelves is an excellent strategy for saving floor space while providing storage and display options, particularly in small rooms. For example, a small bedroom can benefit from wall-mounted shelves that hold books, plants, and personal items, leaving the floor clear and open. Corner shelves can effectively use often-overlooked areas, transforming them into functional and stylish storage solutions that maximize every inch of available space. These cleverly placed shelves can serve as excellent display areas for decorative items while providing necessary organization.
Adjustable shelving options allow for flexibility in storage and display, adapting to changing needs over time. For instance, a shelf that can be repositioned or reconfigured as children grow or interests change enables homeowners to maintain a practical and organized living environment. Multi-tiered shelving units can also provide extensive storage without occupying much floor space, making them ideal for compact living areas. These units can be used to showcase books, collectibles, or plants, creating a vibrant and organized space that feels open and inviting.
Integrating Indoor Plants into Wooden Shelf Designs
Integrating indoor plants into wooden shelf designs can significantly enhance the aesthetic appeal of any space while promoting a healthy environment. Wall-mounted plant shelves are particularly effective for showcasing greenery while saving valuable floor space in living areas. A practical example could be a shelf dedicated to various herbs in a kitchen, where fresh ingredients are both beautiful and functional. DIY options, such as creating unique plant displays with window plant shelves or branch shelves, can further personalize the decor, adding a creative touch to the design.
Choosing plant pots and holders that complement the wood finish creates an elegant and harmonious look throughout the room. Additionally, incorporating trailing plants can produce a cascading effect over the edges of shelves, adding depth and interest to the overall design. This not only beautifies the space but also creates a calming atmosphere, making it a perfect retreat for relaxation. Strategically placing plants among decorative items can create a lush, inviting display that draws the eye and enhances the overall decor.
Conclusion and Inspiration for Choosing Wooden Shelves
The versatility of wooden shelves presents endless creative possibilities in home decoration and organization. By emphasizing personal style and creativity, individuals can choose and design wooden shelves that truly reflect their aesthetics and enhance their living spaces. With a plethora of online resources available, including DIY project ideas and styling tips, homeowners can find inspiration tailored to their unique tastes and needs. Engaging with communities or forums can also provide valuable feedback and spark new ideas for wooden shelf creations, fostering a sense of connection and shared creativity.
Top 5 Woodworking Glues You Need for Perfect Projects
Top 5 Woodworking Glues: These are my top five woodworking glues to ensure strong bonds and successful projects.
Top 5 Woodworking Glues
Understanding the Importance of Choosing the Right Woodworking Glue
When embarking on a woodworking project, the choice of glue is incredibly crucial for its success. The right woodworking glue not only ensures a strong bond between pieces but also significantly affects the longevity and durability of the finished product. For instance, using the wrong type of adhesive can lead to joint failure, resulting in frustrating and costly repairs. Imagine you’ve built a beautiful oak table, only to have the joints separate because you chose an inadequate adhesive. A well-informed choice can greatly enhance the quality of your work, making it vital to understand the various types of woodworking glues available.
This article focuses on the top five woodworking glues that every woodworker should consider for their projects. By exploring these options, you’ll be equipped to make informed decisions that align with your specific needs. Selecting the right adhesive for the type of wood being used can significantly improve bond strength and overall performance, thus elevating your woodworking skills and the outcome of your projects. The right glue can also complement the wood’s characteristics, whether it’s soft pine or dense hardwood, ensuring that your creations not only look great but stand the test of time.
1 PVA Glue (Polyvinyl Acetate)
Titebond Original Wood Glue From Amazon
PVA glue is a favorite among woodworkers for its strong adhesion and user-friendly nature. This white glue, often referred to as “school glue,” is non-toxic and safe for indoor projects, making it an excellent choice for families working with children. PVA glue is particularly effective for porous wood types, as it penetrates the fibers and creates a robust bond. For example, if you’re building a children’s toy chest from soft pine, PVA glue would be the perfect adhesive, ensuring a secure and durable construction that’s safe for little hands.
Typically, PVA glue offers a drying time of about 30 minutes to an hour, providing a sufficient working window for adjustments. It dries to a clear finish and can be sanded or painted over once cured, which adds to its versatility. However, it’s essential to note that while PVA glue works well for indoor applications, it has limited water resistance, making it less suitable for outdoor projects. For instance, if you were constructing a wooden outdoor chair, opting for a more water-resistant adhesive would be necessary to ensure longevity against weather elements.
Moreover, there are different formulations of PVA glue, such as Titebond II and Titebond III, which offer enhanced properties like waterproofing and longer open times. Titebond III, for example, is particularly noted for its waterproof capabilities, making it ideal for projects that might face moisture, such as outdoor furniture. Understanding the nuances between these variations can empower you to select the best option for your specific needs.
2 Epoxy Glue
Epoxy Glue From Amazon
Epoxy glue is renowned for its superior bonding strength, making it ideal for complex assemblies and repairs. This two-part adhesive, which consists of a resin and a hardener, creates a formidable bond when mixed, and it can fill gaps while adhering to uneven surfaces effectively. For instance, if you find yourself needing to repair a cracked wooden chair leg, epoxy glue would provide the lasting strength required to restore the chair to its original function. Its gap-filling properties are particularly beneficial in woodworking, where surfaces may not always align perfectly.
Epoxy has a longer curing time, generally around one hour, allowing users to make adjustments during application. This characteristic is particularly beneficial when working on intricate projects, such as building a custom wooden drawer where precise alignment is crucial. The flexibility of epoxy also allows it to be mixed with fillers to create custom formulations for specific applications, enhancing its usability across various woodworking tasks.
Moreover, epoxy is resistant to moisture and temperature fluctuations, making it suitable for outdoor projects. For instance, in boat building, epoxy is often used due to its exceptional waterproof properties, ensuring a durable and lasting bond in challenging environments. Understanding how to use epoxy glue effectively, including proper mixing ratios and application techniques, can significantly improve your woodworking results.
3 Polyurethane Glue
Polyurethane Glue From Amazon
Polyurethane glue, such as Gorilla Glue, is another strong contender in the woodworking glue arena. This adhesive expands as it cures, creating a robust bond that can hold different materials together, including wood, metal, and plastic. One of the standout features of polyurethane glue is its longer open time of about 15 minutes, which provides ample opportunity for adjustments before the glue sets. For instance, if you’re constructing a mixed-material project like a wooden and metal shelving unit, polyurethane glue would be an excellent choice due to its versatility and strong adhesion across materials.
However, cleanup can be a challenge, as polyurethane glue foams during curing and can be difficult to remove from surfaces if it spills. It is also waterproof, making it suitable for outdoor applications, which can be a game-changer for projects exposed to the elements. For example, if you’re building a wooden birdhouse that will be outside, polyurethane glue would provide the necessary durability against rain and humidity.
Moreover, it requires clamping during the curing process to achieve maximum bond strength. This means that for optimal results, it’s essential to have clamps handy to hold the pieces together while the glue sets. The unique expanding nature of polyurethane glue can also make it challenging to gauge how much to apply, so practicing on scrap wood can help hone your technique before tackling your main project.
4 Cyanoacrylate Glue (Super Glue)
Gorilla Super Glue From Amazon
Cyanoacrylate glue, commonly known as super glue, is famous for its rapid curing time, often bonding surfaces in mere seconds. Its quick-drying nature makes it ideal for small repairs and jig-making, especially when precision is necessary. For example, if you’re working on a delicate model or need to fix a small broken piece on a larger project, cyanoacrylate glue would allow for a fast and effective solution. This adhesive is perfect for situations where you need an immediate bond without waiting for lengthy drying times.
However, it’s essential to use it judiciously, as cyanoacrylate glue can be brittle in larger applications and is not suitable for load-bearing joints. This means that while it excels in quick fixes, like repairing a broken drawer handle, it isn’t appropriate for structural connections in furniture. Understanding its limitations is key to avoiding future issues with joint strength.
This glue can also be used with activators to speed up the curing process even further. Being effective with non-porous materials, cyanoacrylate glue is a handy option for intricate woodworking tasks where minimal squeeze-out is desired. For instance, if you’re applying small decorative elements to a project, this glue would allow for quick application without the mess. However, due to its brittleness under stress, it’s best suited for applications that do not require flexibility.
5 Hide Glue
Hide Glue From Amazon
Hot hide glue is a traditional woodworking adhesive that offers unique advantages, especially for those working on restoration projects or veneering. This glue is reversible, allowing for disassembly when needed, which is particularly valuable in antique restoration. For example, if you’re restoring an old violin, hide glue would allow for the delicate assembly and disassembly of joints without damaging the wood. One of its key benefits is its long open time, which allows for adjustments during application without the rush associated with quicker-drying glues.
Hide glue requires heating for application, which may add a layer of complexity, but it can be easily cleaned up with water before it dries. This makes it a user-friendly option, especially for traditional woodworking techniques where precision is essential. For instance, if you’re creating a fine piece of furniture that requires intricate detailing, hide glue can be an excellent choice because it is compatible with traditional methods and allows for easy repairs in the future.
Moreover, hide glue can be reactivated with heat, allowing for easy disassembly and repairs of joints without damaging the wood. This characteristic makes it ideal for projects that may need adjustments later on, ensuring that your craftsmanship remains intact. Understanding the preparation and application process of hide glue can enhance your skills and broaden your woodworking repertoire, making it an invaluable adhesive in your toolkit.
Key Characteristics of Woodworking Glues
When choosing woodworking glue, understanding key characteristics is vital for project success. Open time refers to the period during which glue can be applied and adjusted before it begins to set. Titebond III, for example, is favored for its waterproof nature and longer open time of 10 minutes, making it suitable for various applications. These characteristics are not only important for the immediate success of the project but also for its long-term durability and performance.
Another aspect to remember is that glue creep, the tendency of glue to deform under stress over time, can impact long-term joint strength. This is particularly important for projects that will bear weight or experience movement, such as shelves or tables. For example, if you’re building a dining table that will see regular use, selecting a glue with minimal creep will help maintain its integrity over time.
Additionally, the final color of dried glue can affect the aesthetics of visible joints, especially for less experienced users. Proper surface preparation is also crucial for achieving optimal adhesion and bond strength, ensuring the best results for your woodworking projects. For instance, sanding surfaces smooth and ensuring they are free of dust or oils can greatly improve the effectiveness of any adhesive used, leading to better overall outcomes.
Best Practices for Applying Woodworking Glue
To achieve the best results when using woodworking glue, it’s essential to follow best practices that can enhance your projects. First and foremost, ensure that surfaces are clean and free of dust or grease, as these contaminants can hinder adhesion. Applying glue evenly is essential to avoid excessive squeeze-out, which can complicate cleanup and affect the appearance of the final product. For example, using a brush or roller can help apply glue evenly on larger surfaces, ensuring a consistent bond throughout.
Using clamps to maintain pressure on joints during the drying process is critical to ensuring a strong bond. It’s important to follow the manufacturer’s instructions regarding application and clamping times for optimal results. For instance, if you’re working on a cabinet, properly applying clamps will help maintain alignment and strength until the glue has fully cured. Additionally, keeping a damp cloth nearby can assist in wiping away any excess glue before it dries, making cleanup much easier.
Moreover, considering the environmental conditions in which you’re working is essential. High humidity or low temperatures can affect drying times and the effectiveness of the adhesive used. For example, if you’re gluing pieces together in a cold garage during winter, you might find that the glue takes longer to set, requiring you to adjust your project timeline accordingly. Keeping these factors in mind can enhance your experience and results in woodworking projects.
Importance of Drying Time and Clamping
Different types of woodworking glue come with varying drying times, and understanding these differences is crucial for project success. For instance, while PVA glue can set in as little as 30 minutes, epoxy may take up to 24 hours to cure completely [3]. Proper clamping is equally important; joints should be held firmly in place to avoid movement during the curing process. For example, if you leave a joint unclamped while the glue dries, you may end up with a misaligned joint that compromises the integrity of your project.
Monitoring environmental factors like temperature and humidity can also impact drying times, so adjustments may be necessary based on conditions. For example, in a humid environment, you may need to allow for a longer curing time to ensure a strong bond. Over-clamping should be avoided, as it can lead to excessive squeeze-out that is difficult to clean and may affect the joint’s aesthetics. Understanding the balance of pressure needed during clamping can greatly impact the final appearance and strength of your work.
Additionally, being patient during the drying process is key. Rushing to remove clamps before the glue has fully cured can lead to weak joints that may fail under stress. It’s often best to err on the side of caution and allow the glue to set for the recommended time, ensuring that your hard work results in a durable and well-crafted piece.
Comparing Woodworking Glues
When comparing woodworking glues, each type offers unique advantages for specific applications. PVA glue is excellent for porous woods, while polyurethane provides versatility due to its expansion properties. Epoxy stands out for its structural integrity, making it suitable for complex projects, while cyanoacrylate glue excels in quick repairs. On the other hand, hide glue is optimal for traditional woodworking, allowing for easy disassembly when needed.
Each glue type comes with its own set of strengths and weaknesses, making it essential to understand their characteristics to make informed choices tailored to your woodworking projects. For example, if you’re building an outdoor garden bench, knowing that epoxy offers superior moisture resistance compared to PVA can guide your choice effectively.
Moreover, experimenting with different adhesives can reveal which works best for particular tasks, enhancing your overall woodworking experience. For instance, trying out polyurethane glue for a mixed-media project can show how easily it adheres to various materials, while hide glue can demonstrate its effectiveness in traditional applications. This exploration can not only improve your skills but also help you develop an intuitive understanding of which glue to use when faced with different woodworking challenges.
Final Thoughts on Choosing the Right Woodworking Glue
In this article, we’ve explored the top five woodworking glues and their specific applications. It’s crucial to choose the right glue based on your project needs and the types of wood you are working with. Experimenting with different adhesives can yield better results, enhancing both the functionality and appearance of your woodworking projects. By selecting the right glue, you can significantly improve the quality of your work and ensure that your projects stand the test of time. Understanding the unique characteristics of each adhesive can help you navigate the world of woodworking with confidence, resulting in beautiful and durable creations that you can be proud of.
Top Five Woodworking Gloves: Enhance Safety and Comfort in Your Craft
Top Five Woodworking Gloves. My top five woodworking gloves that enhance safety, comfort, and performance for your projects.
Top Five Woodworking Gloves
Importance of Wearing Gloves in Woodworking
Wearing gloves while woodworking is essential for several reasons that extend beyond mere comfort. First and foremost, gloves help reduce exposure to allergens and irritants commonly found in wood dust, which can lead to skin reactions or infections. For example, individuals who frequently handle certain types of wood, such as oak or cedar, may develop contact dermatitis due to prolonged exposure. Proper protective gloves serve as a barrier against these irritants, significantly lowering the risk of skin problems and ensuring a more enjoyable woodworking experience.
In addition to providing protection against allergens, wearing gloves enhances hand strength and dexterity, allowing for better control over tools and materials. This is particularly crucial when working on intricate designs or small components, where precision is key to achieving the desired results. For instance, a woodworker cutting fine dovetails will find that high-quality gloves improve their grip on the small, sharp tools, ultimately leading to cleaner cuts and enhanced craftsmanship. Moreover, gloves that fit well can help prevent hand fatigue and strain during prolonged use, thus enhancing overall productivity. A well-fitted glove can make a world of difference for someone engaged in extended hours of sanding or carving, helping to maintain focus and reducing the likelihood of injury.
Key Features to Look For in Woodworking Gloves
When selecting woodworking gloves, certain features can significantly enhance your experience and safety. One of the most important aspects is reinforced stitching, which increases durability and extends the lifespan of the gloves. Gloves with double-stitched seams are less likely to tear during demanding tasks, making them ideal for heavy-duty woodworking projects. For example, someone using a chisel for carving intricate designs will benefit from the added durability of reinforced gloves, as they withstand the rigors of the task without succumbing to wear.
Another valuable feature is touchscreen compatibility, allowing users to operate devices without needing to remove their gloves. This capability can be particularly useful for woodworkers who may want to reference plans or tutorials on their phones while working, as it saves time and keeps them focused on the task at hand. Consider gloves that provide both dexterity and protection, particularly if you are working with small components or intricate designs. Additionally, adjustable wrist straps can ensure a snug fit and minimize debris entry, keeping your hands cleaner and safer during woodworking tasks. This is especially important for those working with fine sawdust or shavings from sanding, as a secure fit prevents dust from entering the glove.
Overview of the Top Five Woodworking Gloves
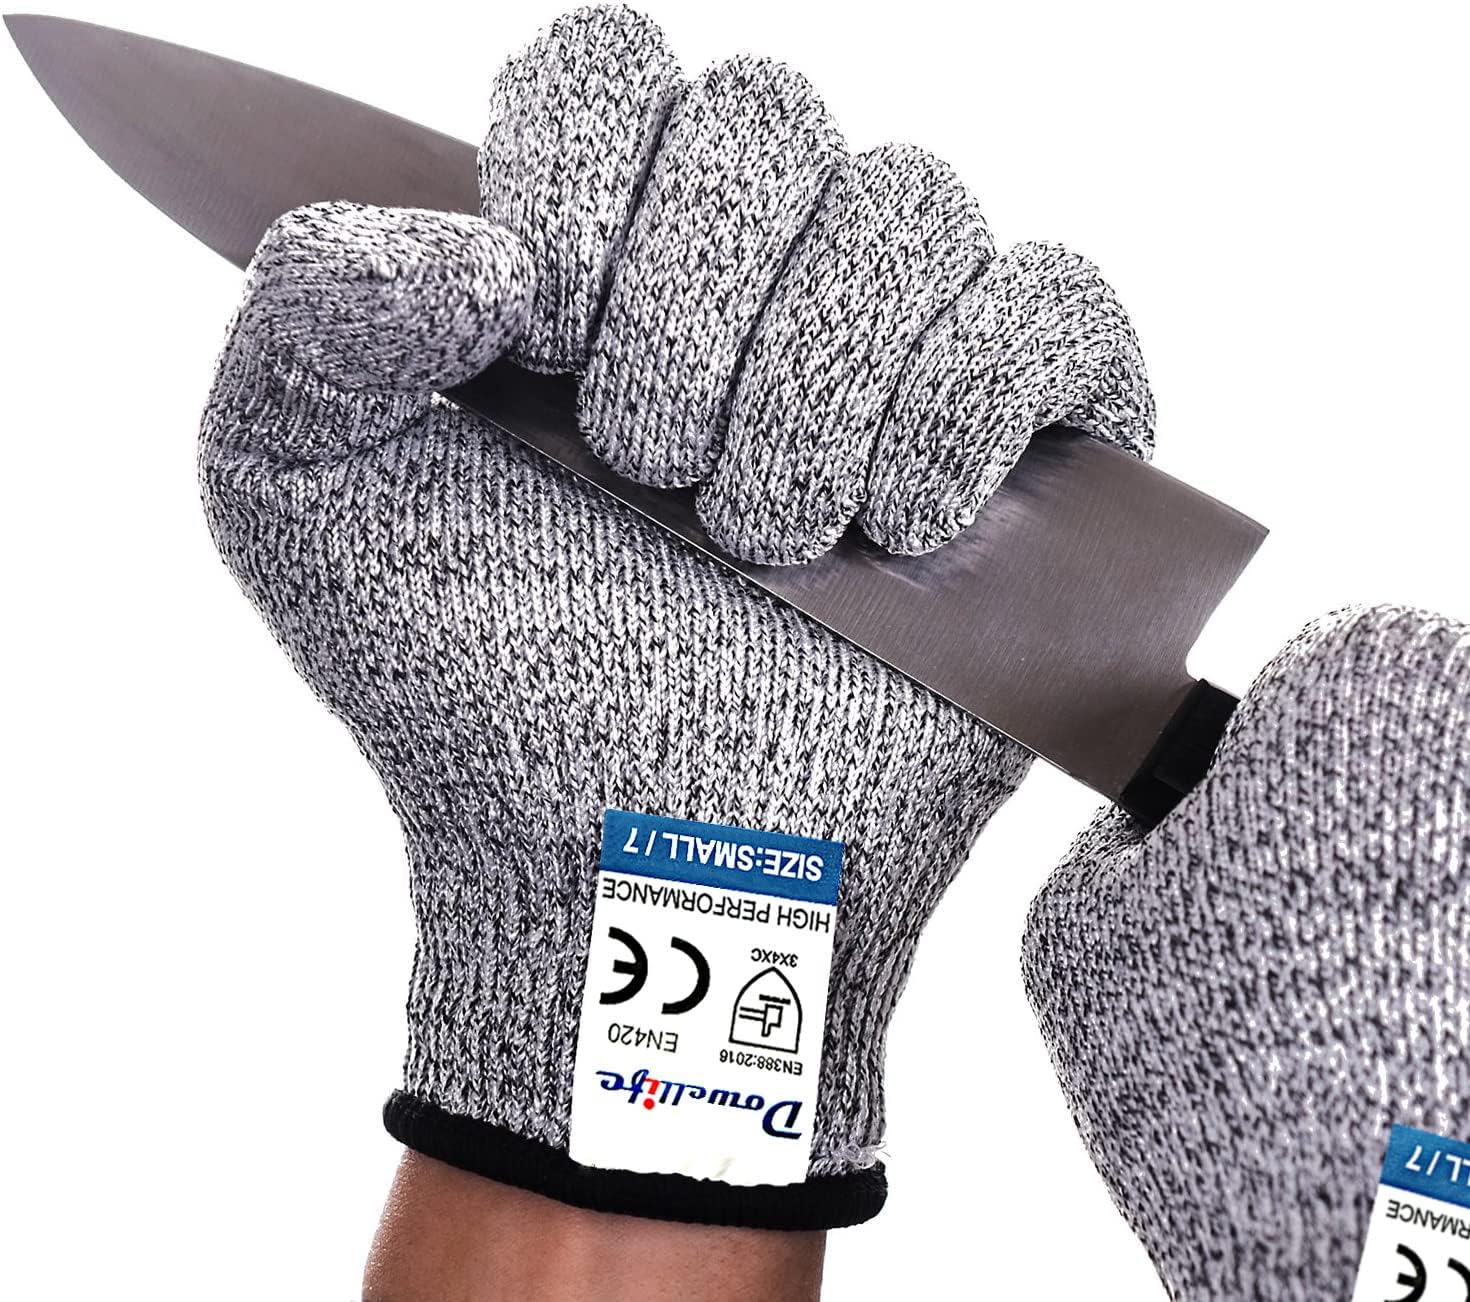
1. Dowellife Woodworking Gloves
Dowellife Cut Resistant Gloves From Amazon
Dowellife Woodworking Gloves are made from a blend of materials that offer both flexibility and protection, making them suitable for various woodworking tasks. Users have reported high satisfaction with the gloves’ grip, especially when handling slippery materials, such as finished wood pieces. The textured palms provide excellent traction, which is invaluable when working with smooth surfaces. Furthermore, these gloves are available in multiple colors and designs, catering to different user preferences, which can make them a more appealing option for those who value both functionality and style.
For those who prioritize comfort, Dowellife gloves feature a lightweight design that enhances breathability, allowing sweat to evaporate during long working sessions. This is a significant advantage over bulkier gloves that can lead to discomfort and distraction. Many users appreciate that they can wear these gloves for extended periods without feeling overly fatigued or restricted, making them an excellent choice for both professionals and hobbyists alike.
2. Atlas Fit Gloves
Atlas Gloves From Amazon
Atlas Fit Gloves are known for their ease of cleaning and maintenance, which helps prolong their lifespan. Frequently recommended for both woodworking and gardening, their versatility is a significant selling point. Users highlight the gloves’ snug fit, enhancing control when working with small tools, making them ideal for precision tasks. For example, a woodworker using chisels or small files would benefit from a glove that allows for ample dexterity while still providing protection against splinters and cuts.
Moreover, these gloves are often available at an affordable price point, making them an accessible option for beginners who may not want to invest heavily in protective gear right away. Their lightweight design adds to their comfort, allowing users to keep their focus on their work rather than on their hands. The availability of various sizes also ensures that users can find a suitable fit, which is crucial for both comfort and effectiveness.
3. Mechanix Wear The Original Work Gloves
Mechanix Wear From Amazon
These gloves feature a synthetic leather palm that provides enhanced durability and grip during heavy-duty tasks. Users have noted that the gloves withstand rigorous use without showing signs of wear, making them a popular choice for professionals who demand reliability. Some models include additional protection features like knuckle guards, which offer extra safety when working with sharp tools or heavy materials. For instance, a woodworker who frequently uses a router can benefit from the added protection provided by knuckle guards, reducing the risk of injury.
Mechanix Wear gloves also boast a versatile design that caters to various trades, not just woodworking. This adaptability makes them a valuable addition to any toolbox, allowing users to transition seamlessly between different tasks. The gloves are machine washable, simplifying the maintenance process, which is a considerable advantage for individuals who often tackle messy projects. This feature ensures that users can keep their gloves in top condition, ready for the next woodworking adventure.
4. Milwaukee Cut Level 3 High Dexterity Gloves
Milwaukee Cut resistant gloves From Amazon
Milwaukee gloves boast a unique design that provides breathability while maintaining cut protection. Users appreciate the form-fitting design, allowing for better handling of precision tools. This is particularly beneficial for detailed tasks such as carving or intricate joinery work, where a secure grip can make a significant difference in the outcome. The cut level 3 protection ensures that woodworkers can work confidently without worrying about accidental injuries from sharp tools.
Furthermore, the gloves are machine washable, making them easy to care for after messy projects, which is a significant advantage for any woodworker. This feature allows users to maintain hygiene and extend the gloves’ lifespan, ensuring that they remain a reliable safety measure. The Milwaukee gloves have gained popularity among woodworking instructors who recommend them to students for their balance of protection and dexterity, making them an ideal choice for learners and experienced woodworkers alike.
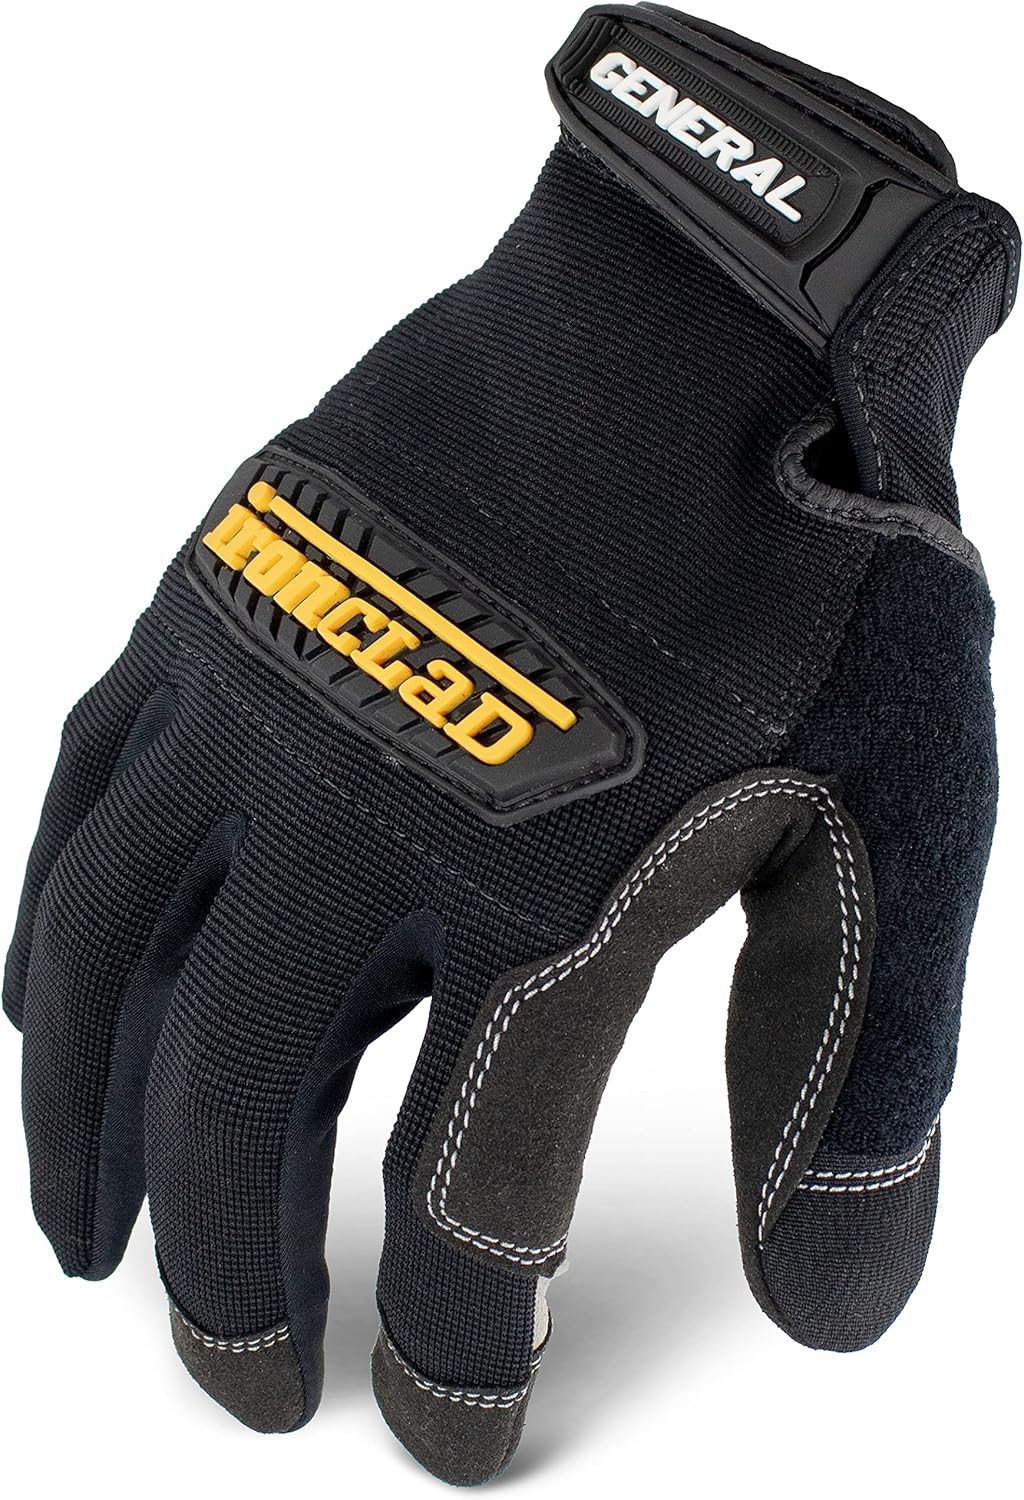
5. Ironclad General Utility Work Gloves
Ironclad General Utility Work Gloves
Constructed with high-performance materials, Ironclad gloves are designed to withstand tough conditions. Users note that these gloves provide excellent tactile sensitivity, vital for detailed woodworking tasks. This sensitivity allows woodworkers to feel the materials they are working with, ensuring precise cuts and placements. The design includes strategically placed padding, which protects against impacts while maintaining dexterity, making them ideal for various woodworking applications.
Ironclad gloves are particularly noted for their durability, often lasting longer than competing brands, which is crucial for professionals concerned about their investment in safety gear. Additionally, the gloves are designed to fit comfortably, reducing the risk of hand fatigue during extended use. Many users appreciate the combination of comfort, durability, and protection, which makes Ironclad gloves a top recommendation among woodworking professionals.
User Reviews and Ratings for Each Glove
User feedback plays a crucial role in choosing the right woodworking gloves. Dowellife gloves consistently receive positive feedback for their comfort, even after prolonged use. Users report that the gloves allow for ample flexibility, making them suitable for various tasks without losing grip. Atlas Fit gloves are often praised for their affordability, making them a popular choice among hobbyists. Many users appreciate their functionality in both woodworking and gardening, showcasing their versatility.
Mechanix Wear gloves have developed a loyal following among tradespeople, highlighting their performance across various applications. Users frequently mention their durability and reliability, which are essential for anyone involved in serious woodworking projects. Milwaukee gloves are frequently recommended by woodworking instructors for students learning to use tools, reflecting their reliability and ease of use. The consensus among educators and experts is that these gloves provide a perfect balance of protection and dexterity for beginners. Lastly, Ironclad gloves are recognized for their durability and ability to withstand wear and tear in demanding environments, ensuring they remain a top choice for serious woodworkers.
Comparison of Breathable vs. Waterproof Woodworking Gloves
Choosing between breathable and waterproof gloves depends largely on the conditions in which you’ll be working. Breathable gloves allow moisture and sweat to escape, keeping hands cool during hot weather, which can be a blessing during long woodworking sessions. For instance, a woodworker might find breathable gloves particularly useful in a warm workshop where ventilation is limited. These gloves can help maintain comfort and focus, preventing distractions caused by sweaty hands.
On the other hand, waterproof gloves often provide insulation and warmth during cold weather woodworking tasks. These gloves can be indispensable for those who work in unheated spaces during winter months, as they help maintain hand warmth while providing necessary protection. Some gloves combine both features, offering a versatile option for varying environmental conditions, making them suitable for year-round use. Understanding the specific requirements of your projects can significantly influence your choice and enhance your overall experience.
Durability and Comfort in Woodworking Gloves
Durability and comfort are paramount in the selection of woodworking gloves. Gloves made with Kevlar or similar materials offer high resistance to cuts and abrasions, enhancing safety during tasks that involve sharp tools. For example, a woodworker using a chisel for detailed work needs gloves that can withstand the risk of accidental slips. This level of protection is crucial for anyone who frequently works with sharp instruments, providing peace of mind while allowing for focused craftsmanship.
Many gloves are designed with ergonomic shapes that conform to hand structure, improving comfort during use. The presence of moisture-wicking liners in some gloves helps keep hands dry and comfortable during extended wear, making them ideal for long woodworking sessions. Choosing gloves with these comfort-enhancing features can significantly affect a woodworker’s efficiency and enjoyment of the craft, allowing them to work longer without discomfort.
Recommended Maintenance for Woodworking Gloves
To maintain the protective qualities of your woodworking gloves, regular cleaning according to manufacturer instructions is essential. This ensures that the gloves remain free from dirt and debris that can compromise their protective capabilities over time. Additionally, inspecting gloves for signs of wear or damage before each use ensures they provide adequate protection when working with sharp tools. Small tears or fraying can drastically reduce their effectiveness, making regular checks vital for safety.
Proper storage is also crucial; keeping gloves in a dry, cool place can prevent deterioration from humidity and temperature fluctuations. This practice helps to prolong the lifespan of the gloves, ensuring they remain reliable companions in your woodworking projects. By following these maintenance tips and treating your gloves with care, you can ensure they continue to provide the protection and comfort you need while working on your woodworking projects.
Final Thoughts on Selecting Woodworking Gloves
When choosing woodworking gloves, it is crucial to assess personal needs, such as specific tasks and environmental conditions. Understanding the demands of your projects will guide your selection, ensuring that you choose gloves that provide the necessary protection and comfort. Trying on different brands and styles may help identify the best fit and comfort level for individual users. This hands-on approach can greatly enhance your satisfaction with the gloves you ultimately choose.
Investing in quality gloves can lead to improved safety, performance, and enjoyment in woodworking projects. The right pair of gloves will not only protect your hands but also allow you to work more effectively, enhancing your overall experience in this rewarding craft. As woodworking is both an art and a skill, ensuring you have the right tools, including protective gloves, is vital to achieving the best results.