What Are the Essential Woodworking Tools

What Are the Essential Woodworking Tools?

what are essential woodworking tools
What Are the Essential Woodworking Tools

What Are the Essential Woodworking Tools? If you’ve ever wondered what are the essential woodworking tools, you’ve come to the right place!   These essential woodworking tools will help you get started in building your own furniture and other   creations. It doesn’t matter if you’re a beginner or a pro, these tools will make your work easier and   faster.

Table saw

Table saws are one of the most useful tools in any woodworking shop. They can make crosscuts, rip cuts, dado cuts, and rabbets and grooves. However, they can also be dangerous. If you are using a table saw, you should wear a pair of good-quality safety glasses, earplugs, and non-slip soles.

A good miter gauge is an important accessory. It can help you to determine the correct angle for your material being cut with your table saw.

Another helpful gizmo is a feather board. The feather board is a device that applies a consistent downward pressure to the stock. This allows for smoother cutting and edge forming.

If you are interested in making more complex cuts with your table saw, a push block is a must. It is similar to a push stick, but allows for better grip when you are pushing stock towards the blade.

Some models include an enclosure. Contractor-style saws can have a custom panel installed. In addition, some table saws are equipped with a zero clearance insert. These inserts help to create a slot with no gaps around the blade.

Jigsaw

Jigsaw is a type of power tool that is used to cut wood, tile, metal, plastic, and other materials. The blade is mounted on a reciprocating arm, and can move in circular motion. This helps to make precise cuts in a variety of materials.

When using a jigsaw, it is important to keep it in proper working condition. You should always use safety glasses and a mask. Wearing these will prevent you from breathing in sawdust or other fumes.

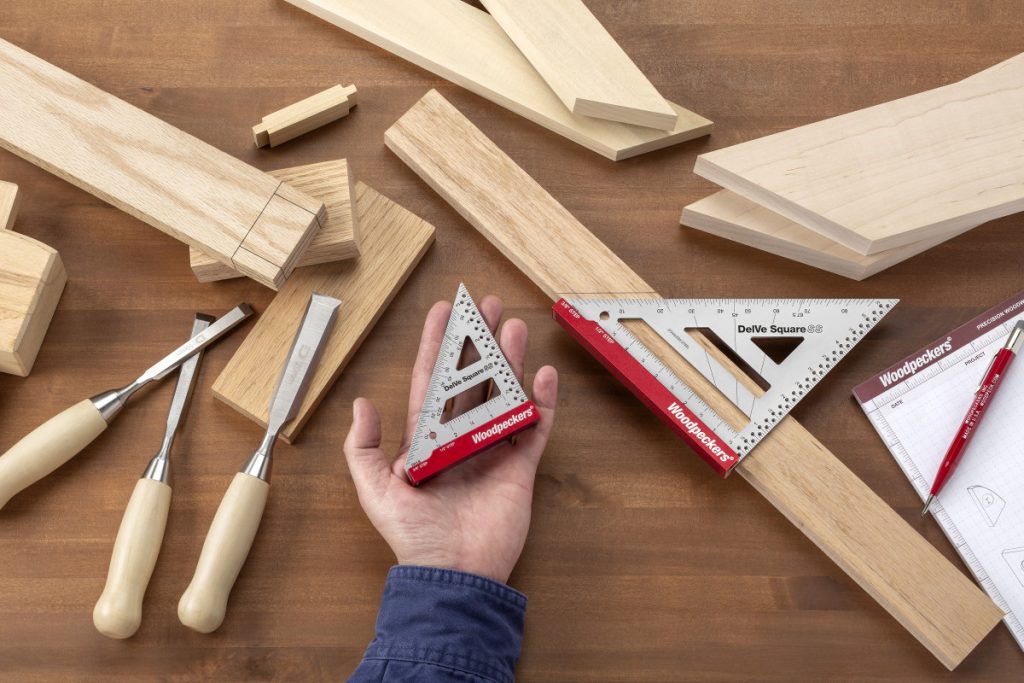
Before cutting, you should mark the line on the material you will be cutting. Masking tape or another marker may be necessary for accurate cuts. A framing square can also be used to help make straight cuts.

Once you have a clear line, you can begin your cut. Make sure to set the jigsaw’s speed to the appropriate speed for the material. If you are making curves, it is best to set the speed on lower.

It is a good idea to wear safety glasses when using a jigsaw. You should also try to maintain a steady surface.

Miter saw

If you have been engaged in woodworking projects or are planning on building your own home, then you should consider a miter saw. They are easy to use and offer quick cutting action. But before buying a miter saw, you should consider the size, quality, and features that you require.

Most basic miter saws have the ability to make straight cuts. However, for complex trimming, you will need to make bevel cuts. A bevel cut is achieved by tilting the blade head to either the left or right side of the miter saw body. This makes the blade slice through the work piece like a hot knife through butter.

You will need to choose a compound miter saw if you plan on making bevel cuts. This will allow you to complete both types of angles in a single cut. Compound miter saws are very helpful because they have the ability to adjust the blade’s swing from left to right.

Many compound miter saws have trigger locks that allow you to lock the saw in place. The trigger is secured by inserting a pin into a hole near the motor.

Tenon saw

Tenon saws are used by carpenters and woodworkers to make precise cuts on different types of wood. They are generally used for making tenons in mortise and tenon joints. But they can also be used for smaller dovetail joints.

Tenon saws usually have a wide, thin blade made of steel. The saw teeth are typically set at an angle to reduce tear-out. The blade can be long or short, depending on the need. Typically, it is a slim profile, but can be up to 18 inches in length.

There are two main types of tenon saws: brass-backed and steel-backed. While both are useful tools, the former is lighter and offers better control. In addition, a heavier back helps power the blade through the wood.

The teeth of a tenon saw are usually set at an angle. This provides a cleaner cut than a crosscut. Ideally, you should choose a saw that has a pitch of 10-14 teeth per inch. It is common for a tenon saw to have a pistol grip handle. However, some smaller models have an open handle.

Benchtop planer

A benchtop planer is a tool that is used to produce parallel surfaces. It also helps to smooth rough edges. However, it does not perform all functions, and the user must decide whether to sacrifice one feature for another.

One important function of a planer is the ability to shave off a piece of wood to the desired thickness. Some planers come with a blade that is raised or lowered to control the amount of material that is removed.

Another function is the ability to catch the grain of the wood. This can help to avoid gauging and creating cuts in the material.

Another functionality of a planer is the ability to square the edge of a board. If you are new to using a planer, you might not realize that this is possible. In fact, you can learn how to do it with a video from a company that offers traditional woodworking courses.

When buying a thickness planer, make sure it has a clear display of its linear scales. A clear display of the same will allow you to quickly see how much material has been removed from the board while it passes through the machine.

Chisels

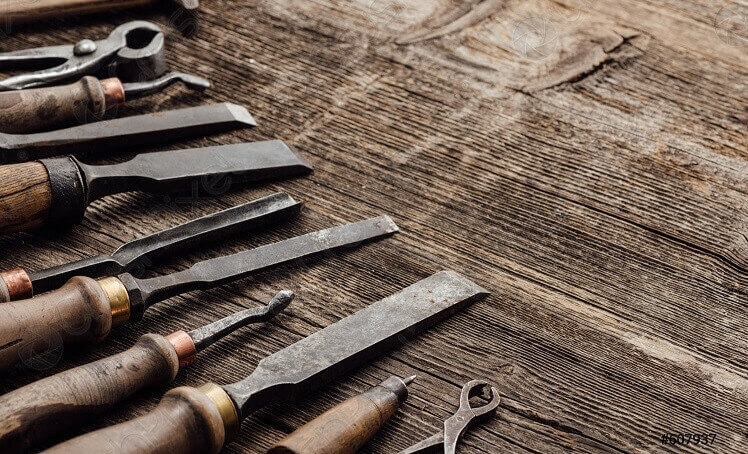
Chisels are the basic tools used in woodworking. They are sharp angled pieces of steel that are used to shape, cut and whittle wood. There are many different types of chisels that you can buy. These can be used for carving, sculpting, joinery and much more.

Chisels are a common woodworking tool that has been around for thousands of years. Although the technique has changed, the essential tools remain the same. Getting the right tool for the job is important.

One of the most common chisels is the bevel edge chisel. This type of chisel is versatile and affordable. It is available in a variety of lengths. A blade between four and seven inches is ideal for a wide range of tasks.

Another popular chisel is the corner chisel. These work in a similar way to a hole punch. By striking the chisel on a wooden piece of wood, the wood is cut like a hole punch.

The best chisels for woodworking should be made of high-alloy carbon steel. You should also choose a hardwood grip for the handle.

Dremel Oscillating Tool

If you are looking for a versatile tool that will help you complete any task, you should consider getting an oscillating tool. This type of tool can be used for a variety of different tasks, including sawing, grinding, and even polishing. They are also useful for cutting and routing.

Oscillating tools are typically used by do-it-yourselfers, professionals, and remodeling contractors. The blades on these tools are usually sharp and can cut skin and bones easily. These tools are safer than spinning blades, as they do not generate as much dust.

There are many types of oscillating tools available, and some are more effective than others. One of the most important features is an easy blade changing mechanism. Another factor is noise level. Expensive oscillating tools tend to be quieter. It is also a good idea to check out the attachments that come with the tool.

The Multi-purpose Cutting Guide (565) is an important accessory for any Dremel owner. This guide allows you to control the depth of your cuts, and offers more accuracy when cutting any material.

Marking tools

Woodworking marking tools are used to mark lines on the surface of the wood or the project piece. They are a necessity to ensure the accuracy of your woodworking projects. There are many types of these tools and each one has its own specific functions.

The scriber is a tool that makes a clean, accurate line. Scribers are commonly used to make mortise joints and door casings. It has a sharp, pointy tip that makes a more noticeable mark than a pencil.

Another marking tool is a marking gauge. A marking gauge is a small wheel with a pointed tip that is dragged along the work piece. Depending on the gauge, the pin is either adjustable or fixed to a specific length.

Similarly, there are many different varieties of tape measures. Some are available in metric measuring systems and others are in imperial. Tape measures are useful for quick measurements. However, they are not suitable for very precise measurements.

Another type of marking device is a marking T-rule. This is similar to the aforementioned t-bevel, but has a blade that can be set to four angles.

How to Sell Woodworking Plans Online

How to Sell Woodworking Plans Online

how to sell woodworking plans online
How to Sell Woodworking Plans Online

How to Sell Woodworking Plans Online. When you first start out selling woodworking plans online, you’ll want to be sure you have an excellent website, good product images, and plenty of content to show people what you can do. These three things will help you get your site noticed by potential customers and get you on the right path to success.

How to Sell Woodworking Plans Online End tables

You can make money by building woodworking projects. However, you may not know what to build. Luckily, there are plenty of resources online to help you do just that.

Woodworking plans are a great place to start. You can choose from hundreds of free guides if you don’t want to spend money. Plus, many of these sites will have a blog for you to check out.

While there’s no magic formula for building a woodworking masterpiece, there are some tips and tricks you can follow to create an aesthetically pleasing piece. For instance, you may want to use recycled materials to keep your costs down.

To get the most out of your efforts, you need to find a good website or service to upload your plans. Once you’ve uploaded your plans, you can start marketing them. In addition to traditional advertising channels, you can also market them on social media.

Trivets

If you are looking to make some extra cash this holiday season, you can sell your woodworking plans online. This can be a great way to reach a wider audience while also getting your product into the hands of your intended audience.

There are several ways to sell your projects, but they all require effective marketing and distribution channels. You can start your own blog, sell your products on online marketplaces, or even attend flea markets to sell your designs. But how do you get the word out about your business?

One of the best ways to market your business is through equity crowdfunding. With a successful campaign, you can determine whether your brand has a following and the level of interest in your product.

Picture frames

Using woodworking plans to sell your own creations online may be a lucrative way to earn additional income. However, there are also risks involved. You will want to do some research before jumping into this business.

One of the best ways to sell your own woodworking projects is to create a blog. This will be an ideal venue for you to share your craft. If you have a knack for design, you can also post sketches and ideas to make it easy for other builders to see what you’ve done.

You can also use design software to create your own high-quality woodworking plan. SketchUp and other similar programs are designed to help casual designers develop their skills, while requiring little training.

In addition to your own design, you can also take advantage of the wide variety of woodworking plans available on the Internet. Some companies provide free plans for their customers. Others charge a small fee.

How to Sell Woodworking Plans Online Planters and pots

If you have a woodworking skill, there’s a lot of potential for making money online. You can sell woodworking plans for planters and pots.

Wood is an ideal material for making planters. It holds up outdoors for years and can be painted in endless designs.

If you don’t have a woodworking skill, there are ways to build a planter on a budget. The amount of materials you will need will depend on the kind of planter you are creating.

You can buy a pre-made planter or make your own. There are many simple designs that are affordable and easy to create. These are great for beginners.

When you make a planter, it is best to keep it well protected from moisture. Using landscape fabric to line the bottom of the planter is a good idea. This helps to protect the wood base and prevent water damage.

How to Sell Woodworking Plans Online Custom dog beds

If you’re looking to sell custom dog beds, you need to be smart about your marketing. Not only are dog beds a popular product, but they also have a wide market. Dog owners are looking for a comfortable place to sleep for their pets.

A custom dog bed can be a fun woodworking project. You can create a simple box with padding or you can add more complexity with engraving. Regardless of the style, your pet will love the way it looks.

Custom pet beds are a great investment. They can be customized to fit any space and home decor, and they can be washed when needed. This is an easy and inexpensive alternative to store-bought pet beds.

You can make a no-sew dog bed for your pet with PVC pipe and an old pillow. Or you can repurpose items such as an old television or computer monitor.

 Armoire Woodworking Plans

 Armoire Woodworking Plans

armoire woodworking plans

Armoire Woodworking Plans. If you want to build your own armoire then you should try using some woodworking plans. You can find some good ones online that will guide you in making a nice wooden piece for your home.

 Build a large armoire

Building a large armoire can be a great way to keep your belongings out of the elements. It also makes a great addition to any bedroom, providing convenient storage for a variety of items. The key is to build a well designed cabinet with a functional front that is not overly complicated to assemble.

Armoire Woodworking Plans. To build an armoire that will last you a lifetime, you will need a few basic supplies. You can get them at your local hardware store or online. If you are lucky, you will even get them at a bargain. Once you have everything on hand, you should be ready to assemble your new cabinet in no time at all.

You can even put together a DIY cabinet jack if you want. For a mere fraction of the cost of hiring a pro, you will have a solid and sturdy piece of furniture that is sure to last the test of time. When it comes to storage, you can’t go wrong with cedar. This durable wood is a great choice for storing clothing, linens, and other household items.

You might be wondering what to actually put on your shelves. For the purpose of this project, the best place to start is with a closet big enough to accommodate a cabinet of this size. A closet can be a great place to keep your shoes, jackets, and other clothing that you don’t want to put on display in the house. As for the contents, it’s up to you. One of my favorite ways to use this type of cabinet is to fill it with a couple of bins and a clothes rod. Having a storage area like this will help free up room in your bedroom for more important items.

It’s easy to see why building an armoire for your bedroom is one of the most popular home improvement projects. Whether you decide to tackle it on your own or have it installed by a professional, you’ll love the finished product. With a little patience and a little luck, you’ll have an elegant storage solution that will last you for years to come.

Install shelves and supports  Armoire Woodworking Plans

When installing shelves and supports in an armoire, it is important to consider the type of wood used for the shelf. This will help determine whether the shelf will be able to stand up to its load. In most cases, a plywood shelf made from thicker panels is a more durable option. The edging of the shelf should be trimmed flush with the top face of the shelf. A butt joint can also be used to secure the edging. However, if the shelf is made from a harder material, such as MDF, the edging may not hold up.

Once you have selected the type of material you want to use, it is time to begin the actual installation. Whether you are hanging a wall-mounted shelf or installing a cabinet, there are many different methods you can choose from. Each method has its own advantages and disadvantages. If you are not sure which method is best for your project, check out the following illustrations to find out.

Wall-mounted shelving is a great way to save floor space. It allows for more flexibility in positioning and can allow you to hang longer items. Using this technique can speed up construction. Depending on the style of the shelf, you can attach the shelf to the wall with screws or finish nails. Paint the shelf after installation to give it a finished look.

Another way to install a wall-mounted shelf is to use a hanging rail. A hanging rail makes it easier to hold the shelf on the wall, as well as increase the strength of the hanging shelf. You can use this method to hang a shelf on an alcove around a fireplace. These spaces can also be used as display or storage areas.

The most common type of wood for shelves is plywood. It is usually a little cheaper than solid hardwood. Plywood is made of sheets of wood that are glued together to make a thicker panel. Use plywood that is at least 3/4 inch in thickness. For a more sturdy shelf, you can also add a layer of hardwood veneer.

You can use a cordless drill to drill pilot holes through the walls. Then, you can use a stud finder to mark the studs. Using a stud finder will allow you to ensure that the shelves will be placed in a proper location.

Once you have found the studs, you can then cut the wood to the appropriate size and shape. Some people prefer to use a circular saw to cut the wood. Alternatively, you can sand the edges to create a smooth finish.

To hang the shelves, you will need to drill holes in the wall for the screws to go through. Typically, you will use #8 flat head screws to mount the shelves to the bracket from underneath.

Different Types of Wood Rot

Different Types of Wood Rot

Different Types of Wood Rot


Different Types of Wood Rot. Wood rot is a serious problem, but there are several ways to address it. The first step is to recognize the symptoms and understand how it works. Secondly, you will need to figure out what the best course of action is to get rid of it.

Different Types of Wood Rot Dry rot

Dry rot is a type of wood rot that is caused by a fungus. It is a dangerous and destructive type of rot that can destroy entire properties. The fungus attacks the cellulose structure of the wood, causing the wood to shrunken and turn brown. In some cases, the rot can travel through masonry and penetrate non-wood surfaces in contact with the ground.

In order to diagnose dry rot, you must first identify the source of moisture. Often, this moisture is caused by a plumbing leak or damaged roof. Once you know the source of the moisture, you can begin to repair the area. However, you must take care to remove any infected timber before starting any repair work. Otherwise, the fungus can continue to grow and spread to other areas of your home.

In the early stages of wood rot, the fungus may be hidden by wall paneling or by the cracks and joints of the lintel. When the rot starts to grow, it will spread rapidly. You can detect the spores of the fungus by observing the color and texture of the dust in the air. These spores are tiny and are almost invisible to the naked eye.

When a dry rot spore lands on an infected area of wood, it will begin to produce hyphae. Hyphae are fine, white tendrils that will eventually form mycelium, a cotton-wool-like mass that searches for cellulose-containing wood.

The fungus needs a moist environment to thrive. If the moisture is not present, the spores can’t get the energy they need to grow. They will eventually weaken and die. Therefore, it’s important to remove any infected timbers to prevent further growth.

If you’re not sure which fungus is causing the rot, you can check online pictures. There are some common household items that can act as fungicides, such as baking soda and vinegar. Alternatively, you can use commercial fungicides. These contain similar ingredients, but have more field testing and have a higher concentration of a fungicide.

Depending on the extent of the dry rot outbreak, you may need to replace the infected wood or apply a stronger fungicide. Removing the infected timbers will ensure that the spores don’t re-infect the surrounding timbers.

Besides removing the infected wood, you should also consider removing the plaster and flooring around the affected area. This will open the infected area up so you can determine which timbers have been infected. Professional woodworkers can help you clean up the infected area. While they’re at it, they can treat the surrounding timbers to stop the rot from spreading.

In the more advanced stages of dry rot, the fungus will cause mushroom growths. The fungus will feed on the moisture in the wood and will cause cuboidal cracks to form.

Different Types of Wood Rot Symptoms

Wood rot is caused by fungi that decompose wood. Generally, it is found in areas where the wood has been exposed to water. It is caused by the breakdown of cellulose and hemicellulose in the wood.

There are two main types of wood rot: the dry and the wet. Both are characterized by structural damage to the wood. The first type is characterized by cracking and discoloration. It can also cause warped wood.

When it comes to the wet rot, it is characterized by a higher moisture content. This causes the wood to become weak and crumbly. It can also cause the tree to die. A common cause of this type of rot is improper pruning. If the branches are not properly pruned, it creates an environment in which a wood-rotting fungus can thrive.

Some of the more common wood rot symptoms include fruiting bodies on the surface of the wood. These are formed by a fungus that is known as Schizophyllum commune.

Another symptom of this fungus is a papery bark. While most of the spores are deposited on wounds, the fungi can also travel by air. In addition, they can infect nearby surfaces.

Various studies have been conducted on the symptoms of wood rot in young apple trees. Researchers examined the effects of several stress factors on the health of the trees. They concluded that young trees can be more susceptible to this affliction than older ones. However, they noted that infected trees take an extended time to succumb.

One study on wood rot found four Basidiomycetes species associated with the symptoms. These include Trametes versicolor (L.) Lloyd. Other fungal taxa included D. rubi-ulmifolii sensu lato and Eutypella citricola.

These fungi are known to produce fruiting bodies, which contribute to aerial inoculum in orchards. They were isolated from bud union and pruning wounds on rootstock.

Although they are not known to attack live trees, they can attack structures built long ago. In homes, it can happen on siding and under the drywall. As a result, it is important to check and treat the wood in your home for wood rot.

One of the earliest signs of wood rot is the gap between pieces of wood. These gaps can be filled by a handyman with epoxy. However, it is advisable to call in a professional. Usually, the best way to prevent wood rot is to avoid leaving water-logged or damp areas. Ensure the home is adequately sealed and that there are proper ventilation systems in place.

Aside from repairing the damaged wood, it is also important to identify the source of the moisture. Water can accumulate in the home when people shower or dry clothes. Proper ventilation helps the moisture to escape. Oftentimes, it can be difficult to detect the source of the water.

Treatment

Wood rot can be a serious problem. It can cause structural damage to your home, and can also be a very expensive repair. There are different types of wood rot, and a comprehensive plan of chemical and mechanical treatment must be employed.

The most common forms of wood rot occur when moisture gets into the wood. This can occur through a leaking pipe or gutter, or from a faulty roof slate. When moisture gets into the wood, it can break down and fungi can grow. As the fungi get deeper into the wood, it becomes weaker and crumblier, and the area begins to look hollow and brown. Affected timber needs to be cut out, repaired, or treated in order to prevent further damage.

Fungi can be quite tricky to eliminate. They can hide in dark places, such as behind the plaster. However, if you can find a way to kill the fungi, you can stop the spread of the disease. For instance, you can apply a fungicide like borax to the affected timbers.

Fungi can also be found in the air. Typically, they grow when moisture is present and the temperature is right. Some fungi are beneficial, whereas others are quite destructive. If the right conditions are present, a fungi can turn wood into food. Unfortunately, fungi can be difficult to remove, and they can spread through contact. Fortunately, a fungicide like Multicide is effective at killing the spores that are already present.

Although a fungicide will only work on the surface rot, it is one of the most useful of all the wood rot treatments. The fungicide will create an anti-fungal layer on the surface of the rotten wood. Once this anti-fungal layer is created, it will protect the rotten wood from further rot.

You can prevent wet rot by ensuring that your home is properly ventilated and that the humidity is kept to a reasonable level. Using a dehumidifier can help, as can sweeping or caulking the exterior of your home. Another good way to prevent wood rot is to install a covered entryway. High humidity can lead to moisture building up in the walls, and this can lead to wet rot.

Dry rot, on the other hand, is a living fungus that draws moisture from the timber. The hyphae that are part of the dry rot grow into mycelium, which appears as cotton wool-like material. The fruiting body of the fungus appears as a mushroom-like structure.

Both dry and wet rot can be detected by their various signs. If you notice any of these, it is best to treat the affected areas immediately.

The most important wood rot treatment, however, is prevention. Wood rot can affect a variety of surfaces in your home, and is most likely to occur on the exterior of your home.

Wooden Bench Plans

Craft Your Own Comfort: Ultimate Guide to Wooden Bench Plans

Wooden Bench Plans: Discover comprehensive wooden bench plans that guide you through tools, styles, and step-by-step instructions for creating beautiful, personalized seating solutions.

brown wooden bench
Wooden Bench Plans

Overview of Wooden Bench Plans

Wooden benches are not only functional but also carry a charm that enhances the aesthetic appeal of various settings, from lush gardens to cozy patios. Their ability to transform outdoor spaces into inviting areas for relaxation and socialization makes them a favored choice for homeowners and garden enthusiasts alike.

There are countless styles of wooden benches that you can create, each serving different purposes—be it a garden bench for quiet reflection, a picnic table for family gatherings, or a storage bench that helps keep your space organized. For instance, a garden bench with a traditional slatted design not only offers a place to sit but also allows for drainage, preventing water accumulation that could lead to rot. Engaging in a DIY project allows you to tailor your bench’s design to your specific needs and personal taste, ensuring that it complements your home or outdoor area beautifully.

Building wooden benches can be a fulfilling project for both beginners and seasoned woodworkers. The hands-on nature of the task fosters creativity and problem-solving skills, making it an excellent way to spend a weekend or an afternoon. As you work on your bench, you will develop a deeper appreciation for craftsmanship and the materials you choose, which can enhance your future woodworking projects.

Essential Tools and Materials

Before diving into your wooden bench project, it’s crucial to gather the necessary tools and materials to ensure a smooth building process. Essential tools for this endeavor include saws, drills, clamps, and sanders, which are vital for achieving accurate cuts and polished finishes. Investing in a good-quality miter saw can make cutting angles simple and enjoyable, while a power drill is indispensable for securing your joints effectively.

In terms of materials, popular choices include cedar, teak, white oak, redwood, and cypress, each offering unique durability and aesthetic qualities. For instance, cedar is renowned for its natural resistance to decay and insects, making it an excellent choice for outdoor benches. Additionally, using screws that are specifically designed for outdoor use can greatly enhance the longevity of your bench, as they are built to withstand the elements.

Safety gear is another critical component of woodworking. Wearing goggles and gloves protects your eyes and hands from splinters and debris, ensuring that you can focus on the task at hand without distraction. It’s also wise to have a first aid kit nearby, just in case of any minor accidents. Once you have your tools and materials ready, the excitement of building your wooden bench can truly begin.

Wooden Bench Plans
Wooden Bench Plans

Different Styles of Wooden Benches

Garden benches typically feature a slatted design, allowing for drainage and airflow, making them perfect for outdoor environments. A classic example is a curved garden bench that not only provides seating but also adds an elegant touch to your yard, encouraging guests to sit and enjoy the surroundings.

Picnic benches usually have a robust construction with flat surfaces, ideal for family meals or gatherings. These benches often feature attached tables and can be crafted in various sizes to accommodate different group sizes. Another practical option is a storage bench, which combines the benefits of seating with hidden compartments, perfect for organizing garden tools or outdoor cushions. This type of bench is particularly useful in smaller spaces where storage is at a premium.

In addition to traditional designs, modern benches may incorporate geometric shapes and innovative materials, creating striking focal points in contemporary settings. For example, a sleek, minimalist bench made from reclaimed wood and metal accents can serve as a conversation starter in an urban garden or patio. Whether you prefer rustic warmth or modern elegance, there’s a wooden bench style that can complement your vision perfectly.

Step-by-Step Instructions for Building a Basic Wooden Bench

Creating a basic wooden bench can be an enjoyable and straightforward process when approached methodically. Start with precise measurements and cutting your wood pieces to the specified lengths as per your design. For example, if you’re building a 5-foot bench, you’ll need to measure and cut the wood for the legs, seat, and any backrest or support pieces accurately to ensure stability and comfort.

Once the pieces are cut, assemble the legs first, ensuring they are securely attached and aligned properly before you proceed to attach the slats for the seat. Using pocket holes can be particularly beneficial, as they minimize visible screws, resulting in a cleaner and more polished appearance. After the legs and slats are attached, it’s essential to sand all surfaces meticulously. This step not only smooths the wood for comfort but also prepares it for finishing, as rough edges can lead to splinters and discomfort.

Finishing touches are crucial for enhancing the bench’s aesthetic appeal and durability. Fill any screw holes with wood filler and allow it to dry before sanding it smooth. Applying a protective coat of stain or sealer will not only beautify your bench but also shield it from the weather elements if it’s placed outdoors. Following these steps will ensure that your completed project is both functional and visually appealing, ready to be enjoyed for years to come.

Safety Tips While Working with Wood

Prioritizing safety is essential when engaging in woodworking projects. To begin, always work in a well-ventilated area to avoid inhaling wood dust and fumes. If you are using any finishes or adhesives, ensure that the space is adequately ventilated, as some products can release harmful vapors. Additionally, keeping your work area organized can help prevent accidents, allowing you to focus on the task without the distraction of clutter.

Proper maintenance of your tools is also vital; ensure they are functioning correctly and used according to manufacturer guidelines. Regularly check your saw blades for sharpness and your drill bits for wear to maintain efficiency and safety in your work. When using power tools, keep your hands clear of cutting areas, and consider employing push sticks or similar devices when working with small pieces of wood.

Finally, familiarize yourself with the operation of each tool before beginning your project. Knowing how to handle tools safely can prevent injuries and boost your confidence as you work. Always store your tools safely when not in use, especially if you share your workspace with others, to minimize the risk of accidents. By incorporating these safety tips, you can enjoy your woodworking experience while ensuring a secure environment.

Finishing Options for Durability and Aesthetics

One effective approach is to apply a wood sealant or outdoor varnish, which protects against moisture and harmful UV rays, both of which can degrade the wood over time. For instance, if you choose a high-quality marine varnish, it can provide excellent protection for benches exposed to the elements, making it an ideal choice for outdoor furniture.

Staining your bench can enhance its natural beauty and provide an additional layer of protection. The right stain can bring out the wood grain, making your bench a stunning focal point in your outdoor area. Regular maintenance, including reapplication of your chosen finish, can prolong the life of your bench significantly. If you notice the finish beginning to wear, it’s a good practice to schedule a touch-up, which will keep your bench looking its best.

When selecting a finish, consider how it complements the surrounding decor. A darker stain might look stunning against lighter-colored siding, while a natural finish can bring warmth to a rustic setting. Testing different finishes on scrap wood before application allows you to see how the color and sheen will look on your bench, ensuring you achieve the desired effect without any surprises.

Wooden Bench Plans
Bench Plans

FAQs About Wooden Bench Plans

If you’re interested in beginner-friendly wooden bench plans, seek out options that provide comprehensive materials lists and visual aids. Many resources offer step-by-step instructions that break down the process, making it easier for novice woodworkers to follow along. For example, a plan for a simple wooden bench might include diagrams and clear instructions, helping you visualize the project from start to finish.

Standard dimensions for a wooden bench typically range from 4 to 6 feet in length, which is comfortable for most users and allows for ample seating. If you have specific needs, such as accommodating larger gatherings, you can adjust the dimensions accordingly. Unique designs, such as a shoe storage bench, can blend functionality with aesthetics, making these plans particularly appealing for entryways.

Plans for benches can vary in complexity, catering to different skill levels. Beginners might appreciate straightforward designs that can be completed in a weekend, while more experienced woodworkers may seek out plans that incorporate advanced techniques. Utilizing resources like video tutorials can also enhance your understanding, providing visual learners with additional guidance to make the construction process more accessible.

Creative Ideas for Modern and Rustic Wooden Benches

The world of wooden benches is rich with creative possibilities, allowing you to express your style through your design choices. Modern benches often feature sleek lines and minimalistic styles, which fit perfectly into contemporary settings. For example, a modern bench crafted from polished hardwood with stainless steel legs can serve as a stunning accent piece in a modern garden design.

Rustic benches, on the other hand, typically include reclaimed wood and natural finishes, adding a warm and inviting feel to any space. Imagine a rustic bench made from weathered barn wood, complete with a natural edge that showcases the wood’s character. These benches not only provide seating but also tell a story, enhancing the overall ambiance of your outdoor area.

To add comfort and personality to your benches, consider incorporating cushions or upholstered seating. Custom engraving or painting can further personalize your bench, making it a unique statement piece that reflects your individual style. Mixing materials, such as wood with metal accents, can create an eye-catching contrast, offering a modern twist on traditional designs. Embracing creativity in your bench design allows you to craft a piece that is both functional and visually captivating.

Popular Resources for Free Wooden Bench Plans

Numerous websites offer free wooden bench plans suitable for a variety of skill levels and styles, making it easy to find the perfect project for your needs. Websites like Instructables and Minwax provide downloadable plans that include detailed instructions, material lists, and tips for successful construction. One popular plan is the “Simple Wood Bench,” which can be completed in just a few hours, making it ideal for beginners eager to dive into woodworking.

The Spruce Crafts features an extensive array of blueprints and cut lists for various bench designs, allowing you to choose one that best fits your space and skill level. For instance, a mid-century slatted bench plan can provide a stylish solution for those looking to add seating to their patio without compromising on aesthetics. DIYGardenPlans.net offers quick projects that are beginner-friendly, emphasizing ease of construction and accessibility for those new to woodworking.

Engaging with online woodworking communities can also prove beneficial, as these platforms offer advice, modifications, and inspiration based on personal experiences. Many woodworking blogs share user-generated projects, providing a treasure trove of ideas and alternative designs to inspire your next bench project. By exploring these resources, you can find the perfect plan that suits your needs and abilities, setting you on the path to creating your own wooden bench masterpiece.

Encouragement for DIY Wooden Bench Projects

Wooden Bench Plans
Wooden Bench Plans

Taking on a DIY wooden bench project can be a gratifying experience that yields both personal satisfaction and cost savings. Building your own bench not only allows for creativity but also provides a sense of accomplishment that comes from completing a project with your own hands. Crafting a bench tailored to your style and needs can be much more rewarding than purchasing a pre-made option, leading to a unique piece that enhances your space.

Sharing your completed projects on social media can inspire others in the DIY community, fostering a sense of connection and camaraderie among fellow woodworking enthusiasts. Utilizing hashtags like #DIYBench can help you showcase your work while discovering other projects that ignite your creativity. Remember that every completed project is a step forward in your woodworking journey, building your skills and confidence as you take on new challenges.

The skills you gain from building a wooden bench can serve as a foundation for more complex woodworking projects in the future. As you learn about joinery, finishing techniques, and material selection, you’ll find yourself better equipped to tackle larger or more intricate designs. Embrace the journey of woodworking, knowing that each project enhances your capabilities and brings you closer to becoming a skilled craftsman.

You cannot copy content of this page