Mortise Gauge Types

Mastering Mortise Gauges: The Key to Precision in Woodworking

Mortise gauge types: Discover the essential role of mortise gauges in woodworking, their types, usage techniques, and tips for maintaining accuracy.


mortise gauge types
mortise gauge types

Understanding Mortise Gauges: Definition and Purpose

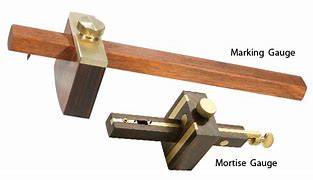
A mortise gauge is a specialized woodworking tool specifically designed for marking mortise and tenon joints with remarkable precision. Its primary function is to assist carpenters and woodworkers in creating accurate markings that ensure tight-fitting joints in furniture and cabinetry. This precision in woodworking is vital, as it directly affects the overall quality and durability of the finished product. The design of a mortise gauge typically includes two pins or spurs that allow for simultaneous marking of both sides of a mortise, thereby enhancing the accuracy of the cuts made.

For example, when constructing a wooden frame for a door, a mortise gauge can be employed to mark the exact width needed for the mortise. This ensures that the tenon fits snugly into the mortise, contributing to a stronger and more stable structure. Without such precision, the door frame could become misaligned, leading to structural weaknesses or aesthetic issues. Moreover, the mortise gauge is invaluable in traditional joinery applications, where the integrity of the joint is critical to the performance and longevity of the piece. Understanding the tool’s purpose is essential for woodworkers aiming to produce high-quality results.

Types of Mortise Gauges

There are several types of mortise gauges available, each designed for specific tasks in woodworking. The most common type is the dedicated mortise gauge, which features two pins for marking both sides of a mortise simultaneously, allowing for greater accuracy. Additionally, combination mortise gauges can function as both a marking gauge and a mortise gauge, which provides versatility for various projects. These types are especially useful for woodworkers who may not have the space for multiple tools, as they can perform multiple functions with a single gauge.

Mortise gauges are typically made from durable hardwood such as rosewood, which is known for its strength and resistance to wear. Many models feature brass components that add to their durability and longevity. Some mortise gauges also include advanced features like a double-beam for enhanced accuracy around tools like chisels, which can be particularly beneficial when working on intricate designs. Adjustable mortise gauges allow users to modify the width setting quickly, accommodating various mortise sizes, making them a preferred choice for projects requiring diverse joint dimensions. This adaptability makes it easier for woodworkers to achieve precise results without needing multiple gauges for different sizes.

How to Use a Mortise Gauge

Using a mortise gauge properly is essential for achieving the best results in woodworking projects. To begin, set the distance between the spurs to match the width of the mortise chisel you plan to use. Once adjusted, position the gauge against the wood and slide it to create a clear marking line. For added accuracy, it is advisable to use a try square and marking knife to outline the mortise before utilizing the gauge. This preparatory step helps ensure that the marked lines are straight and true, providing a solid foundation for subsequent cuts.

In practical applications, such as cabinet-making, precise mortise and tenon joints are critical for the structural integrity of the furniture. A mortise gauge can help ensure the correct width is marked, allowing for a snug fit of the tenon. When using the gauge, ensure that it is held perpendicular to the workpiece during marking to create clean, accurate lines that will guide your chiseling and cutting efforts. Regular practice with the mortise gauge can significantly enhance one’s speed and precision in marking mortises, ultimately contributing to better craftsmanship and higher-quality projects.

Importance of Accuracy

Accuracy is paramount when using a mortise gauge, as it directly impacts the integrity of the wood joints. Inaccurate markings can lead to misaligned joints, which not only compromise the structural stability of the finished product but can also result in wasted materials and increased project costs. The design of mortise gauges promotes high precision, ensuring that measurements are exact for effective joinery and reducing the risk of costly mistakes.

For example, if a woodworker miscalculates the width of a mortise, it may lead to an ill-fitting tenon that requires additional adjustments, wasting materials and time. Furthermore, a well-calibrated mortise gauge can enhance the overall quality of a project by ensuring that all joints fit together seamlessly. Consistent accuracy minimizes material waste and reduces the need for corrections during assembly, allowing for a more efficient workflow. Ultimately, the importance of accuracy cannot be overstated, as it is foundational to successful woodworking.

Importance of Accuracy


Maintaining Your Mortise Gauge

Proper maintenance of a mortise gauge is essential for ensuring its longevity and performance. To maintain optimal functionality, it is crucial to keep the gauge clean and free from resin and debris that can accumulate during use. This maintenance step helps prevent any interference with the marking process. Regularly checking and adjusting the pins is also important to ensure they remain sharp and functional, as dull pins can lead to inaccurate markings and frustration during projects.

For instance, storing the mortise gauge in a protective case when not in use can prevent damage and keep the tool in good working condition. Additionally, periodic inspections for wear or damage can help identify issues before they affect performance. Applying a light oil to moving parts can also maintain smooth adjustments and prevent rust, ensuring the mortise gauge operates effectively for years. Routine maintenance not only prolongs the life of the tool but also ensures that it consistently delivers accurate results, which is essential for high-quality woodworking.

Mortise Gauge vs. Marking Gauge

Mortise Gauge vs. Marking Gauge

Mortise Gauge Types: Understanding the difference between a mortise gauge and a marking gauge is essential for woodworkers, as each tool serves a unique purpose. Mortise gauges are characterized by their two spurs that allow for simultaneous marking of both sides of a mortise, making them ideal for joinery tasks. In contrast, marking gauges typically feature a single spur, designed primarily for general marking purposes such as scribing lines along the grain or for layout work.

Combination gauges can serve dual purposes, which is particularly beneficial for woodworkers with limited workspace or for those just starting in the craft. While both tools are valuable in their own right, mortise gauges often provide greater precision for specific tasks compared to general marking gauges, making them a preferred choice for joinery projects. For instance, a woodworker working on a complex piece of furniture would likely choose a mortise gauge to ensure the mortises are marked accurately, whereas a marking gauge might be sufficient for simple line scribing. Understanding these distinctions can help woodworkers select the right tool for their specific needs.


Mortise Gauge Types Techniques for Enhanced Precision

To improve marking techniques when using a mortise gauge, lightly pressing the gauge is recommended to avoid damaging the wood and to ensure smoother markings. Highlighting scribed lines with a pencil can enhance visibility, making it easier to follow during cutting and chiseling. This step can be particularly useful when working on darker woods or intricate designs where the original line may be difficult to see.

Additionally, adjusting the spur to find the center of a workpiece by marking from both edges can help achieve more accurate results. This technique is especially useful in projects requiring symmetrical designs. Consistency is key; maintaining uniform pressure while marking will ensure that the depth of the line remains consistent across the entire marking. For angled cuts, adjusting the gauge to match the angle of the workpiece will provide better alignment and improve the overall quality of the cut. Mastering these techniques can dramatically enhance a woodworker’s efficiency and the precision of their work.

Features to Look for in a Mortise Gauge

When selecting a mortise gauge, several features should be considered to ensure versatility and functionality. Look for models with an adjustable spur that allows for easy modifications in marking different widths. A locking thumb screw is also beneficial, providing consistent distance settings that prevent accidental adjustments during use. This feature is particularly helpful when working on multiple joints of the same size, as it allows for quick and easy setting without the need for continuous recalibrating.

Ergonomics play a significant role in comfort and control, so evaluating the handle design is essential. Some mortise gauges feature built-in rulers or measuring scales, which can serve as quick references during marking, enhancing efficiency in woodworking tasks. Consideration of these features will help you choose a mortise gauge that best suits your needs and enhances your woodworking experience. Additionally, reading reviews or seeking recommendations can provide insights into the performance and longevity of different models, ensuring you invest in a quality tool.

Mortise Gauge Types Common Mistakes to Avoid

When using a mortise gauge, certain common mistakes can hinder accuracy and performance. One of the most significant errors is applying excessive pressure while marking, as this can damage the wood and lead to inaccurate lines. Finding the right balance in pressure is essential for achieving clean, precise markings. Regular maintenance should not be neglected, as it ensures the gauge remains functional and effective, thereby preventing issues that could arise from using a worn or damaged tool.

Moreover, it’s crucial to ensure that the gauge is correctly set before starting any marking to avoid incorrect measurements. Overlooking the importance of a clean marking surface can also lead to uneven lines and inaccurate cuts, which can affect the quality of the joints. Finally, failing to practice technique may result in inconsistent markings and poor joint fit. By being aware of these common pitfalls, woodworkers can improve their overall marking accuracy and project outcomes.

The Essential Role of Mortise Gauges in Woodworking

Mortise Gauge Types: Mortise gauges are indispensable tools for precise woodworking, particularly in joinery tasks. A thorough understanding of their features, uses, and maintenance can significantly enhance the quality of woodworking projects. The ability to accurately mark mortises is foundational to many furniture-making processes, allowing woodworkers to create strong and aesthetically pleasing joints. Mastery of the mortise gauge not only elevates a woodworker’s skills but also opens the door to more complex and intricate designs.

For instance, a skilled woodworker who can effectively use a mortise gauge can tackle sophisticated projects such as cabinetry with intricate inlays and dovetail joints. By utilizing this tool correctly and understanding its importance in the woodworking process, woodworkers can achieve results that reflect both precision and craftsmanship, ultimately elevating their work and reputation in the craft. The mortise gauge, therefore, stands as a testament to the importance of accuracy and skill in woodworking.
5 Types of Woodworking Angle Tool

5 Types of Woodworking Angle Tool

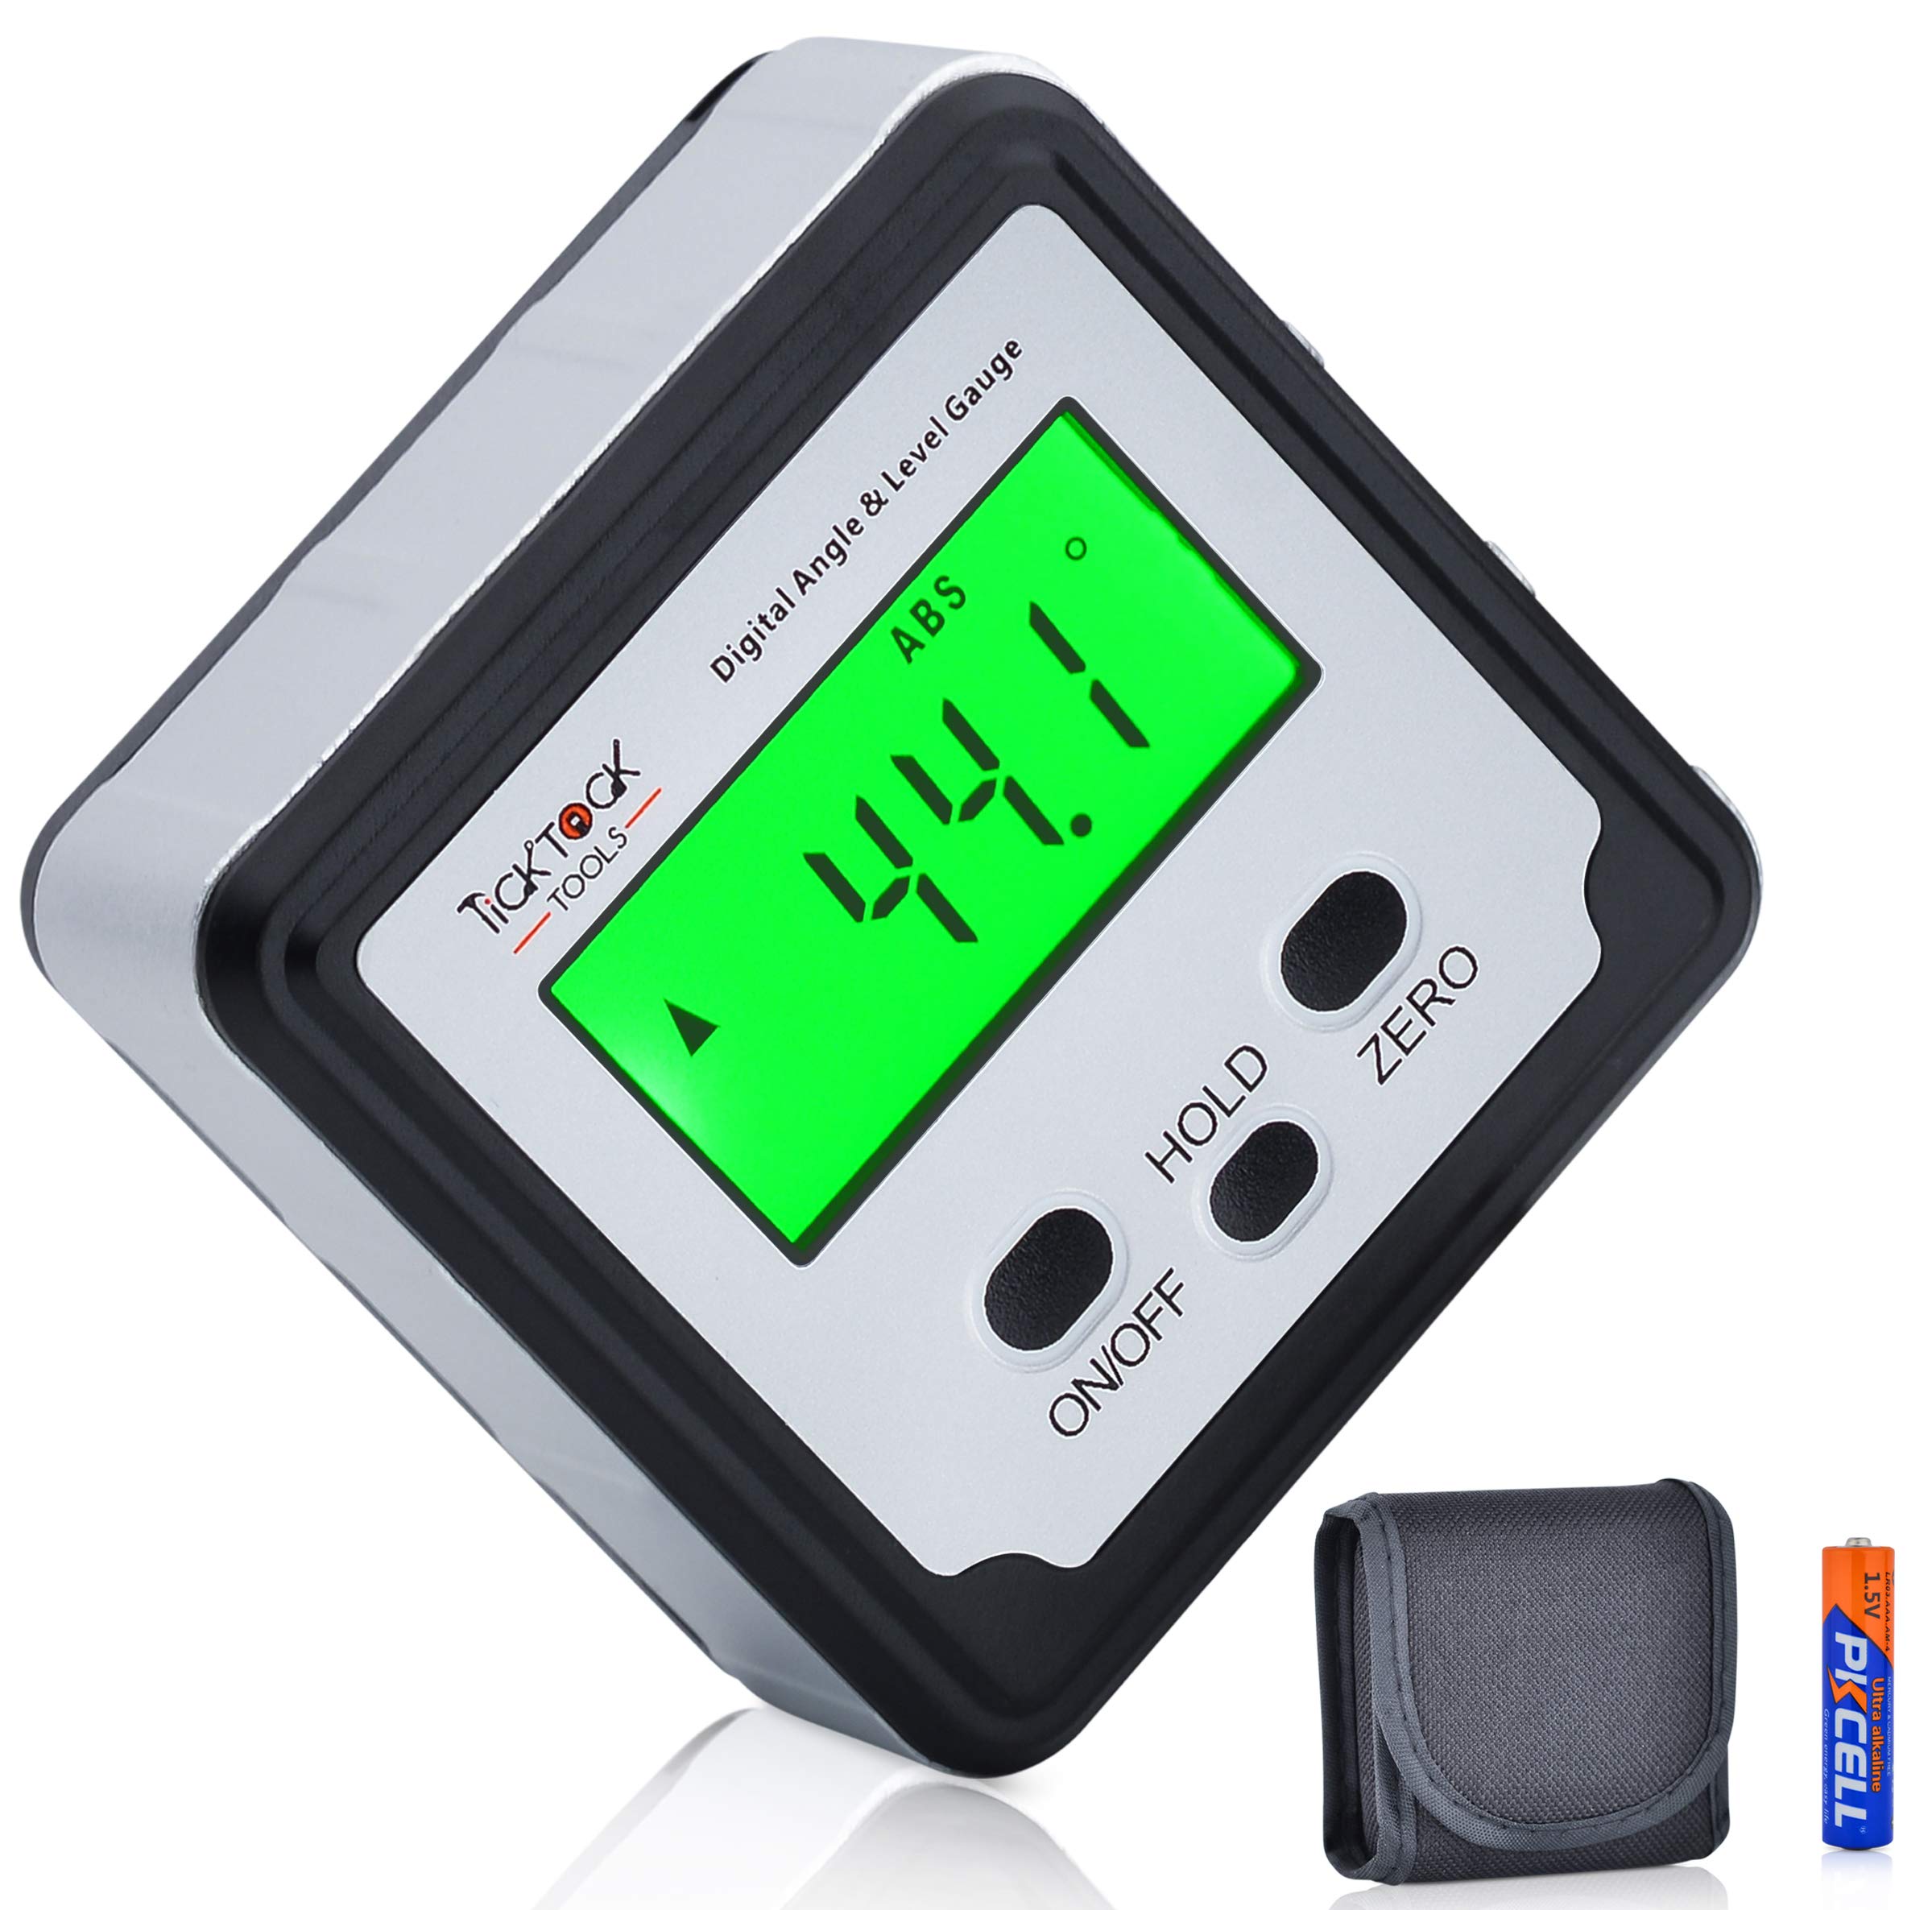
5 Types of Woodworking Angle Tool. Whether you are a carpenter or a DIYer, an angle tool is a must have. These tools allow you to measure angles and ensure that everything fits together correctly.

You can use a variety of tools for this purpose, so it’s important to know how to choose the right one for your project. To help you out, we have listed five of the most popular options below.

Layout Square

5 Types of Woodworking Angle Tool
Layout Square

A Layout Square is a type of woodworking angle tool that’s designed to help you align pieces of wood or other woodworking materials. Using a layout square is a great way to ensure that the work you do is accurate and precise, making it easier for you to get a perfect finished product.

A layout square can be used for a wide variety of projects, from measuring angles from 90 and 45 degrees to checking if surfaces are flat. Depending on the project, you may also need it to mark a workpiece or to find the center of a piece of wood.

In addition to its main purpose of aligning lines, a layout square can also be used as a protractor, line scriber and saw guide. It can also be used to chisel or turn a workpiece.

Whether you’re a professional or a beginner, a layout square is an essential tool for your woodworking arsenal. It’s easy to pick up and use, and will make your next project more accurate and efficient.

One of the most common uses for a layout square is to mark lines along its edges at precisely 90 degrees to a board’s edge. This can be particularly helpful when laying out studs on wall plates, positioning floor joists on decks or laying out stair stringers for staircases.

Other important uses for a layout square include scribing straight lines and checking the surface to be sanded for flatness. If the surface appears to be uneven, a layout square is a good way to determine where you need to do more sanding or planing to achieve a perfect finish.

Protractor Plus

A protractor is a useful tool for measuring and drawing angles. Whether you’re a beginner or an expert, it can help you get the job done right the first time around.

A good protractor can also be used to determine the slope of a surface. For instance, if you’re building a sidewalk, you can use the tool to measure the angle of the slope and make sure that it is perpendicular to the ground.

Using the correct scale on your protractor is essential to its function. There are different scales for acute (less than 90 degrees), obtuse, and right angles. Fortunately, the majority of protractors come with these scales printed on them so that you can easily find the one that matches your particular task.

To use the protractor, you need to align the reference line with the baseline of the instrument. The baseline is a straight line that is parallel to the edge of the instrument. The baseline varies from 0deg to 180deg on the edge in both clockwise and anti-clockwise directions.

Once you have aligned the reference line with the baseline of the protractor, you can start calculating the degree of the angle you’re trying to draw. Then, you need to mark the paper at that degree.

You can use a protractor to measure a variety of angles, including inside and outside angles. This is useful for construction jobs, cabinet-making and fine carpentry.

The best angle tools are easy to use and accurate. These are especially helpful for projects that require precision, such as laying out dovetails. They can also be used for a variety of other tasks, including measuring slopes and making T-bevels.

Pivot Square

A Pivot Square is one of the most basic, yet useful tools in your toolbox. It has many functions, ranging from measuring cuts to determining roof pitch and angles. It’s often used to help you layout a stairway or frame a solar panel support.

It’s a tried and true woodworking tool that is affordable, durable, and easy to use. It also offers a variety of features that make it useful for both professional carpenters and DIYers alike.

For starters, it has a lipped fence along one of its right-angled edges that lets you hold the square against a piece of lumber and scribe a line to create a perfect 90deg edge. The other right-angled edge can be used as a saw guide, allowing you to cross-cut lumber at an accurate 45deg angle with a hand or circular saw.

Another common function is to use a speed square as a protractor, marking degrees and other angles. To do this, locate the pivot point on the bottom corner of the tool where the flange meets the straight edge. Secure the square to this pivot point with a firm grip.

After locating this pivot, slide the tool to where the angled edge of the board is at the desired angle. Securing it again, use the angled edge to scribe the cut line.

A Pivot Square can also be used to measure a roof pitch and determine the height of roof shingles. It’s a fairly painless technique, and it can save you from using an expensive torpedo level.

5 Types of Woodworking Angle Tool T-Bevel

A T-Bevel is a woodworking angle tool that is used to take accurate measurements of angles. It is one of the most important tools in woodworking and can be used in a variety of ways to improve your work.

It can be used to transfer angles from one piece of wood to another or to create them with the help of a protractor. It can also be used to check the accuracy of an existing angle.

This tool is very easy to use and can be used by anyone who has a basic understanding of woodworking. It is a useful tool to have in any workshop, especially for projects that require cutting or shaping wood.

To use a T-Bevel, you will need to set the tool up on a work surface and adjust it so that the blade is level with the wood’s surface. This will ensure that the bevel is at a precise angle. You will also need to make sure that the handle is comfortable to hold and is easy to control.

The best T-Bevels are made from stainless steel and can be set to any angle between 0 and 360 degrees. These bevels are durable and will last for a long time.

A T-Bevel can be used for many different types of projects, including furniture, cabinets, and boxes. It can also be used for taking measurements of irregularly shaped pieces of wood.

There are several different types of T-Bevels available on the market, each with its own unique features. It is important to choose a bevel that is comfortable to use and will provide you with the accuracy you need for your projects. It is also important to choose a bevel that is made of stainless steel and will be durable for a long time.

Types of Woodworking Clamps

woodworking clamps

Types of Woodworking Clamps

Clamps are an essential tool in every woodworker’s toolbox. They come in various types and can be used for a variety of projects.

Aside from choosing the right type, a professional or DIYer should also consider the clamp’s power and durability. If a product isn’t strong enough, it could mark your work piece and ruin your project.

C-clamps

The C-clamp is a versatile tool that can be used in a variety of woodworking applications. It features a metal frame with two jaws that work together to grip materials and hold them in place. The jaws can be adjusted by turning a screw.

The frame of a C-clamp is made from steel or iron and provides strength, durability, and warp resistance. Its design also allows for easy adjustment of the clamp’s throat size, allowing it to accommodate different types of material.

A C-clamp can be used in a wide range of projects, including welding, cutting, drilling, and gluing. Its versatility is what makes it so useful for so many different tasks.

C-clamps are available in a variety of styles and sizes, so you can find one that suits your needs. Depending on your specific project, you may want to consider buying a clamp with a locking mechanism or a quick-release feature.

These types of clamps are ideal for holding large, heavy pieces of wood firmly during construction and glue-up projects. They have deep throats and load capacities that can handle both wood and metal. They can be found in a variety of styles, including extra heavy duty, light duty, and regular duty.

If you’re looking for a great C-clamp, we recommend checking out the Wilton C-Clamp kit. This kit includes four heaviest-duty models that are made with high-strength ductile iron frames and black oxide coatings. Each model features a clean, black oxide finish, an oscillating ball-and-socket tip, and sliding cross-pin handles for maximum leverage.

Another type of clamp that is suited to some woodworking tasks is the F-clamp. It is named for its resemblance to the letter c, and it uses a sliding member that rides along a straight part of the frame. This sliding member lets the jaws expand to grasp larger materials than a standard C-clamp.

The best woodworking clamps can help you do a lot of work in your workshop. They are durable, easy to use, and affordable. They can be a valuable addition to any home garage or workshop. They are especially effective for projects that involve a lot of pressure, such as cutting or bending.

Spring clamps

A spring clamp is a handy tool for woodworking projects. These are lightweight and easy to use with one hand and generate a decent amount of pressure for holding materials together. These clamps are great for small tasks, and they’re also available in a wide range of sizes to accommodate different needs.

Aside from being used as a quick clamp for cutting or fastening materials, a spring clamp can also be used for gluing wooden pieces together. This type of clamp is ideal for a variety of woodworking tasks because it can hold a workpiece still while the adhesive sets.

If you’re a beginner, a set of spring clamps is an excellent investment for your home or garage. You’ll be able to use them for a variety of woodworking projects and they’re easy to store when you’re not using them.

Unlike other types of clamps, spring clamps are designed to open and close with a slight touch of the handle. They’re often coated in PVC or rubber to prevent them from scratching or marring the surface of the material they are clamping.

Spring clamps have two jaws, and they often have a curved tip that can swivel to grip odd-shaped materials. Alternatively, they may have adjustable jaws that can be positioned to fit the specific surface structure of the workpieces.

You should look for a spring clamp that’s made from high-quality materials to ensure that it lasts long enough to help you with your DIY projects. Nylon is a good option for most small tasks, but if you plan on doing a lot of heavy-duty clamping you might want to go with muslin or metal.

Many spring clamps also have handles that are coated in PVC or rubber to prevent them slipping and damaging the surface of the workpieces they’re clamping. A strong handle is also helpful in helping you grip the spring clamp securely and not get sweaty or cramped while using it.

This 24-pack of MegaDeal 6-Inch spring clamps offers a great deal of holding power for several DIY projects at once, with nonslip, PVC-coated tips to keep them from shifting on the workpieces they’re clamping. They’re also comfortable to hold, so you’ll be able to work longer with them.

One-hand clamps

Woodworking clamps are one of the most important tools in a woodworking workshop, because they can help you to hold pieces of wood together and apply pressure to the surface. They can be used to fasten boards with screws, nails, or dowels, and they can also be used to glue two pieces of wood together.

Clamps come in different forms and sizes, which means that woodworkers need to know how to choose the right ones for their projects. Some of them are more versatile than others, so it is necessary to shop around and find the perfect ones for your needs.

First, you need to understand the different types of clamps and how they work. For example, pipe clamps are a type of woodworking clamp that is used to join larger pieces of wood together and apply pressure to the wood’s surface. They are a great choice for woodworkers who need to create large pieces of furniture.

Spring clamps are another type of clamp that is used to hold smaller pieces of wood together in a quick and easy way. These clamps are similar to clothespins and can be attached to the edges of small pieces of wood in a matter of seconds. They are also easy to apply and remove.

If you want a clamp that will hold up to heavy use, you need to look for one that is made from high-quality materials. Typically, these clamps are made from cast iron or forged steel.

These are also rust-resistant, which means that they will stay in good condition for a long time. Some of these clamps also feature soft-pressure caps that optimize material protection and secure clamping.

Besides these features, you should also consider the size of the clamp. This is a crucial factor, as it will determine how long it will last.

Finally, you should also look at the quality of the clamp’s handle. It should be crafted from durable materials and should be comfortable to use.

The best one-hand bar clamps are those that provide the right fit, features, and pressure for your job. They are designed for both small and large projects and feature non-marring face pads that protect your workpieces while evenly distributing the clamping force. They also come with a convenient release trigger that is located discreetly on the grip.

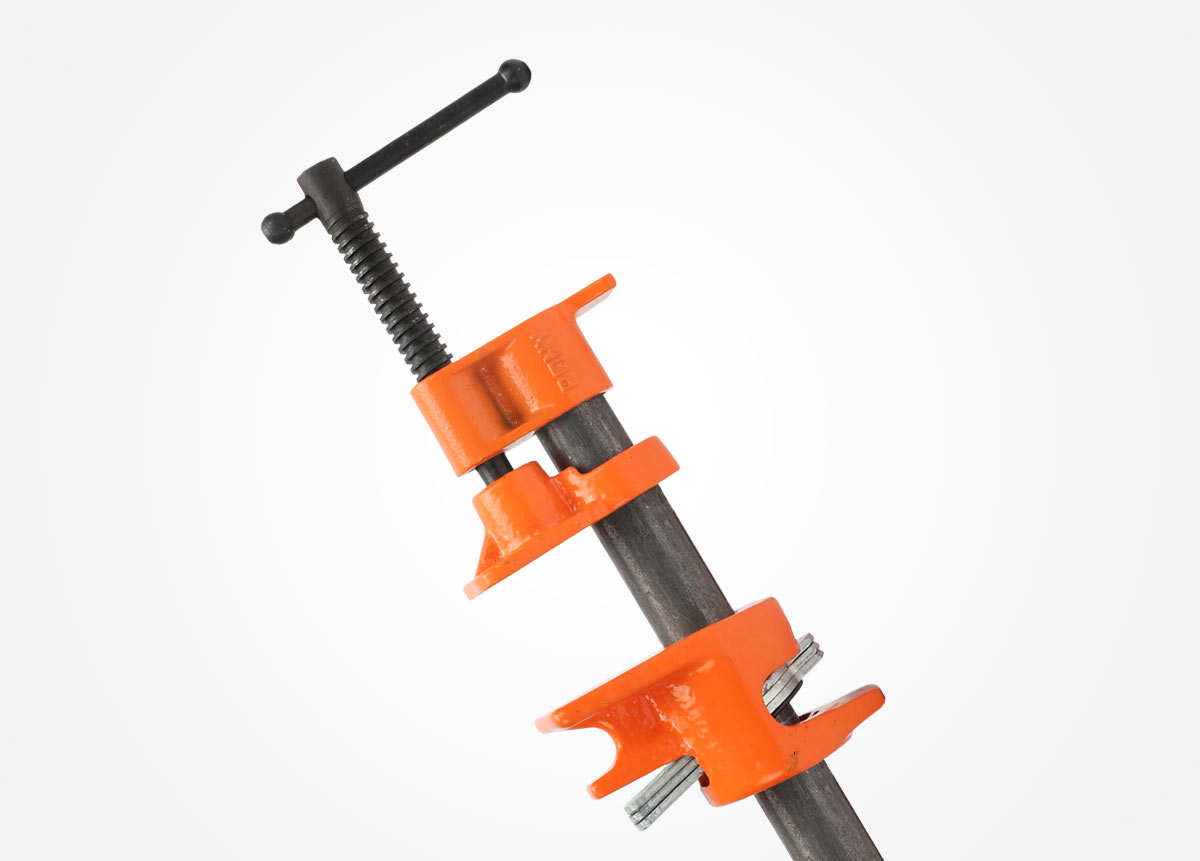
Pipe clamps

Pipe clamps are a versatile and inexpensive way to secure workpieces during woodworking projects. They’re also great for plumbing jobs that require overhead support and access to hidden pipes or fittings.

Like bar clamps, pipe clamps are made up of two pieces: a “jaw” that screws onto the threads of a length of common threaded black pipe and another piece that slides up and down the length of the pipe to accommodate the size of the woodworking project. They’re available in a variety of diameter sizes, including the standard 1/2 and 3/4 inch pipes that you can buy at your home center or lumber yard.

To use a pipe clamp, you’ll need a piece of wood that’s at least 25 mm wide and 10 mm thick. Some pipe clamps require a threaded end on the pipe, so you’ll need to purchase one of those as well if you want to use them.

You can usually find threaded black pipe at most home centers and hardware stores. Some places will even cut these ends for you.

Once you’ve bought your pipe, prepare it for use by placing a piece of painters tape on its end to protect the surface of the wood from glue and stains that might dribble down the tube. You can also place a piece of foam tape on the pipe to prevent it from bending under pressure.

Then, place the workpiece on the pipe, glue the edges, and clamp it down using the sliding end of the pipe clamp. It’s important to use only enough pressure to hold the joint in place and not to tighten the clamps too much, which can cause the boards to bow up on the middle. This isn’t a problem when gluing smaller pieces, but it can be a challenge on wider boards.

A good way to deal with this issue is to alternate pipe clamps on both sides of the board, so the pressure is distributed across the entire workpiece. You can also add a heavy weight to the middle of the board to keep it from bowing up when you’re tightening the pipe clamps.

Different Types of Wood Rot

Different Types of Wood Rot

Different Types of Wood Rot


Different Types of Wood Rot. Wood rot is a serious problem, but there are several ways to address it. The first step is to recognize the symptoms and understand how it works. Secondly, you will need to figure out what the best course of action is to get rid of it.

Different Types of Wood Rot Dry rot

Dry rot is a type of wood rot that is caused by a fungus. It is a dangerous and destructive type of rot that can destroy entire properties. The fungus attacks the cellulose structure of the wood, causing the wood to shrunken and turn brown. In some cases, the rot can travel through masonry and penetrate non-wood surfaces in contact with the ground.

In order to diagnose dry rot, you must first identify the source of moisture. Often, this moisture is caused by a plumbing leak or damaged roof. Once you know the source of the moisture, you can begin to repair the area. However, you must take care to remove any infected timber before starting any repair work. Otherwise, the fungus can continue to grow and spread to other areas of your home.

In the early stages of wood rot, the fungus may be hidden by wall paneling or by the cracks and joints of the lintel. When the rot starts to grow, it will spread rapidly. You can detect the spores of the fungus by observing the color and texture of the dust in the air. These spores are tiny and are almost invisible to the naked eye.

When a dry rot spore lands on an infected area of wood, it will begin to produce hyphae. Hyphae are fine, white tendrils that will eventually form mycelium, a cotton-wool-like mass that searches for cellulose-containing wood.

The fungus needs a moist environment to thrive. If the moisture is not present, the spores can’t get the energy they need to grow. They will eventually weaken and die. Therefore, it’s important to remove any infected timbers to prevent further growth.

If you’re not sure which fungus is causing the rot, you can check online pictures. There are some common household items that can act as fungicides, such as baking soda and vinegar. Alternatively, you can use commercial fungicides. These contain similar ingredients, but have more field testing and have a higher concentration of a fungicide.

Depending on the extent of the dry rot outbreak, you may need to replace the infected wood or apply a stronger fungicide. Removing the infected timbers will ensure that the spores don’t re-infect the surrounding timbers.

Besides removing the infected wood, you should also consider removing the plaster and flooring around the affected area. This will open the infected area up so you can determine which timbers have been infected. Professional woodworkers can help you clean up the infected area. While they’re at it, they can treat the surrounding timbers to stop the rot from spreading.

In the more advanced stages of dry rot, the fungus will cause mushroom growths. The fungus will feed on the moisture in the wood and will cause cuboidal cracks to form.

Different Types of Wood Rot Symptoms

Wood rot is caused by fungi that decompose wood. Generally, it is found in areas where the wood has been exposed to water. It is caused by the breakdown of cellulose and hemicellulose in the wood.

There are two main types of wood rot: the dry and the wet. Both are characterized by structural damage to the wood. The first type is characterized by cracking and discoloration. It can also cause warped wood.

When it comes to the wet rot, it is characterized by a higher moisture content. This causes the wood to become weak and crumbly. It can also cause the tree to die. A common cause of this type of rot is improper pruning. If the branches are not properly pruned, it creates an environment in which a wood-rotting fungus can thrive.

Some of the more common wood rot symptoms include fruiting bodies on the surface of the wood. These are formed by a fungus that is known as Schizophyllum commune.

Another symptom of this fungus is a papery bark. While most of the spores are deposited on wounds, the fungi can also travel by air. In addition, they can infect nearby surfaces.

Various studies have been conducted on the symptoms of wood rot in young apple trees. Researchers examined the effects of several stress factors on the health of the trees. They concluded that young trees can be more susceptible to this affliction than older ones. However, they noted that infected trees take an extended time to succumb.

One study on wood rot found four Basidiomycetes species associated with the symptoms. These include Trametes versicolor (L.) Lloyd. Other fungal taxa included D. rubi-ulmifolii sensu lato and Eutypella citricola.

These fungi are known to produce fruiting bodies, which contribute to aerial inoculum in orchards. They were isolated from bud union and pruning wounds on rootstock.

Although they are not known to attack live trees, they can attack structures built long ago. In homes, it can happen on siding and under the drywall. As a result, it is important to check and treat the wood in your home for wood rot.

One of the earliest signs of wood rot is the gap between pieces of wood. These gaps can be filled by a handyman with epoxy. However, it is advisable to call in a professional. Usually, the best way to prevent wood rot is to avoid leaving water-logged or damp areas. Ensure the home is adequately sealed and that there are proper ventilation systems in place.

Aside from repairing the damaged wood, it is also important to identify the source of the moisture. Water can accumulate in the home when people shower or dry clothes. Proper ventilation helps the moisture to escape. Oftentimes, it can be difficult to detect the source of the water.

Treatment

Wood rot can be a serious problem. It can cause structural damage to your home, and can also be a very expensive repair. There are different types of wood rot, and a comprehensive plan of chemical and mechanical treatment must be employed.

The most common forms of wood rot occur when moisture gets into the wood. This can occur through a leaking pipe or gutter, or from a faulty roof slate. When moisture gets into the wood, it can break down and fungi can grow. As the fungi get deeper into the wood, it becomes weaker and crumblier, and the area begins to look hollow and brown. Affected timber needs to be cut out, repaired, or treated in order to prevent further damage.

Fungi can be quite tricky to eliminate. They can hide in dark places, such as behind the plaster. However, if you can find a way to kill the fungi, you can stop the spread of the disease. For instance, you can apply a fungicide like borax to the affected timbers.

Fungi can also be found in the air. Typically, they grow when moisture is present and the temperature is right. Some fungi are beneficial, whereas others are quite destructive. If the right conditions are present, a fungi can turn wood into food. Unfortunately, fungi can be difficult to remove, and they can spread through contact. Fortunately, a fungicide like Multicide is effective at killing the spores that are already present.

Although a fungicide will only work on the surface rot, it is one of the most useful of all the wood rot treatments. The fungicide will create an anti-fungal layer on the surface of the rotten wood. Once this anti-fungal layer is created, it will protect the rotten wood from further rot.

You can prevent wet rot by ensuring that your home is properly ventilated and that the humidity is kept to a reasonable level. Using a dehumidifier can help, as can sweeping or caulking the exterior of your home. Another good way to prevent wood rot is to install a covered entryway. High humidity can lead to moisture building up in the walls, and this can lead to wet rot.

Dry rot, on the other hand, is a living fungus that draws moisture from the timber. The hyphae that are part of the dry rot grow into mycelium, which appears as cotton wool-like material. The fruiting body of the fungus appears as a mushroom-like structure.

Both dry and wet rot can be detected by their various signs. If you notice any of these, it is best to treat the affected areas immediately.

The most important wood rot treatment, however, is prevention. Wood rot can affect a variety of surfaces in your home, and is most likely to occur on the exterior of your home.

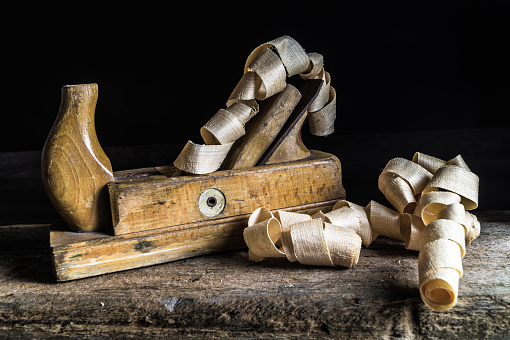
Wood Planer Types

Timber Planer Types. Timber planers are equipments that trim away product. Due to the fact that the blades are turned promptly, planers leave a smooth side, in some cases scalloped.
If you’re in the market for a benchtop density planer, there are a pair of various designs to select from. Its attributes make it a far better choice than various other designs in its cost variety.

When picking a benchtop density planer, you ought to look for a design that includes accurate evaluates, clear instructions, and also noticeable straight ranges. Snipped boards will certainly leave spaces as well as dips in the timber.

There are a couple of various versions of benchtop density planers, as well as every one has its disadvantages as well as pros. The DeWalt DW735 is a premier design, as are numerous various other versions made by Makita, Craftsman, and also WEN. You’ll discover numerous designs that fulfill your budget plan and also assumptions.

The WEN benchtop density planer comes with infeed as well as outfeed tables and also added blades. It likewise includes a dirt tube adapter for usage with a store vac.

A benchtop density planer is a fantastic option for those that desire to decrease the density of their boards without jeopardizing the high quality. Benchtop density planers are a lot more inexpensive than their bigger equivalents, as well as are extra mobile.
A sculpt aircraft for timber planer is a helpful device for a range of woodworking jobs. Its vast mouth and also convex new wave make it an outstanding device for eliminating huge quantities of timber swiftly. Jack airplanes are much shorter and also smaller sized than the carve aircraft, however they can likewise be made use of to straighten out boards as well as get rid of warps.

A sculpt aircraft is various than a bench aircraft due to the fact that it has no front guard. A mix airplane, on the various other hand, has compatible blades and also can additionally act as a rabbet airplane or molding aircraft.

Honing a carve airplane for timber planer needs a couple of actions. As soon as the burr is eliminated, the blade is all set for usage.

With its slim, sharp carve and also flexible deepness, this device enables you to attain numerous jobs that would certainly or else be difficult with a routine aircraft. It is likewise valuable for cleansing up adhesive lines and also smoothing rabbets. Its dimension as well as weight likewise make it much easier to navigate in limited locations.

A tiny airplane can be lugged quickly with you as well as is wonderful for small tasks. At just 4 inches long as well as 2.4 inches large, this device is very easy to shop.
Compass aircrafts are functional woodworking devices. These aircrafts have a flexible pivot as well as front and also back takes care of.

Compass airplanes are rounded aircrafts with a flexible sole. Compass airplanes are flexible as well as can function on numerous surface areas, yet they need a specific quantity of technique.

One more timber planer kind is the smoothing airplane. These airplanes are additionally made use of to develop mouldings as well as various other forms in timber.

Timber planers come in various dimensions, products, as well as features. Experienced woodworkers are acquainted with various kinds of timber planer as well as can pick the one finest matched for your requirements.

Compass airplanes can be an excellent selection for harsh timber and also a little twisted items. These airplanes set you back $40 to $90 as well as appropriate for pros as well as novices alike.

Timber Planer Types Bullnose aircraft

The Bullnose aircraft is a flexible device for timber planers. Bullnose airplanes vary from sculpt airplanes in the means they make great modifications.

The Bullnose airplane integrates the advantages of the Rebate Plane in one device. Its brief nose enables you to reduce right into edges and also approximately the side of the work surface. It is the best device to smooth as well as develop out a variety of woodworking tasks.

One more functional device in the Bullnose aircraft household is the Plow Planer. The Bullnose airplane can additionally be made use of to make accurate cuts, airplane rabbets, as well as degree the base of joint rabbets.

Bullnose airplanes are perfect for a little turned timber. These aircrafts are excellent for woodworkers of any kind of ability degree.

Selecting the ideal timber aircraft for your timber planer is a necessary action in grasping the craft of woodworking.
An airplane utilized to make infill openings in timber is recognized as an infill airplane. His infill aircrafts established a brand-new requirement for woodworking devices, and also he was at the peak of the woodworking device sector.

Infill airplanes have several woodworkers as well as several advantages like utilizing them. Infill airplanes are a little bit much heavier than various other kinds of infill aircrafts, so they are not suggested for usage with bigger jointing airplanes.

As the name recommends, an infill aircraft has a timber core enclosed within a steel network. Remarkably, the timber core in these airplanes has actually been around for a number of centuries.

Infill aircrafts likewise come in various designs, as well as their blades are commonly steeper. Infill aircrafts can be tailor-made by woodworkers or can be gotten as sets.

Jack aircrafts are much shorter and also smaller sized than the carve airplane, yet they can additionally be made use of to align boards as well as eliminate warps.

A mix aircraft, on the various other hand, has compatible blades and also can additionally act as a rabbet aircraft or molding aircraft. The Bullnose airplane can likewise be utilized to make exact cuts, airplane rabbets, and also degree the base of joint rabbets.

An aircraft made use of to make infill openings in timber is understood as an infill aircraft. Infill airplanes are a little bit much heavier than various other kinds of infill airplanes, so they are not suggested for usage with bigger jointing aircrafts.

You cannot copy content of this page